Habitat bright ideas with Fleur Thorpe – DIY projects
Create your own festive Christmas tree shelf to display small Christmas decorations.
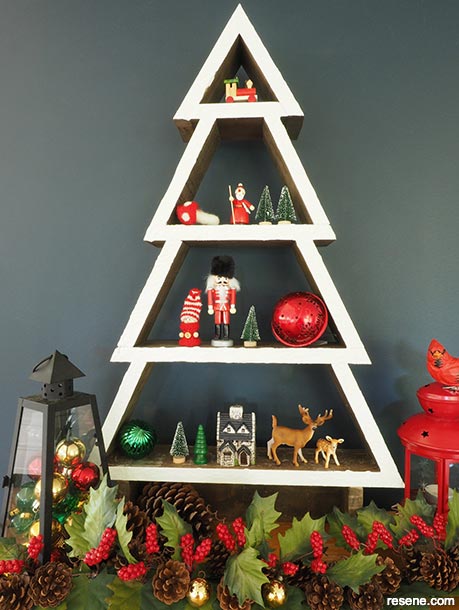
Wall painted in Resene Dark Knight
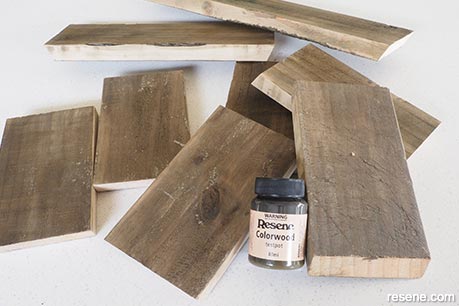
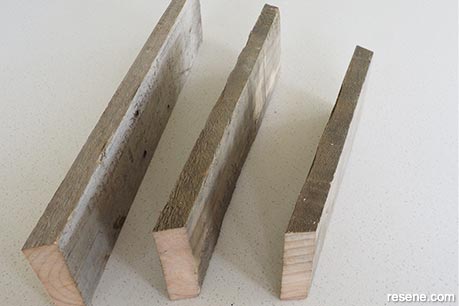 Step 1
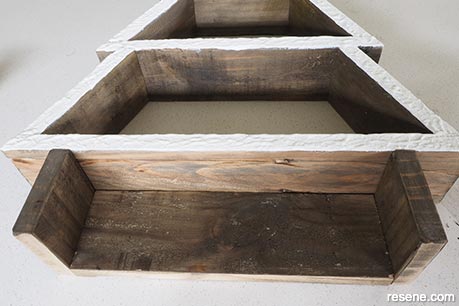
For this project Fleur used old pallet wood but it could easily be made out of new store-bought wood. Fleur’s pallet wood was 9.5cm wide and 2cm thick. Start by cutting the three shelves. Set your mitre saw to cut at 25 degrees and make the bottom shelf 48cm long from longest point to longest point with the two cut ends angled in. Cut the middle shelf to 38cm from longest point to longest point, and cut the top shelf to 28cm from longest point to longest point.
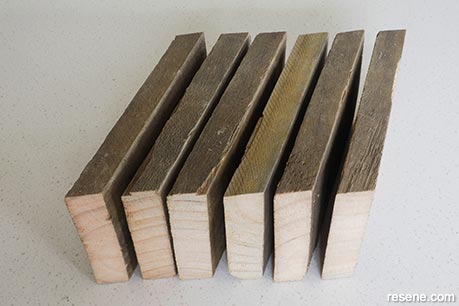 Step 2
Cut six lengths for the sides. Fleur’s are 17cm long but you could make yours bigger or smaller depending on how big you want your finished shelf to be. The two cut ends should be parallel and cut at 25 degrees.
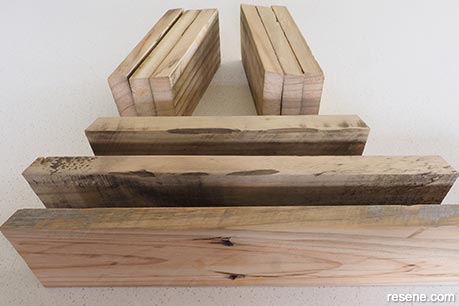 Step 3
Give the flat faces of the boards a sand to remove the worst of the rough old pallet wood. Give the front edge a really good sand, so that the primer and paint will adhere to it well.
 Step 4
After sanding, darken the wood by rubbing on Resene Colorwood in Resene Touch Wood with a cloth.
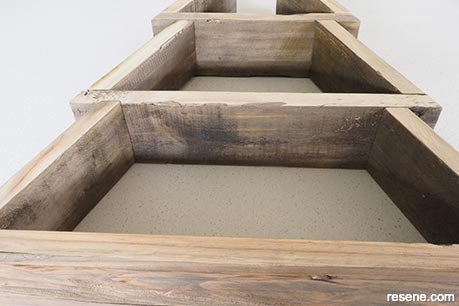 Step 5
Use wood glue to start gluing your shelf together. You can also use a brad nail gun.
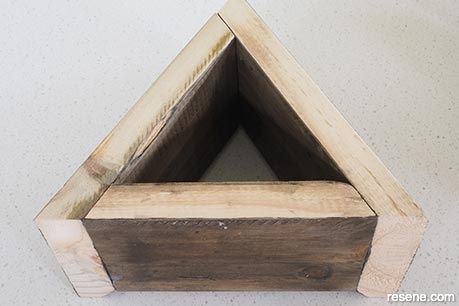 Step 6
While the glue is drying, cut the wood for the top triangle of the tree. Set your mitre saw to cut at 30 degrees and cut three lengths at 14cm, 16.5cm and 19cm from longest point to longest point so that the angles of the cut ends are facing in. Sand the faces of the boards and the front edge and wipe off the sanding dust. Stain the faces with Resene Colorwood (Fleur used Resene Touch Wood) and glue together on to the top of the shelf.
 Step 7 (a)
Use a paintbrush to paint on one coat of Resene Quick Dry to the front edge of the wood.
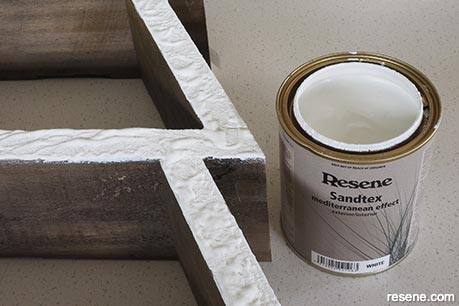 Step 7 (b)
Once the Resene Quick Dry has dried, apply a coat of Resene Sandtex Mediterranean Effect. Fleur dabbed it on liberally to create a rough ‘snowy’ texture. Set aside and allow to dry for a couple of hours.
 Step 8
For the base, cut one length of wood 32cm long and two lengths at 9.5cm long, or whatever width your wood is. Glue and nail this to the bottom of your shelf. Touch up any of the exposed cut ends with more Resene Colorwood (colour Resene Touch Wood).
Top tip: For a shimmering tree apply Resene FX Pearl Shimmer over your Resene Sandtex finish.
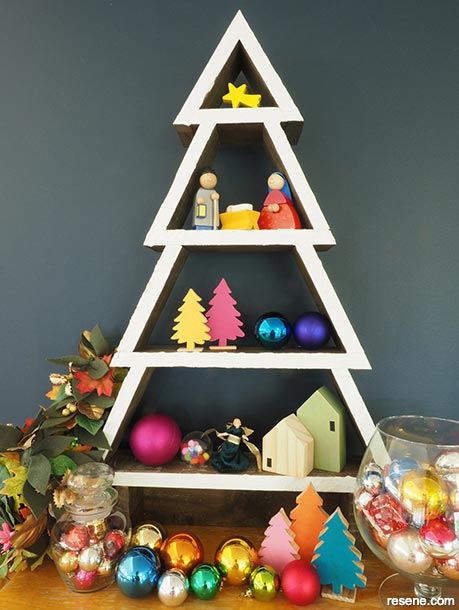
Colourful theme
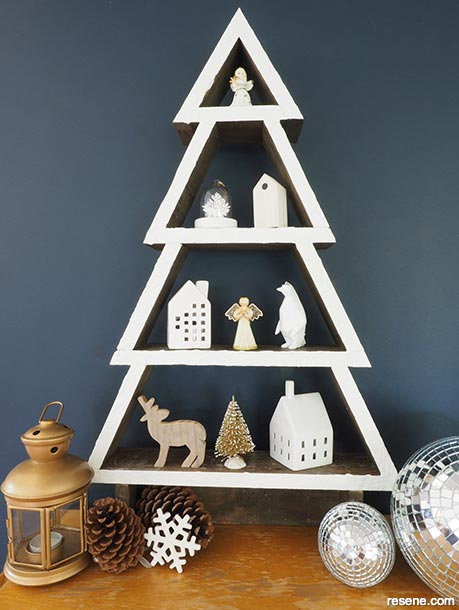
Scandi theme
Styling and images by Fleur Thorpe. Nov 2021.
Habitat bright ideas
Need to add colour, pattern or a little creativity to your place? Check out these easy step by step DIY project ideas created in collaboration with Fleur Thorpe. We hope you enjoy making and painting these bright ideas and bringing colour to your home inside or out.
![]() Get inspired ! Subscribe
Get inspired ! Subscribe ![]() Get saving ! Apply for a DIY card
Get saving ! Apply for a DIY card
![]()
Can't find what you're looking for? Ask us!
Company profile | Terms | Privacy policy | Quality and environmental policy | Health and safety policy
Colours shown on this website are a representation only. Please refer to the actual paint or product sample. Resene colour charts, testpots and samples are available for ordering online. See measurements/conversions for more details on how electronic colour values are achieved.
What's new | Specifiers | Painters | DIYers | Artists | Kids | Sitemap | Home | TOP ⇧


