Habitat bright ideas with Fleur Thorpe – DIY projects
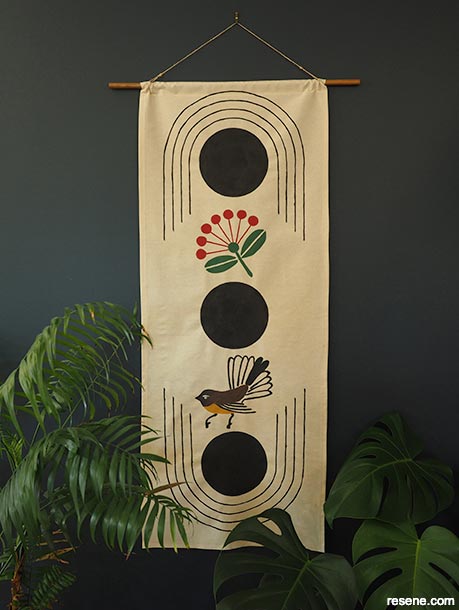
Get inspired by mid-century woodblock prints and make a wall hanging to suit your place.
Top tip: Let your kid's loose with Resene testpots and let them create abstract wall hangings with a mix of their favourite colours. These make good room brighteners and cute gifts for doting grandparents.
 Step 1
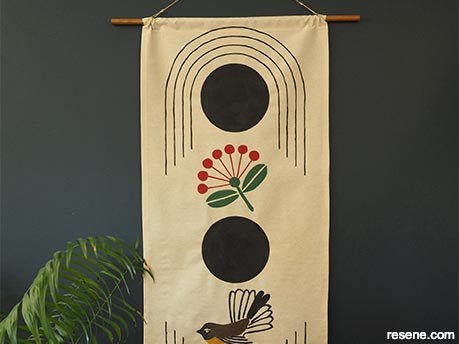
Start by sewing the two long side edges of the fabric over to give it a nice finished edge. The finished width of my wall hanging is 43cm wide. Sew the top edge over to form a loop so that a length of dowel can fit in it for hanging the wall-hanging up.
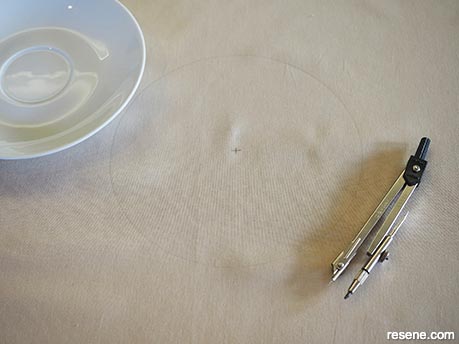 Step 2
Use a ruler or measuring tape to find the middle width of the fabric. Make a mark with your pencil. Next, divide the length into three and make three evenly spaced marks. This is where the three black circles will go. Use a compass or a small plate and pencil to make the circles (mine are 16cm in diameter).
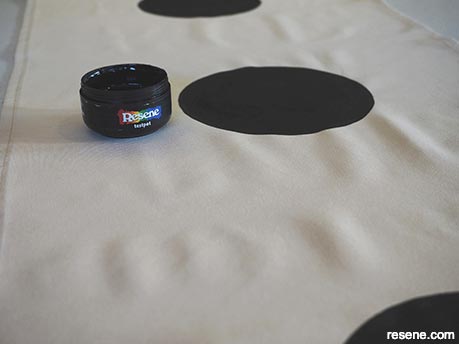 Step 3
With a small craft paintbrush, carefully paint in each of the three circles with Resene Black.
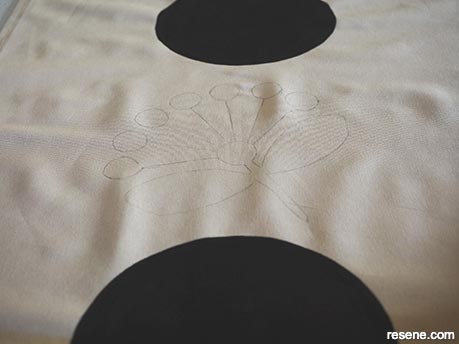 Step 4
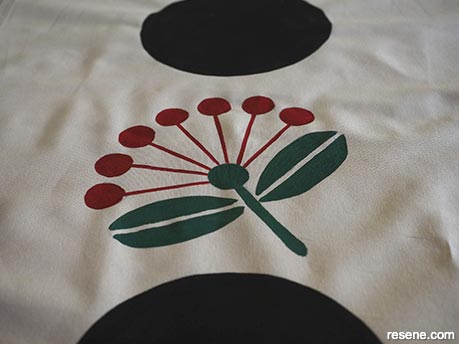
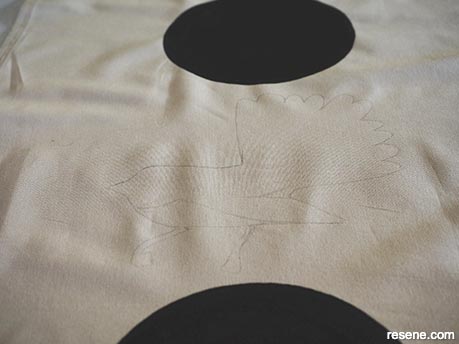
Between the top and middle circle, use a pencil to draw on a stylised sketch of a Pohutukawa flower.
 Step 5
Paint the flower using Resene Pohutukawa and Resene Goblin.
 Step 6
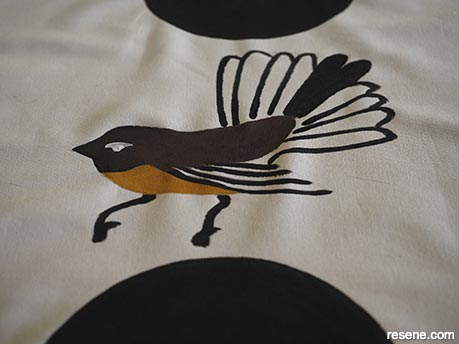
Between the middle and the bottom circle, sketch on a bird and paint this using Resene Black, Resene Rebel and Resene Rusty Nail. Use Resene Truffle for the eye. If painting a fantail it’s best to display the finished art in a sheltered area outdoors.
 Step 7
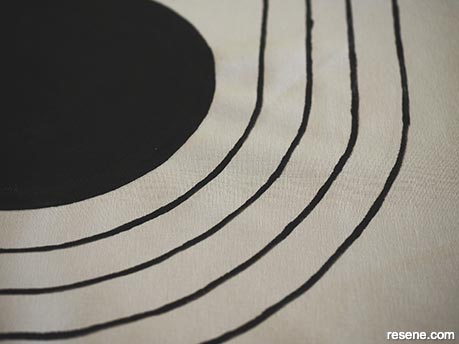
To finish, use a compass to create arches radiating out from around the circles. Make sure they are evenly spaced Fleur’s are 2cm apart). Carefully paint them with a stiff small craft paintbrush in Resene Black.
 Step 8
Thread a length of dowel through the loop at the top and hang using a length of string.
 Finished project
A close-up of the finished Kiwiana wall hanging.
Styling and images by Fleur Thorpe. May 2021.
Habitat bright ideas
Need to add colour, pattern or a little creativity to your place? Check out these easy step by step DIY project ideas created in collaboration with Fleur Thorpe. We hope you enjoy making and painting these bright ideas and bringing colour to your home inside or out.
![]() Get inspired ! Subscribe
Get inspired ! Subscribe ![]() Get saving ! Apply for a DIY card
Get saving ! Apply for a DIY card
![]()
Can't find what you're looking for? Ask us!
Company profile | Terms | Privacy policy | Quality and environmental policy | Health and safety policy
Colours shown on this website are a representation only. Please refer to the actual paint or product sample. Resene colour charts, testpots and samples are available for ordering online. See measurements/conversions for more details on how electronic colour values are achieved.
What's new | Specifiers | Painters | DIYers | Artists | Kids | Sitemap | Home | TOP ⇧


