Habitat bright ideas with Fleur Thorpe – DIY projects
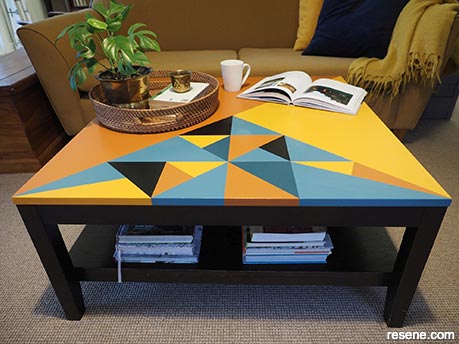
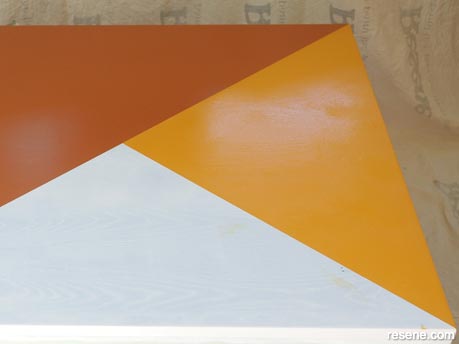
Give your coffee table a whole new look with a colourful painted geometric design. You can vary the design size and colouring to suit your table.
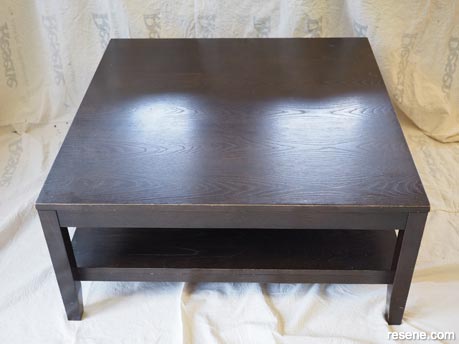
Step 1: Start by giving the top of the coffee table a sand with medium grit sandpaper. You don’t have to remove all the old surface/varnish but rough it up enough to create a key for the paint to hold to. Wipe off all sanding dust.
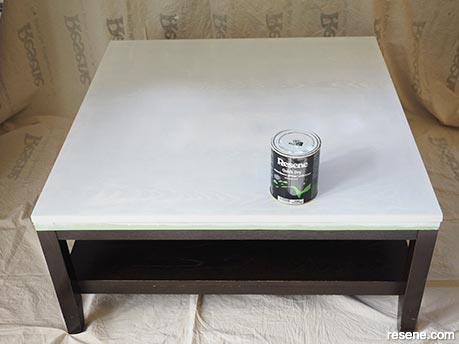
Step 2: Put painters tape around the edge of the tabletop to prevent paint getting where you don’t want it.
Step 3: Use a small foam roller to apply one coat of Resene Quick Dry. Once this has dried, sand the primer with a very fine finishing sandpaper. Wipe away any dust with a soft dry cloth.
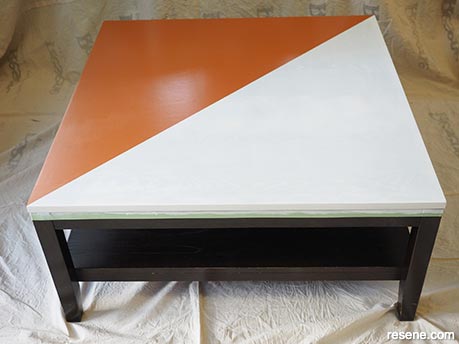
Step 4: Use a long ruler or straight edge and pencil to draw a line diagonally between two opposite corners.
Step 1
Step 2 / 3
Step 4
Step 5: Put painters tape along this pencil line and press the tape down firmly to prevent any bleed through of paint. Use the foam roller to apply two coats of Resene Alert Tan, allowing for the first coats to dry before applying the second coat. Remove the tape as soon as you have finished the final coat of paint.
Step 6: Measure the distance between the two diagonal corners and mark the halfway point. From this mark, draw a line to the corner. Use tape to mask off this quarter of the table and proceed to paint as above, this time using Resene Pirate Gold.
It’s a good idea to leave the paint as long as possible to cure before putting tape on it to paint the next adjacent area, as you don’t want the tape to pull off your new paint when you remove the tape. Fleur left her paint a couple of hours, and sometimes ideally overnight, before doing the next section.
Step 5
Step 7
Step 8
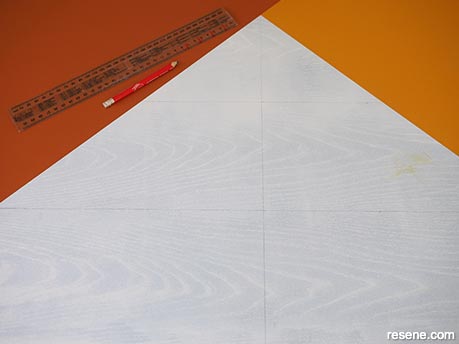
Step 7: With the remaining unpainted quarter of the table, use a ruler to divide the quarter in half vertically and into three even sections horizontally.
Step 8: Draw in random triangles, making some big and some small.
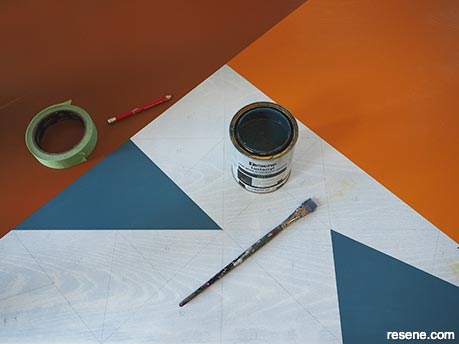
Step 9: Use the same method for taping as you did with the first two bigger triangles, making sure to rub the tape down firmly before painting it. Fleur used a larger sized craft paintbrush for painting these smaller triangles. Fleur made a random pattern with more Resene Alert Tan and Resene Pirate Gold, and added Resene Bismark, Resene Fast Forward and Resene Black.
Top tip: Consider extending your main Resene base colour onto the legs of your table for tip to tail colour.
Styling and images by Fleur Thorpe. May 2021.
Habitat bright ideas
Need to add colour, pattern or a little creativity to your place? Check out these easy step by step DIY project ideas created in collaboration with Fleur Thorpe. We hope you enjoy making and painting these bright ideas and bringing colour to your home inside or out.
![]() Get inspired ! Subscribe
Get inspired ! Subscribe ![]() Get saving ! Apply for a DIY card
Get saving ! Apply for a DIY card
![]()
Can't find what you're looking for? Ask us!
Company profile | Terms | Privacy policy | Quality and environmental policy | Health and safety policy
Colours shown on this website are a representation only. Please refer to the actual paint or product sample. Resene colour charts, testpots and samples are available for ordering online. See measurements/conversions for more details on how electronic colour values are achieved.
What's new | Specifiers | Painters | DIYers | Artists | Kids | Sitemap | Home | TOP ⇧


