Habitat bright ideas with Fleur Thorpe – DIY projects
Learn how to make colourful and random wood art with the help of Resene and Fleur Thorpe.
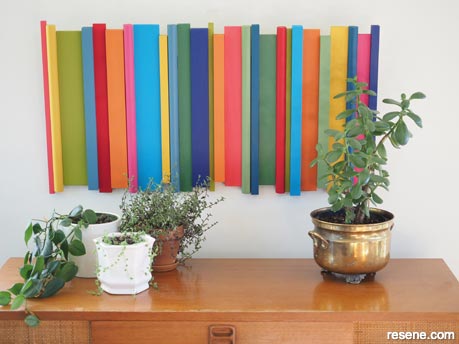
Wall painted in Resene Carrara
Step 1: Cut your wood to a variety of different lengths. Fleur’s range from 35cm to 40cm long. How long you cut your wood will depend on how big you want your finished piece of art. Fleur also cut 2 wooden broom handles into three lengths. Use sand paper to sand any rough bits smooth. Wipe off all sanding dusts.
Step 2: Lay your wood out in a random pattern, alternating short ones next to long ones. Once you are happy with your placement, number the backs of them. While your wood is set out, measure the total length. Cut your two back boards to this length.
Step 3: Paint your bits of wood. Fleur did 2 or 3 of each colour and tried to spread them out so that two similar colours were not next to each other.
Step 4: Place your two back boards on your work surface and use Blu-Tack to hold them in place, parallel to each other and about 20cm apart.
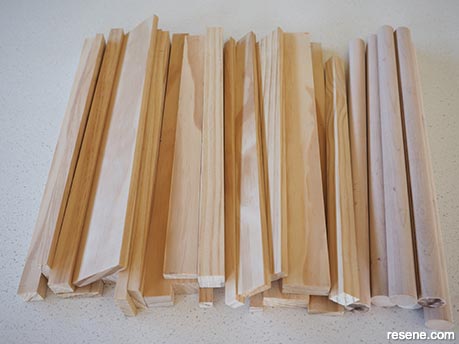
Photo one
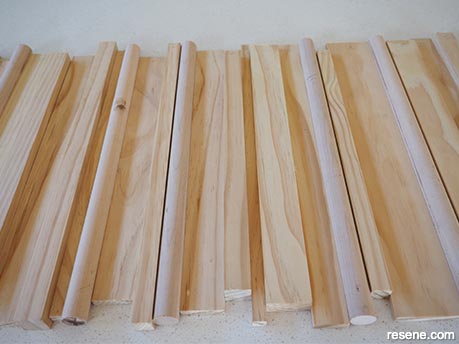
Photo two
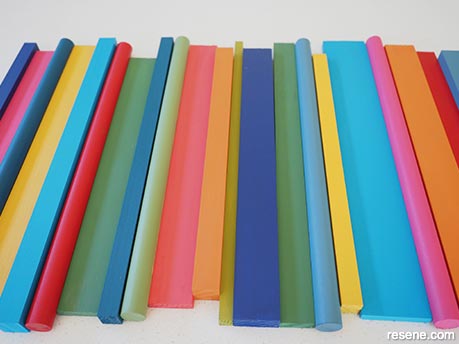
Photo three
Step 5: Glue your first bit of wood to the back boards with wood glue. Make sure you centre it so that there is an even amount of overhang at each end. Use a set square to make sure that you have it sitting straight and perpendicular to your backing boards. Take your time to get this one right and square and wait for it to dry in place before adding the others. If you get this one in place well and firmly held in place, you can put all the other ones on easily and quickly without worrying about any of them moving while the glue still dries.
Step 6: Continue to glue the other bits of wood in place, making sure that there is an even bit of overhang at either end as you go.
Step 7: Drill two small screws in the back at either end and tie strong string between them for hanging.
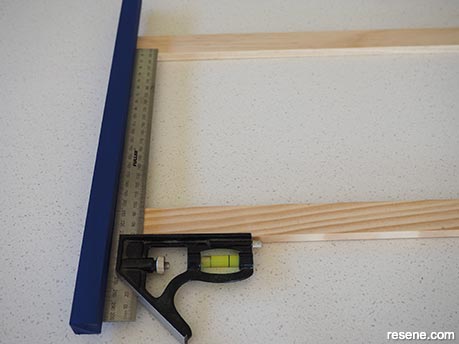
Photo four
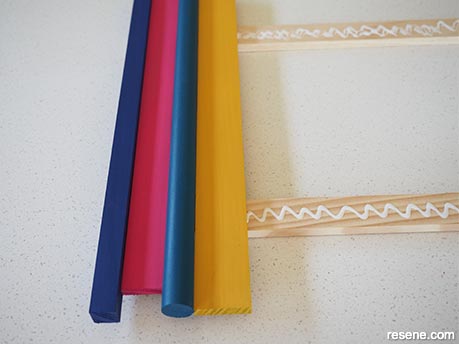
Photo five
Top tip: For a beachwashed piece of art, finish all timber in hues from the Resene Colorwood ‘We Speak Beach’ range.

Styling and images by Fleur Thorpe. Sep 2020.
Habitat bright ideas
Need to add colour, pattern or a little creativity to your place? Check out these easy step by step DIY project ideas created in collaboration with Fleur Thorpe. We hope you enjoy making and painting these bright ideas and bringing colour to your home inside or out.
![]() Get inspired ! Subscribe
Get inspired ! Subscribe ![]() Get saving ! Apply for a DIY card
Get saving ! Apply for a DIY card
![]()
Can't find what you're looking for? Ask us!
Company profile | Terms | Privacy policy | Quality and environmental policy | Health and safety policy
Colours shown on this website are a representation only. Please refer to the actual paint or product sample. Resene colour charts, testpots and samples are available for ordering online. See measurements/conversions for more details on how electronic colour values are achieved.
What's new | Specifiers | Painters | DIYers | Artists | Kids | Sitemap | Home | TOP ⇧


