Habitat bright ideas with Fleur Thorpe – DIY projects
Clear a space for your children to work or for you to get home admin done with this handy and colourful desk organiser.
How to make a colourful DIY desk organiser:
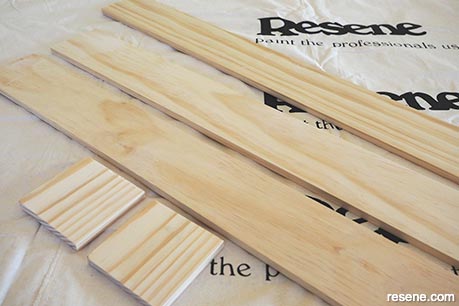 Step 1
Start by measuring the width of your desk and cut the long boards to fit. The total length of Fleur’s desk organiser is 88cm, the width is 11cm and the height is 9cm. Fleur cut the two sides to be 88cm long and the base to be 86cm long (accounting for the wood being 1cm thick). Also cut the two ends – Fleur’s were 9cm square.
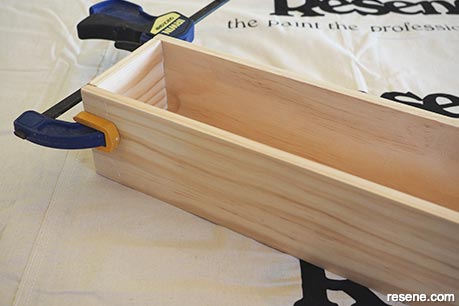 Step 2
Glue the two long sides and the two ends to the base. Use woodworking clamps to hold these in place while they dry.
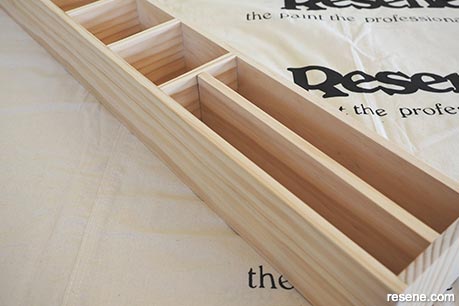 Step 3
Cut six partitions – Fleur’s were 9cm wide by 8cm tall. Glue these into place at 9cm intervals so that each cubby hole is a square. Measure the remaining space and cut a partition long enough to go in this space lengthways. This is where long thin items can be stored, such as iPads, books and pads.
 Step 4
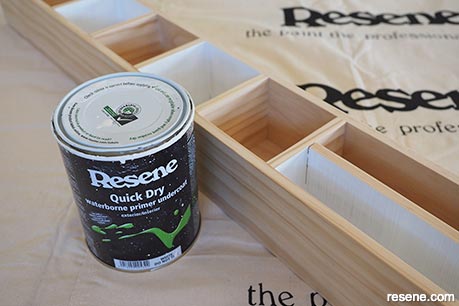
Once the glue has dried, sand any rough edges smooth. Wipe the dust away with a soft cloth. Paint the inside of every second cubby hole with one coat of Resene Quick Dry.
 Step 5
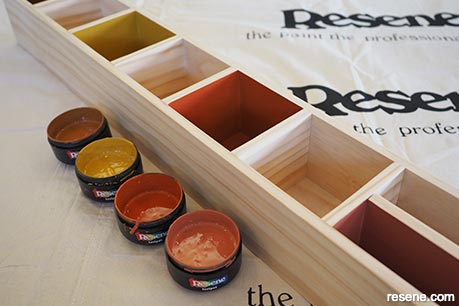
Once the primer has dried, paint each cubby hole a different colour. Fleur used Resene Cinnamon, Resene Hot Toddy, Resene Fire and Resene Hot August. Do two coats, allowing the first coat to dry before applying the second coat.
 Step 6
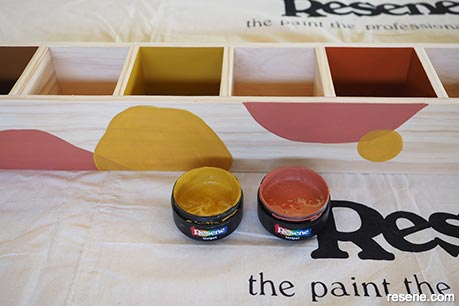
For the outside of the organiser, use Resene Hot Toddy and Resene Hot August to paint on your design. Fleur painted soft, organic shapes in just one coat so the wood grain still showed through a little.
 Step 7
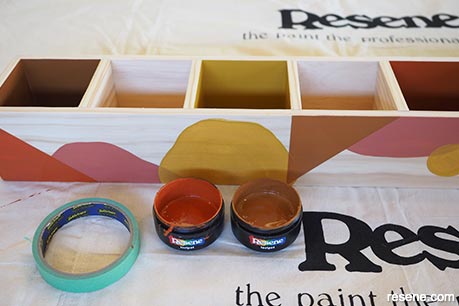
Next, with some painters tape, use Resene Cinnamon and Resene Fire to paint on more of your design. Fleur painted on geometric shapes with these colours.
 Step 8
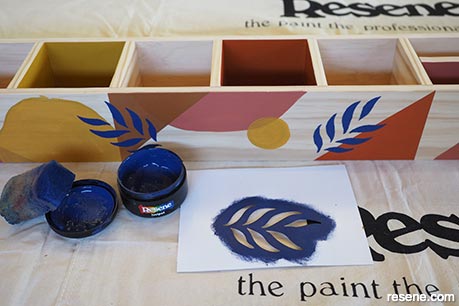
Finish by printing out a stencil, cutting this out with a sharp craft knife, and then using a small piece of foam or sponge to dab on some Resene Lucky Point over the stencil.
 Step 9
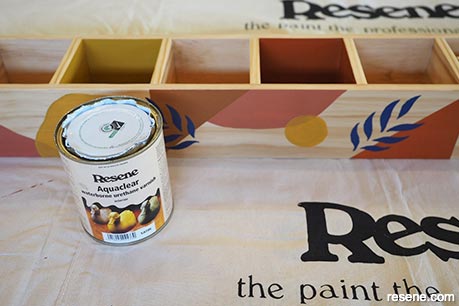
Once the paint is dry, apply two coats of Resene Aquaclear over the whole organiser, including inside the unpainted cubby holes.
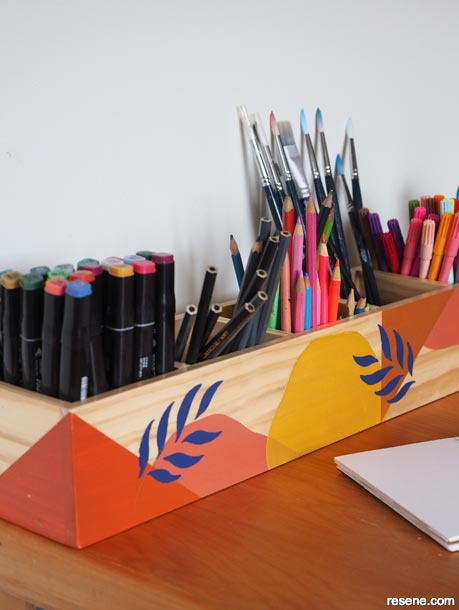
 Finished project
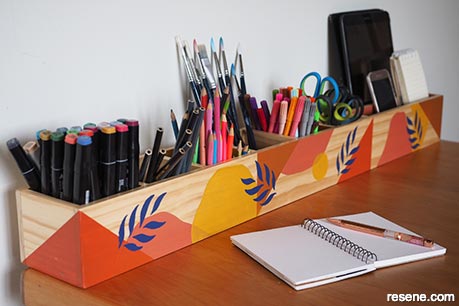
This finished DIY desk organiser is bright painted in Resene Cinnamon, Resene Fire, Resene Hot Toddy, Resene Hot August and Resene Lucky Point. Wall painted in Resene Carrara.
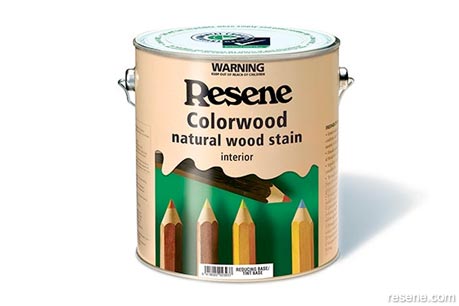 Top tip: For a natural look organiser use a range of Resene Colorwood wood stain and colourwash colours instead of solid paint colours.
Styling and images by Fleur Thorpe. Jun 2022.
Habitat bright ideas
Need to add colour, pattern or a little creativity to your place? Check out these easy step by step DIY project ideas created in collaboration with Fleur Thorpe. We hope you enjoy making and painting these bright ideas and bringing colour to your home inside or out.
![]() Get inspired ! Subscribe
Get inspired ! Subscribe ![]() Get saving ! Apply for a DIY card
Get saving ! Apply for a DIY card
![]()
Can't find what you're looking for? Ask us!
Company profile | Terms | Privacy policy | Quality and environmental policy | Health and safety policy
Colours shown on this website are a representation only. Please refer to the actual paint or product sample. Resene colour charts, testpots and samples are available for ordering online. See measurements/conversions for more details on how electronic colour values are achieved.
What's new | Specifiers | Painters | DIYers | Artists | Kids | Sitemap | Home | TOP ⇧


