Habitat bright ideas with Fleur Thorpe – DIY projects
Try your hand at origami and create a pendant light to brighten your home. Mix and match favourite Resene colours to give an old lampshade a whole new look.

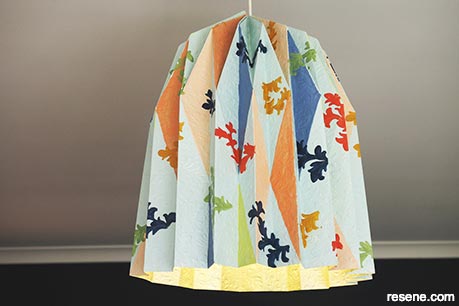
The finished lamp glows painted in Resene Metallic Stun, Resene Half Opal, Resene Wax Flower, Resene Japonica, Resene Waikawa Grey, Resene Wild Willow, Resene Hot Toddy, Resene Koru, Resene Bunting and Resene Kamikaze
How to create your own DIY origami pendant light:
 Step 1
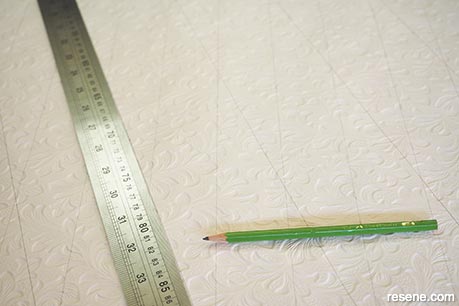
Start by cutting the wallpaper to a length of 165cm. Working on the back of the paper, measure and mark 5cm intervals along the two long edges. Draw vertical lines from one edge to the other.
 Step 2
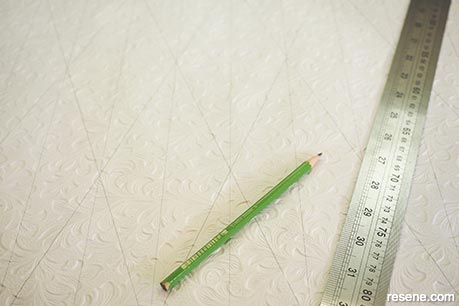
Next you need to draw in the diagonal lines. Start in the top left hand corner and draw a diagonal line to the fourth vertical line, meeting at the bottom edge of the paper. Repeat this for every second vertical line.
 Step 3
Do the same for the diagonal lines that go in the opposite direction.
 Step 4
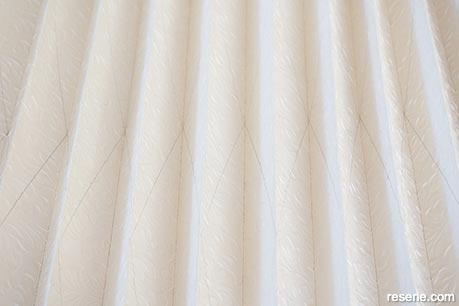
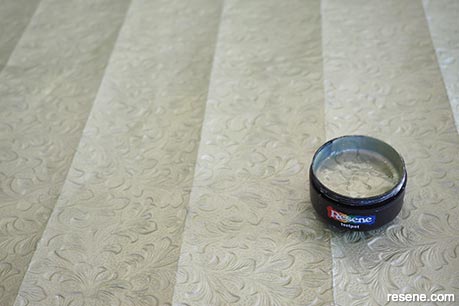
Once you have all the lines drawn in, you should have lots of diamond shapes. Now you can start folding. Start by folding all the vertical lines, then flatten these out a bit and then fold all the diagonal lines. Once this is done, you’re ready to start painting.
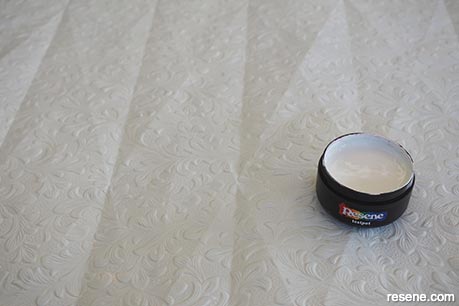
 Step 5
Paint the back of the paper with a coat of Resene Stun metallic paint. If you want a more intense finished colour, apply an undercoat of Resene Coriander before the metallic paint.
 Step 6
Once the paint is dry, flip the paper over and paint on Resene Half Opal.
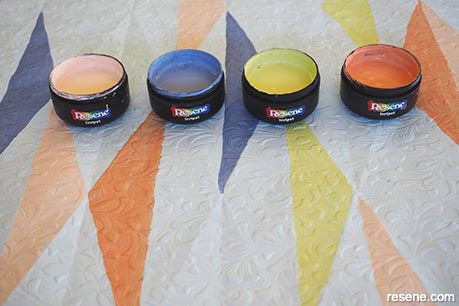 Step 7
Once the Resene Half Opal is dry, paint on triangles within the fold lines with Resene Wax Flower, Resene Japonica, Resene Waikawa Grey and Resene Wild Willow. Fleur painted hers on in random places, but aimed to make them reasonably evenly spaced out.
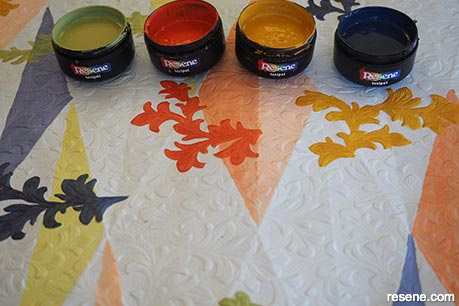 Step 8
Next, paint some of the leaf patterns of the anaglypta paper with Resene Hot Toddy, Resene Koru, Resene Bunting and Resene Kamikaze.
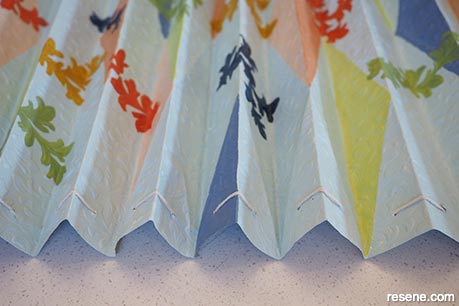 Step 9
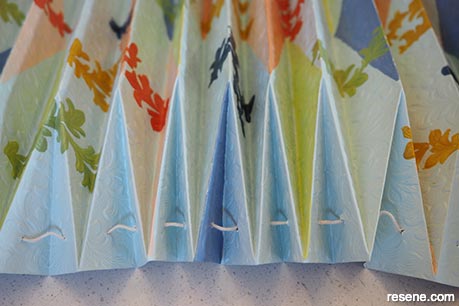
Once this paint has dried, it’s time to turn the flat paper into a 3D shape. Refold the vertical folds, punch a hole along the top and thread a length of string through the holes as shown. Fleur used a metal skewer to make the holes but you could also use a hole punch.
 Step 10
Invert the top folds to form a sunken triangle as shown.
 Step 11
Next you need to form a sunken diamond. Do this by inverting the vertical ‘mountain folds‘ into ‘valley folds‘. This stage is a bit tricky and requires some patience and perseverance, but just work along, forming the diamonds and swapping the direction of the vertical folds.
 Step 12
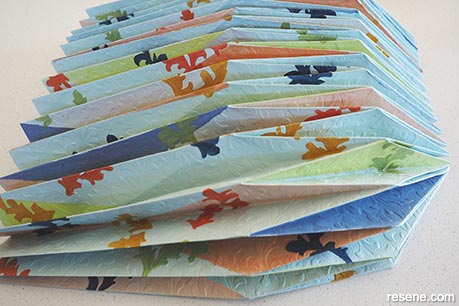
Once finished, the folded paper should look like that shown here.
 Step 13
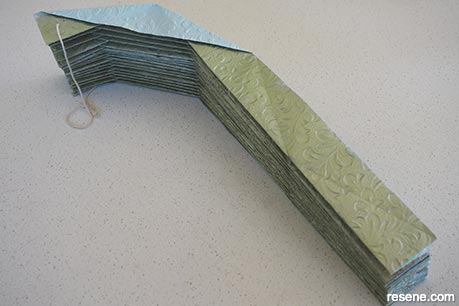
The extended shape should look something like this.
 Step 14
To finish, glue or staple the two short ends together. Fleur stripped the fabric off an old lightshade so that she just had the frame and attached this to the pendant light fitting. She then slipped the origami light up and over the light shade frame and pulled the string tight at the top, tied a knot and cut off the excess string. The lightshade frame helped hold the origami shade in a good shape, and it also meant the light bulb was held away from the paper.
Top tip: Paint small parts of your design in Resene White, allow to dry then coat in Resene FX Nightlight for a glow-in-the-dark effect that will softly glow and wane once the lights go out.
Styling and images by Fleur Thorpe. May 2022.
Habitat bright ideas
Need to add colour, pattern or a little creativity to your place? Check out these easy step by step DIY project ideas created in collaboration with Fleur Thorpe. We hope you enjoy making and painting these bright ideas and bringing colour to your home inside or out.
![]() Get inspired ! Subscribe
Get inspired ! Subscribe ![]() Get saving ! Apply for a DIY card
Get saving ! Apply for a DIY card
![]()
Can't find what you're looking for? Ask us!
Company profile | Terms | Privacy policy | Quality and environmental policy | Health and safety policy
Colours shown on this website are a representation only. Please refer to the actual paint or product sample. Resene colour charts, testpots and samples are available for ordering online. See measurements/conversions for more details on how electronic colour values are achieved.
What's new | Specifiers | Painters | DIYers | Artists | Kids | Sitemap | Home | TOP ⇧


