It’s easy to create this textured pattern using bubble wrap and a little Resene know-how.
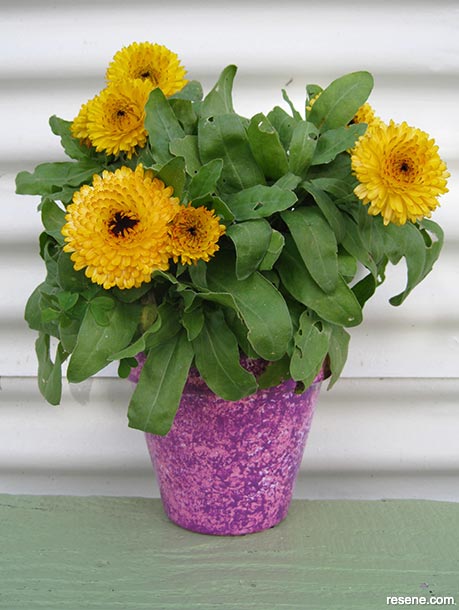
Resene art with Mark Rayner - Project 112
Difficulty level: Easy
To get the look: Mark painted the background fence with Resene Lumbersider tinted to Resene Green White.
Other ideas: For a cool blue effect, use Resene Malibu and Resene Resolution Blue over a base coat of Resene Anakiwa.
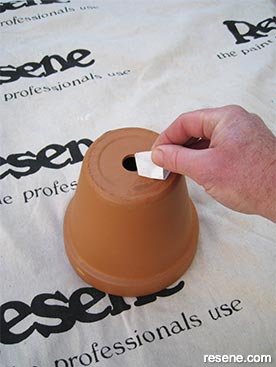 Step one
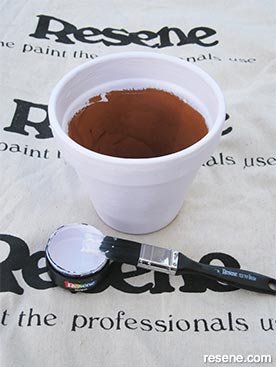
Remove any labels from the terracotta pot.
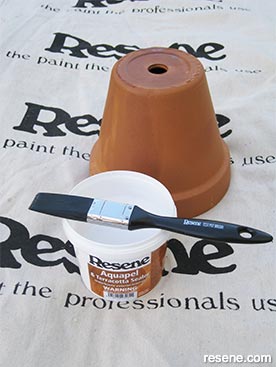 Step two
Apply one coat of Resene Terracotta Sealer to the terracotta pot and allow to dry.
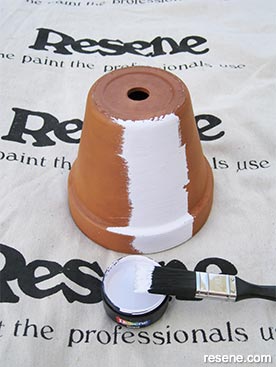 Step three
Apply one coat of Resene Dreamtime to the sealed pot and allow to dry.
 Step four
Apply a second coat of Resene Dreamtime to the pot and allow to dry.
 Step five
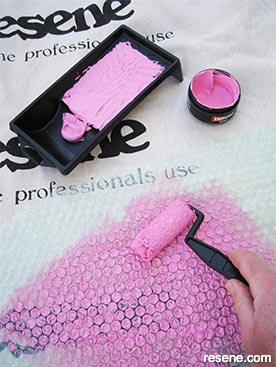
Lay out a piece of bubble wrap (bubble side up) and carefully apply a layer of Resene XOXO using the testpot roller, as shown.
 Step six
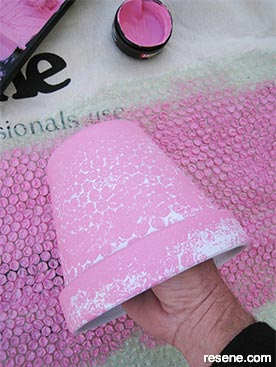
Carefully roll the painted pot across the bubble wrap to create a textured pattern and allow to dry.
 Step seven
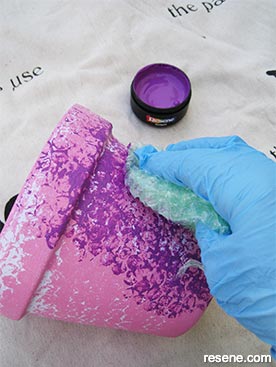
Take a small piece of bubble wrap and dab on a second layer of pattern using Resene Eye Candy. Allow to dry
 Step eight
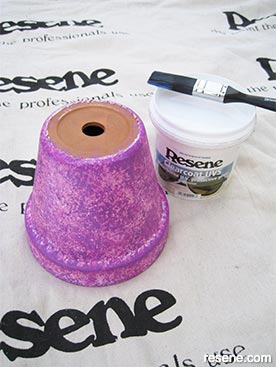
Apply one coat of Resene Clearcoat UVS to the patterned pot and allow to dry.
![]()
Crackle pot
Resene art
![]()
Lavender room freshener
Resene art
![]()
Warm abstract painting
Resene art
![]()
Paint herb pots
Weekend DIY
![]()
Rustic bird house
Ways with wood
![]()
Planter pot & stand
Weekend gardener
![]() Get inspired ! Subscribe
Get inspired ! Subscribe ![]() Get saving ! Apply for a DIY card
Get saving ! Apply for a DIY card
![]()
Can't find what you're looking for? Ask us!
Company profile | Terms | Privacy policy | Quality and environmental policy | Health and safety policy
Colours shown on this website are a representation only. Please refer to the actual paint or product sample. Resene colour charts, testpots and samples are available for ordering online. See measurements/conversions for more details on how electronic colour values are achieved.
What's new | Specifiers | Painters | DIYers | Artists | Kids | Sitemap | Home | TOP ⇧

