From habitat highlights - issue 40, small projects
With a Resene testpot or two you can create and transform some fun and fancy projects.
Resene testpots are a vital tool when it comes to choosing the right colours for your interior or exterior project, but they’re also the perfect size for use on small design and art projects.
Here's a selection of some cool and quirky, but often practical Resene testpot projects, perfect for your own home, or giving as gifts.
Give old vases a new lease on life.
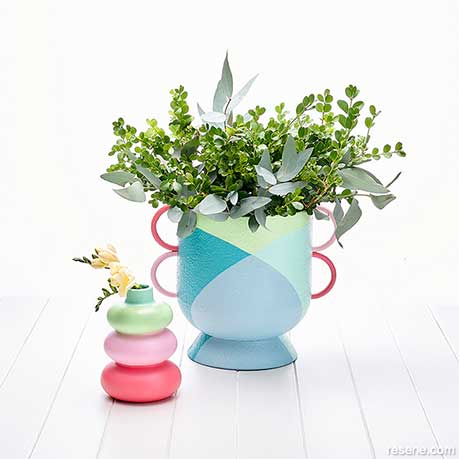
top tip Use masking tape for crisp clean edges.
Paint your vases and pots with two coats of Resene Quick Dry primer. Once dry, divide your pot into sections with a pencil or tape. Paint each section with a different Resene colour. We've used Resene Feijoa, Resene Vista Blue, Resene Moby, Resene Cupid, Resene Cabaret and Resene Retreat.
Upcycle an old clipboard into a helpful to-do chart.
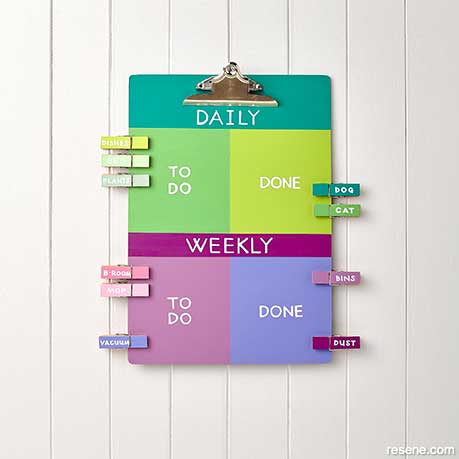
With a pencil and a ruler, divide the board into four even square sections leaving a strip at the top and through the middle for your title words. Mask off the sections using washi masking tape and paint each section in two coats of your favourite Resene colours. We’ve used Resene Deep Sea, Resene Groovy, Resene Limerick, Resene Centre Stage, Resene Butterfly and Resene Moody Blue. While the clipboard is drying, paint both sides of at least 10 wooden pegs with two coats of co-ordinating Resene colours. We’ve used Resene Half Limerick, Resene Spring Rain, Resene Feijoa, Resene Deep Sea, Resene Groovy, Resene Hopbush, Resene Ballerina, Resene Moody Blue, Resene Butterfly and Resene Centre Stage. When thoroughly dry, with a fine paintbrush, label the top strip with ‘Daily’, the middle strip with ‘Weekly’, the two left-hand squares with ‘To Do’ and the two right-hand squares with ‘Done’. Mark each peg with a different chore (both sides) and clip them to the side of the ‘Daily’ or ‘Weekly’ ‘To Do’ boxes. When the chores are complete, the pegs can be clipped onto the ‘Done’ boxes.
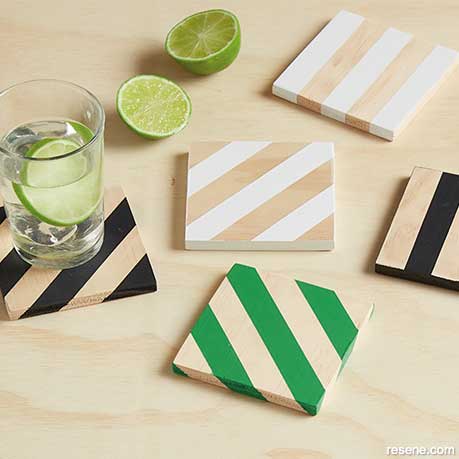
Measure down a W90mm x D10mm x L1200mm length of pine at 90mm intervals and rule a line across at each point. Cut each line using a handsaw. Smooth off all the edges with sandpaper and wipe off sanding dust. Mask out diagonal or straight stripes on each square with Resene washi tape. Paint the exposed wood with two coats of Resene Half Black White, Resene Double Foundry (black) or Resene Japanese Laurel (green). When the paint is completely dry, peel off the tape and coat with Resene Aquaclear waterborne urethane varnish.
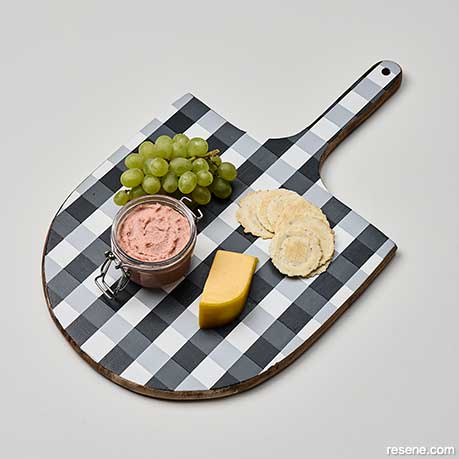
Tape around the entire edge of your board with washi masking tape. Next, paint the front of the board with two coats of Resene Poured Milk. When thoroughly dry, tape stripes across the front of the board with masking tape, horizontally from left to right. Leave a tape-width space between each strip. Paint two coats of Resene Grey Chateau over the exposed pieces of horizontal board. Once dry, peel off the tape to reveal a grey and white striped board. Now tape the washi masking tape the same way as before but vertically this time, from top to bottom. Paint two coats of Resene Tuna over the exposed pieces of vertical board. Once dry, leaving the tape in place, tape another set of stripes, horizontally again from left to right with the same spacing as before. Paint two coats of Resene Double Foundry over the remaining pieces of exposed board. When dry, peel off all the tape and seal with two coats of Resene Aquaclear waterborne urethane varnish.
did you know?
Most Resene testpots contain Resene Lumbersider Low Sheen exterior and interior paint, so they're easy to wash up in water and Eco Choice approved.
Colours mentioned in this article
Resene testpots are ideal for many small projects. Buy online, shop.resene.com/testpots or at your local Resene ColorShop or reseller.
Products mentioned in this article
projects: Emily Somerville-Ryan
images: Bryce Carleton
Search habitat magazine stories
Printed copies of habitat highlights are available from late March 2024 at Resene ColorShops and resellers, while stocks last. You can view back issues of habitat magazine online.
Specifiers:
If you have an idea, project or story that you think would suit habitat, we’d love to hear from you. Please drop us an email with your details and include photos if submitting a project.
Sign up for a DIY card and Save! Australia | New Zealand
![]() Get inspired ! Subscribe
Get inspired ! Subscribe ![]() Get saving ! Apply for a DIY card
Get saving ! Apply for a DIY card
![]()
Can't find what you're looking for? Ask us!
Company profile | Terms | Privacy policy | Quality and environmental policy | Health and safety policy
Colours shown on this website are a representation only. Please refer to the actual paint or product sample. Resene colour charts, testpots and samples are available for ordering online. See measurements/conversions for more details on how electronic colour values are achieved.
What's new | Specifiers | Painters | DIYers | Artists | Kids | Sitemap | Home | TOP ⇧


