From habitat magazine - issue 38, TradieGal tutorial
Professional painter Tegan Williams aka TradieGal uses Resene to revamp her bathroom and powder room over a long weekend.
Doing up your bathroom can be an expensive job. A brand-new bathroom and powder room weren’t in our budget, but our bathroom’s yellow walls and brown lino had to go. I decided to give it a bit of TLC using Resene paints to transform the walls, ceiling and flooring – and my friends can’t believe the difference!

TradieGal Tegan Williams turned to Resene paints for a cost-effective, quick bathroom makeover.
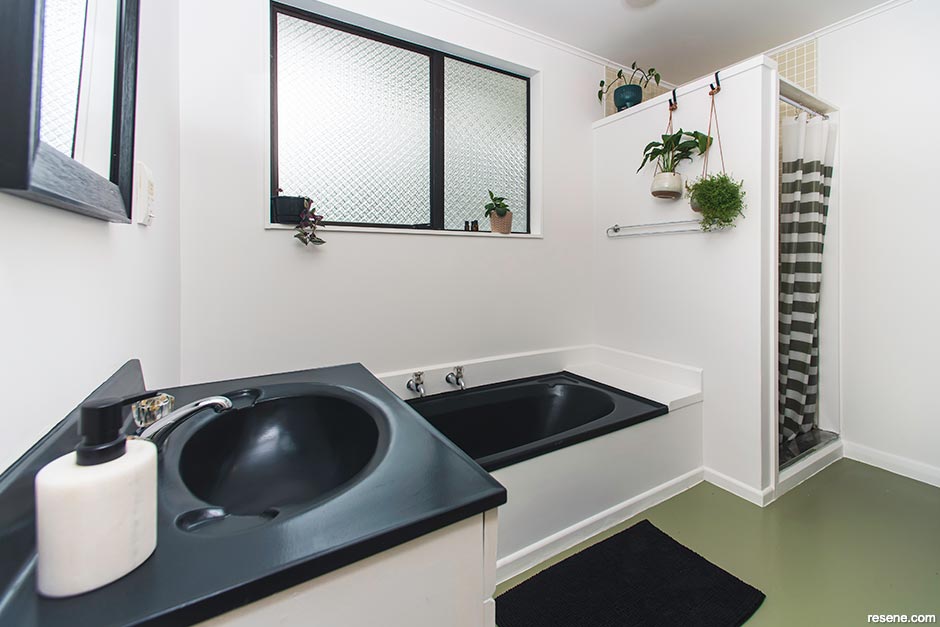
A Resene Flax floor adds an earthy, natural note to the otherwise monochrome space.
TradieGal Tutorial: Bathroom and powder room makeover
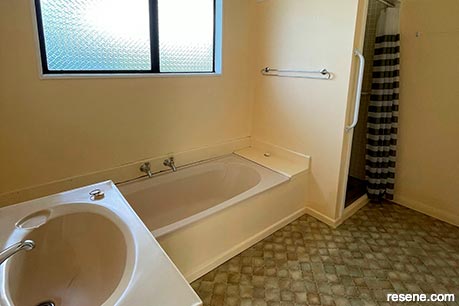 Bathroom before revamp
The bathroom's old brown and yellow colour scheme had to go!
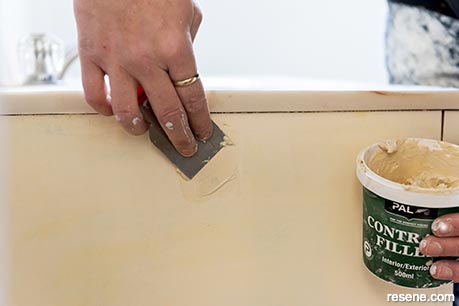 Step 1
Before painting, fill in holes and imperfections in the walls with contract filler and allow it to dry.
 Step 2
Sand all the walls in the bathroom and powder room using an electric sander. Use a sanding block on especially rough edges and hard-to-reach internal corners. Use a clean, damp cloth to wipe down the wall.
 Step 3
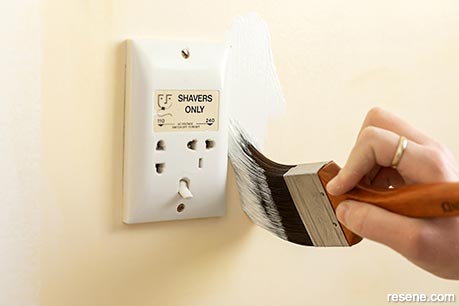
If your walls and ceiling are old and water stained, seal the walls and ceiling using Resene Sureseal. First, cut around any objects fixed to the ceiling and walls, such as plugs, towel rails, vanities and the shower unit.
 Step 4
Load up the roller and start coating the ceiling with Resene Sureseal, followed by the walls. Ensure your rolls are as long as possible along the walls to prevent hard stop-and-start lines.
 Step 5
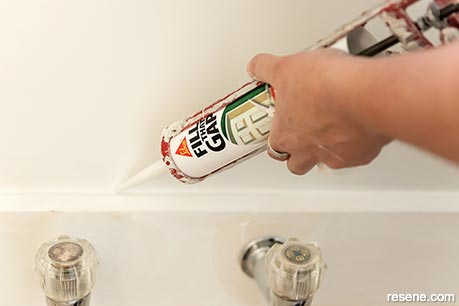
Once the sealer is dry, sand all walls and the ceiling using a pole sander before filling any gaps with gap filler. A good technique is to squeeze the tube over the area while pulling back. Then run the ball of your finger over the gaps, applying medium pressure to remove any excess and push the filler into the cracks before wiping down the area with a damp cloth.
 Step 6
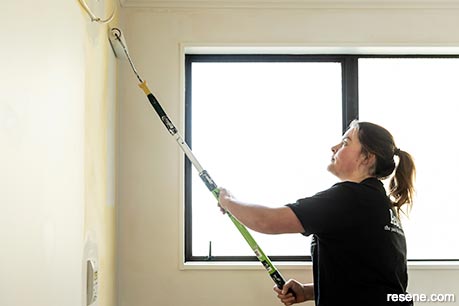
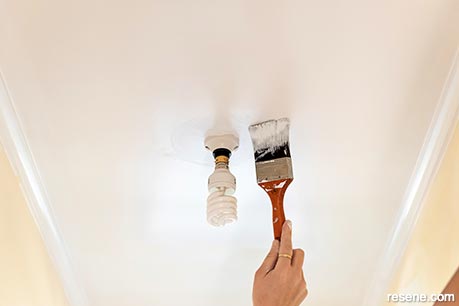
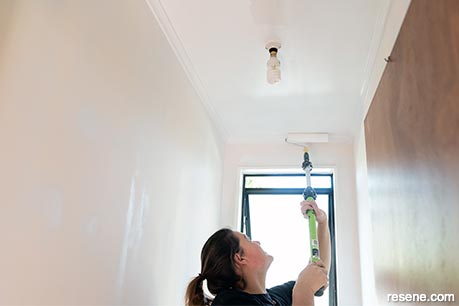
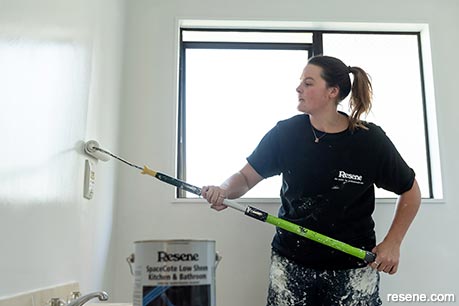
To paint the bathroom and powder room ceilings, use Resene SpaceCote Flat Kitchen & Bathroom (I used Resene Double Alabaster) and, for the walls, use Resene SpaceCote Low Sheen Kitchen & Bathroom (I used Resene Quarter Black White). Both are waterborne paints suitable for wet areas. When painting, always work from top to bottom, starting with the ceiling, first cutting in around light fittings or extractor fans.
 Step 7
Roll over the ceiling, and then go along with your brush and cut in the scotia and any parts of the ceiling the roller misses. Apply a second coat once the first coat is dry.
 Step 8
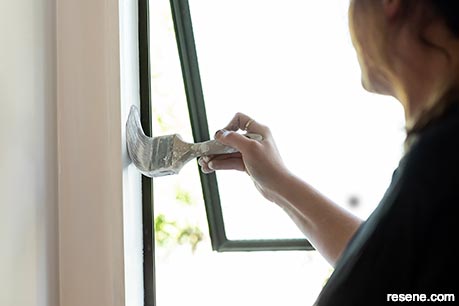
While the ceiling is drying, paint the trims and woodwork in two coats of Resene Lustacryl Kitchen & Bathroom (I used Resene Double Alabaster). You can also use this to paint wooden vanities or cupboards.
 Step 9
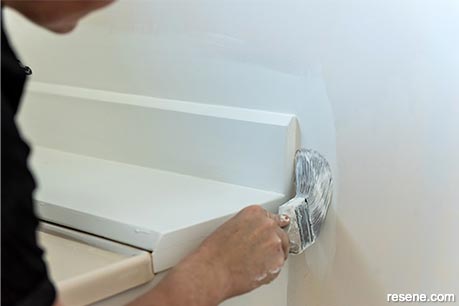
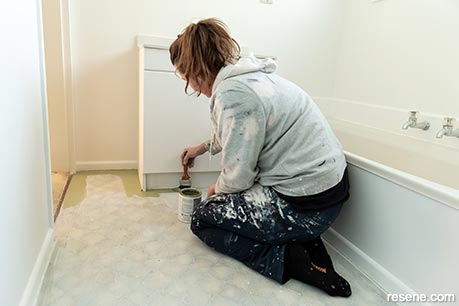
Next, paint the walls with Resene SpaceCote Low Sheen Kitchen & Bathroom. Start by cutting in the bottom edge of the scotia, internal corners and the skirtings. Also cut around light fittings and woodwork.
 Step 10
Use a roller to paint the main walls, starting about one roller width from the corner and rolling up and down the wall. To finish run the roller lightly the full height of the wall to lay off the paint for a smooth finish. Apply a second coat once the first coat is dry.
 Step 11
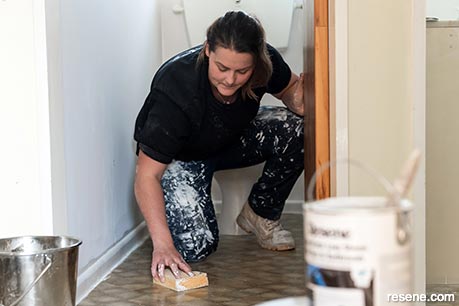
Now it’s time to start on the lino. First give the floor a good clean.
 Step 12
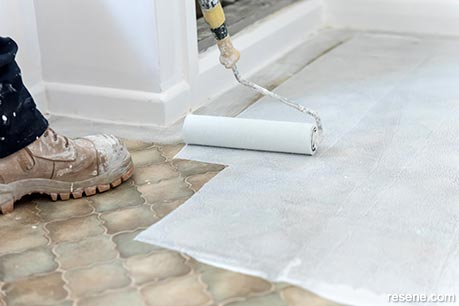
Once dry, prime the flooring with Resene Waterborne Smooth Surface Sealer. This gives the paint something to grip on the vinyl surface. Let the sealer cure overnight.
 Step 13
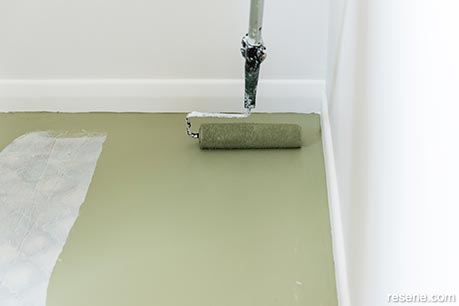
Paint the floor with Resene Walk-on flooring paint (I used Resene Flax), cutting in around the edges.
 Step 14
Use a long roller to paint the entire floor. Apply two coats allowing dry time between each coat.
 Step 15
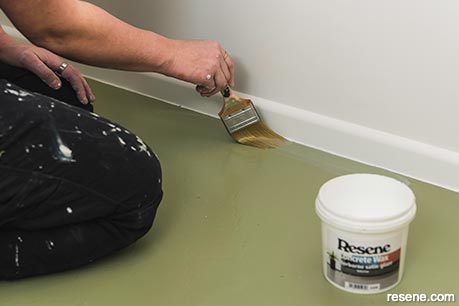
Once dry, apply a smooth clear coating to the floor using Resene Concrete Wax for extra protection.
 Bonus step
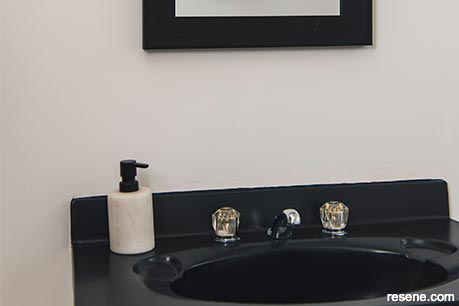
The old plastic sink and bathtub had yellowed with age, so Tegan replaced them with new black ones. If you have a metal bath that needs a refresh, you can rejuvenate the exterior with Resene Armourcote 221 and Resene Uracryl 402.
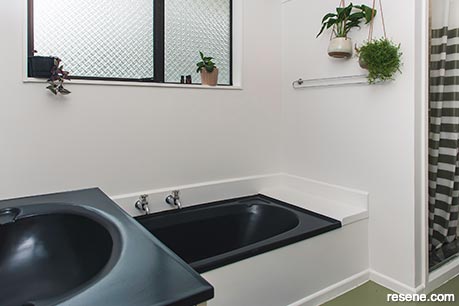 After reno
› For more TradieGal Tutorials visit www.habitatbyresene.com/tips/tradiegaltutorials. Follow Tegan on Instagram at @tradiegal.
Words: Tegan Williams
Images: Sharisse Eberlein Photography
Search habitat magazine stories
Printed copies of habitat highlights are available from late March 2024 at Resene ColorShops and resellers, while stocks last. You can view back issues of habitat magazine online.
Specifiers:
If you have an idea, project or story that you think would suit habitat, we’d love to hear from you. Please drop us an email with your details and include photos if submitting a project.
Sign up for a DIY card and Save! Australia | New Zealand
![]() Get inspired ! Subscribe
Get inspired ! Subscribe ![]() Get saving ! Apply for a DIY card
Get saving ! Apply for a DIY card
![]()
Can't find what you're looking for? Ask us!
Company profile | Terms | Privacy policy | Quality and environmental policy | Health and safety policy
Colours shown on this website are a representation only. Please refer to the actual paint or product sample. Resene colour charts, testpots and samples are available for ordering online. See measurements/conversions for more details on how electronic colour values are achieved.
What's new | Specifiers | Painters | DIYers | Artists | Kids | Sitemap | Home | TOP ⇧


