From habitat magazine - issue 37, TradieGal tutorial
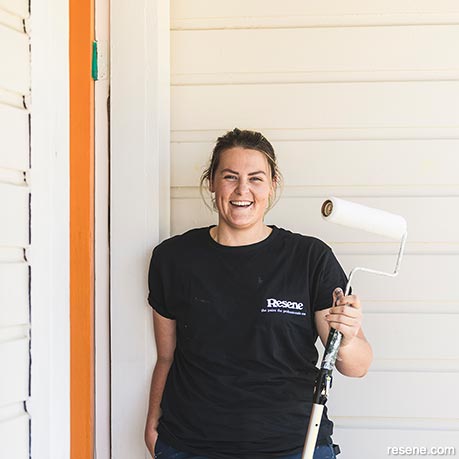
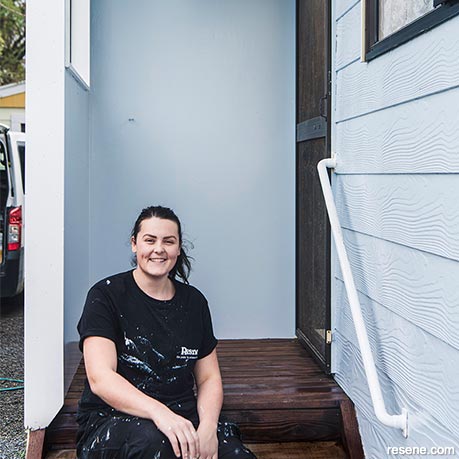
Shortly after receiving the keys to her new home, Tegan Williams aka TradieGal, was straight to work creating a porch that’s a step up.
This year I became a first-time homeowner, a dream I never thought attainable. My new home is an untouched 1980s gem that needs a lot of work. To make it a home, the natural place to start was the first thing that welcomes everyone in – the entranceway. It’s easy to make a big impact in such a small space. For this DIY, I painted the weatherboards, soffits and porch walls and stained the steps and deck. Let’s get to work.
 Step one
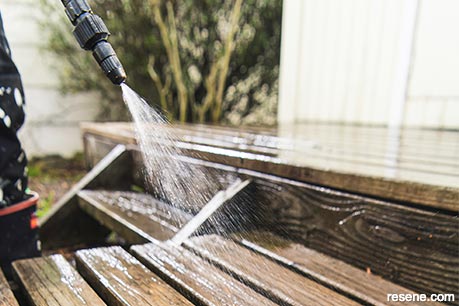
First, I needed to clean and treat the mould on the timber steps. Fill a garden sprayer with Resene Moss & Mould Killer concentrate and dilute it with water following the instructions on the label. Leave for 24 hours before scrubbing and rinsing with water.
 Step two
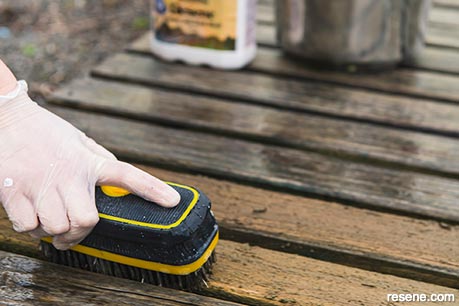
Clean the timber with Resene Timber and Deck Wash using a brush to scrub in the same direction as the grain. Rinse thoroughly and allow to dry overnight before painting or staining.
 Step three
As I knew I’d be walking back and forth up the steps while working, I decided to save the staining of the steps until last and moved on to painting the porch and weatherboards. First, prep the painted surfaces by washing with Resene Paint Prep and Housewash or Resene Bio-Cleaner. Sand and then dust with a clean, dry cloth.
 Step four
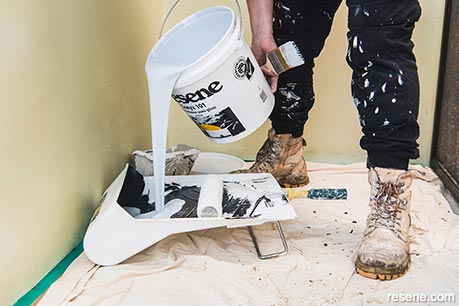
Put down drop cloths and mask anywhere you don’t want to get paint. Pour your paint into a tray – I used Resene Sonyx 101 tinted to Resene Oxygen for the weatherboards.
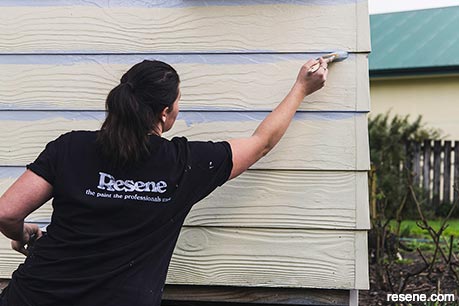 Step five
Cut in the weatherboards on the edges using a flat brush, working your way from bottom to top. This helps you see if you've missed any weatherboards, and if any flecks of paint from the brush go onto the board above, you can catch it with the roller before it dries. In cooler weather, you can cut in multiple boards at once if you keep a wet edge. I recommend cutting and rolling one board at a time or using Resene Hot Weather Additive in warm weather to slow drying time.
 Step six
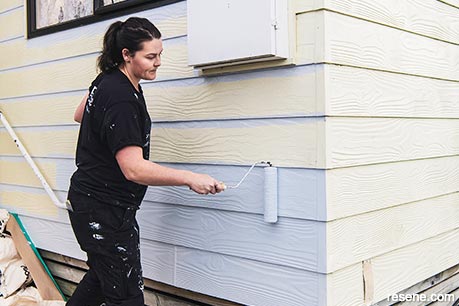
I used an 8mm nap, Resene No.1 roller sleeve for the weatherboards. This type of roller sleeve holds enough paint for the weatherboards and walls and has enough nap to get into the grooves of the weatherboards. When rolling weatherboards, hold the roller flat and work in a long rolling motion with consistent pressure.
 Step seven
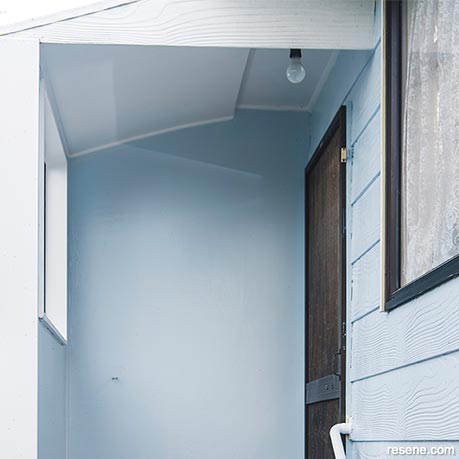
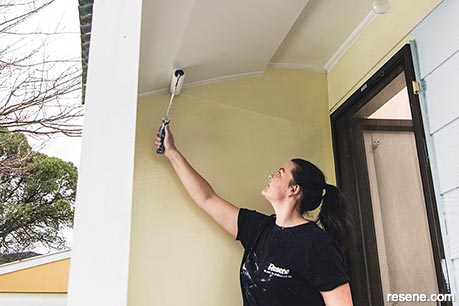
Moving onto the soffits, hold the brush sideways (as opposed to flat) to cut in around the edges, light fittings, mouldings or beadings. Make sure the quarter-round beading is coated with paint but don’t waste time cutting this in perfectly. If you accidentally paint the main wall, you can cover this up when you cut in the main wall later. For the soffits, I used Resene Sonyx 101 tinted to Resene Half White Pointer. Once dry, repeat with a second coat.
 Step eight
Roll the soffit paint to the edges, covering any harsh brush lines.
 Step nine
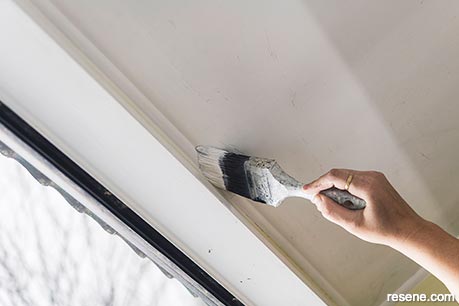
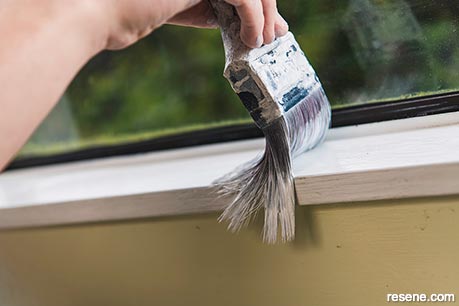
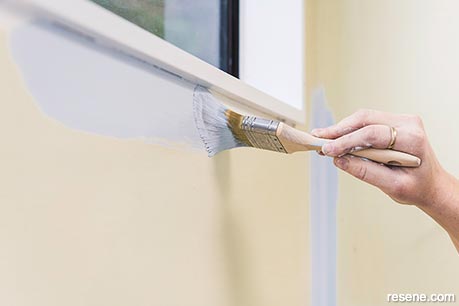
While waiting for the soffit paint to dry, move on to trims and joinery such as windows, door architraves and handrails. Start by sanding, dusting then filling any gaps. Use a flat brush to cut in the window frame’s sides, bottom and corners before using nice long strokes to finish off the faces of the frame. To paint the trims, I used Resene Lustacryl tinted to Resene Half White Pointer. Repeat with a second coat once dry.
 Step ten
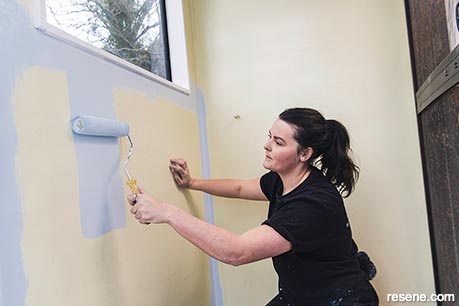
Prepare and paint the remaining walls of the porch. Sand them using 120- grit sandpaper and then dust. Start by cutting in internal corners, around any frames or wall fixtures and the soffit.
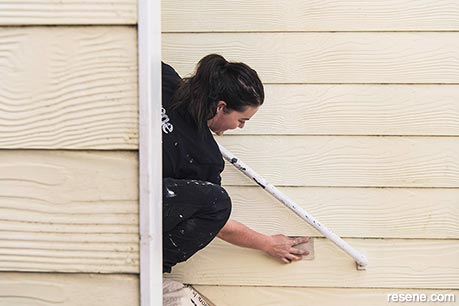
 Step eleven
You’re now ready to roll. I recommend an 8-10mm nap roller to paint the walls. Start in the middle and move outwards – this helps you put the bulk of the paint in the middle of the wall. Moving the roller back over the area will pick up any excess paint and allow you to spread it over the rest of the wall, providing an even coating. Layoff the paint by running the roller up and down your finish lightly once each piece of the wall is painted for a smooth even finish.
 Step twelve
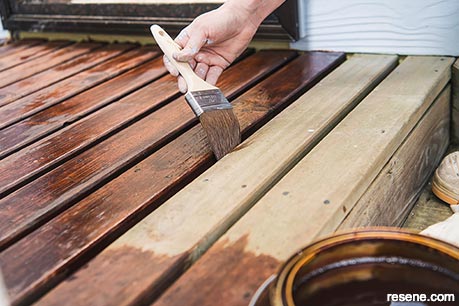
Before staining the deck and steps, give them a sweep to remove any dirt. Using a brush, cut in the edges and down the cracks of the deck, then use long any excess stain with a rag. You could use a Deck Master or a lambswool applicator on large surfaces. My deck was made from kwila, so I used Resene Kwila Timber Stain to rejuvenate it. Allow to dry before applying a second coat.
top tip When staining a deck or porch, work methodically to avoid trapping yourself in a corner.
› For more TradieGal Tutorials visit www.habitatbyresene.com/tradiegaltutorials. Follow Tegan on Instagram at @tradiegal.
Words: Tegan Williams
Images: Mike Heydon, Tegan Williams
Search habitat magazine stories
Printed copies of habitat highlights are available from late March 2024 at Resene ColorShops and resellers, while stocks last. You can view back issues of habitat magazine online.
Specifiers:
If you have an idea, project or story that you think would suit habitat, we’d love to hear from you. Please drop us an email with your details and include photos if submitting a project.
Sign up for a DIY card and Save! Australia | New Zealand
![]() Get inspired ! Subscribe
Get inspired ! Subscribe ![]() Get saving ! Apply for a DIY card
Get saving ! Apply for a DIY card
![]()
Can't find what you're looking for? Ask us!
Company profile | Terms | Privacy policy | Quality and environmental policy | Health and safety policy
Colours shown on this website are a representation only. Please refer to the actual paint or product sample. Resene colour charts, testpots and samples are available for ordering online. See measurements/conversions for more details on how electronic colour values are achieved.
What's new | Specifiers | Painters | DIYers | Artists | Kids | Sitemap | Home | TOP ⇧


