DIY project from NZ Gardener magazine
This easy project is great for keen gardeners with limited space.
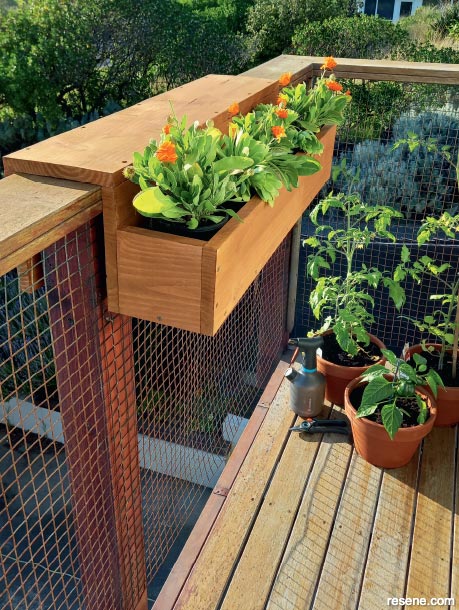
Hang the planter over your balcony, and plant out with your favourite herbs or plants.
Materials:
Note:
Tools:
Health & Safety:
Cut list:
Cost:
Learn how to make a balcony planter for your garden:
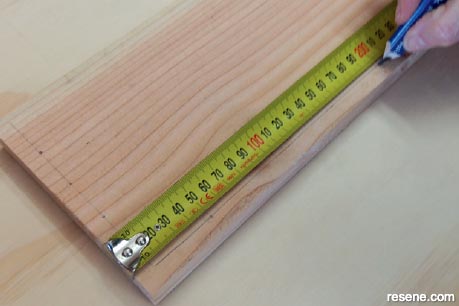
Measure the width of the top of your balcony, and cut the timbers to size. This balcony measures 140mm, and 20mm is added to each side for the timbers; this will make the top 180mm wide.
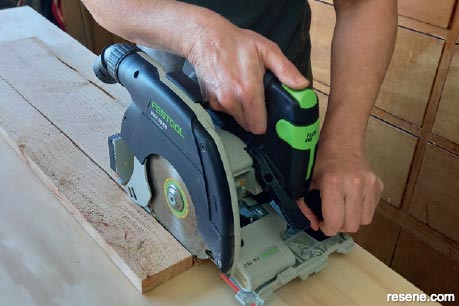
Place timbers together and make sure they all line up and fit together.
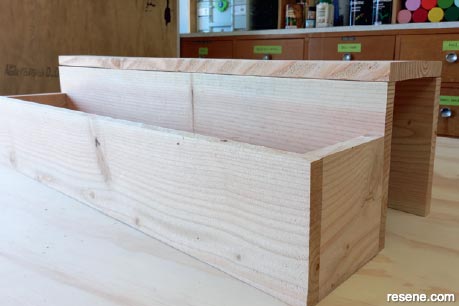
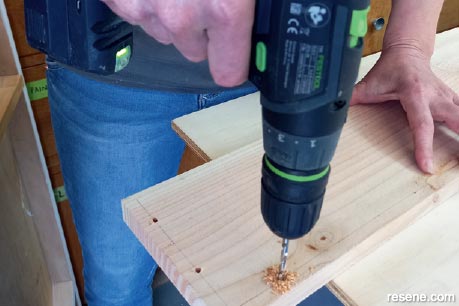
Measure out for screws, and mark ready for the pilot holes. These are placed evenly along each joining side at 10mm in from the edge. Always keep away from the corners to prevent cracking the timber.
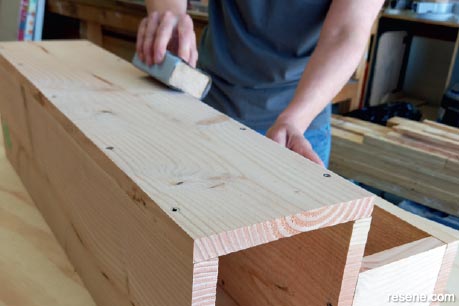
Drill the pilot holes ready for the screws. Screw the front box together. Place the back and top, and screw together. Sand edges if necessary.
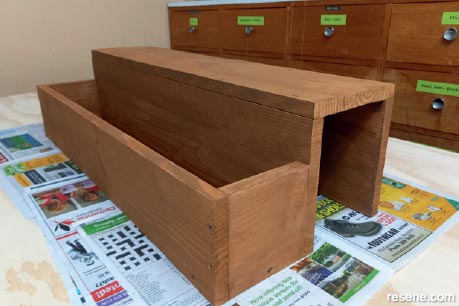
The planter is ready for staining. I have used Resene Exterior Stain in Nutmeg. Hang the planter over your balcony, and plant out with your favourite herbs or plants.
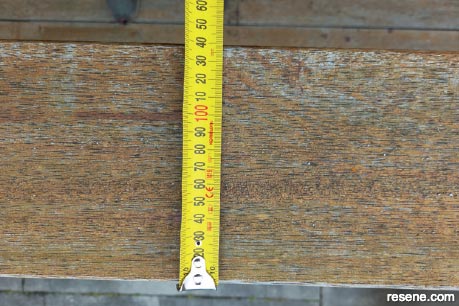 Step 1
 Step 1a
 Step 2
 Step 3
 Step 4
 Step 4a
 Step 4b
 Step 5
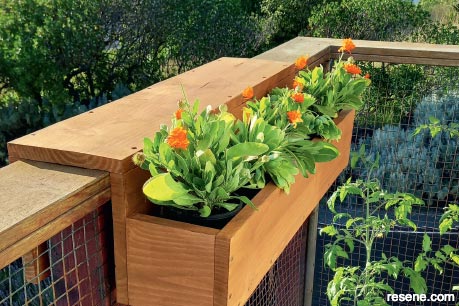 Finished project
Project: Jane Horne and partner Simon Bartholomew design and develop projects from their studio (plainandsimple.co.nz) in Christchurch, managing projects throughout the South Island
![]() Get inspired ! Subscribe
Get inspired ! Subscribe ![]() Get saving ! Apply for a DIY card
Get saving ! Apply for a DIY card
![]()
Can't find what you're looking for? Ask us!
Company profile | Terms | Privacy policy | Quality and environmental policy | Health and safety policy
Colours shown on this website are a representation only. Please refer to the actual paint or product sample. Resene colour charts, testpots and samples are available for ordering online. See measurements/conversions for more details on how electronic colour values are achieved.
What's new | Specifiers | Painters | DIYers | Artists | Kids | Sitemap | Home | TOP ⇧

