DIY project from NZ Gardener magazine
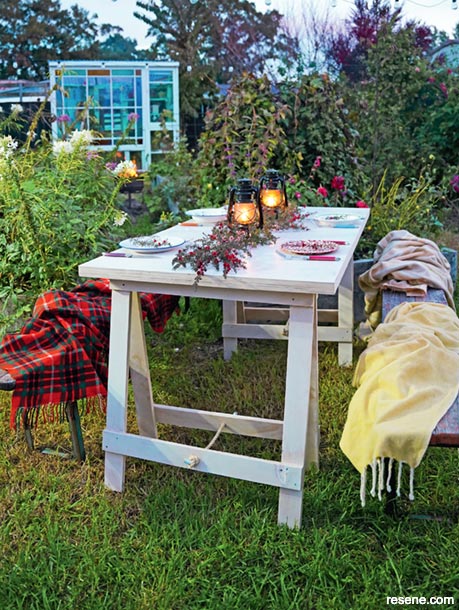
Jacob Leaf prepares for a Matariki celebration by making a stylish ply trestle table that is easy to transport and setup wherever this star cluster shines brightest.
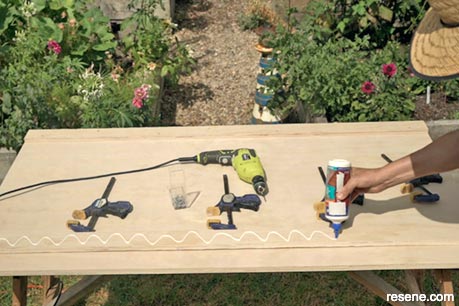
Materials
Cut list
Paint colours
Tools
Cost: $110 excluding Resene products.
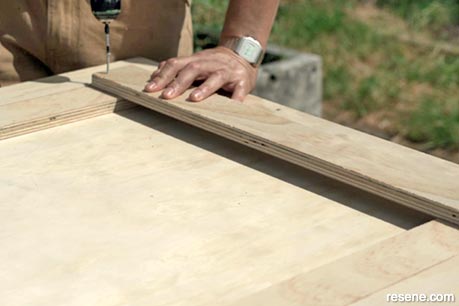
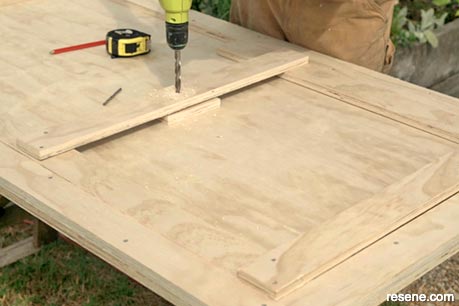
Make a brace around the ply edge. This will thicken its profile, add rigidity and prevent sagging in the middle. Glue, clamp and screw both 1500mm x 70mm pieces along both long edges. Glue, clamp and screw two 680mm x 70mm pieces along the short edges.
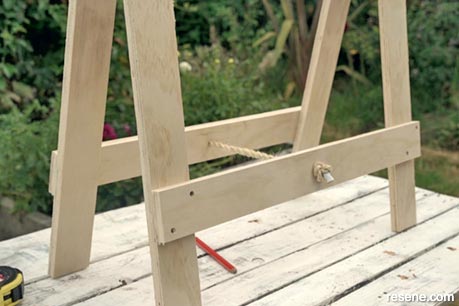
Each trestle is made up of eight pieces of wood. Both halves of each trestle are made up of two legs, each with a top and a bottom brace. They are attached at the top with two hinges and rope at the bottom stops them from opening too wide. Glue and screw two 680mm x 70mm pieces (lateral braces) onto two 744mm x 70mm pieces (legs). Attach one piece so that it’s flush with the top of the legs and the other lower brace 140mm up from the bottom of the legs. Use the underside of the tabletop as a jig (to ensure everything is square). Repeat until you have four leg sections.
Step 1a
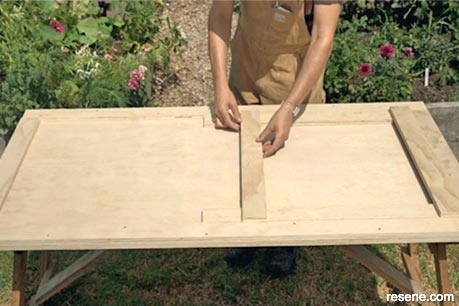
Step 1b
Step 2
Drill a hole in the centre of each lower brace. To attach the two halves of each trestle, turn them over, lay them flat with the inside facing up and with each top end facing each other. Screw these together with the hinges to make two sets of legs.
Each should be 500mm. Secure each end with tape to stop it from fraying and thread it through the lower brace holes on each trestle. Lock them in place by tying a knot at each end.
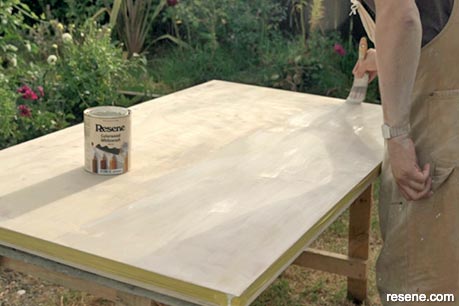
Now you’re ready to paint or stain. I masked off my edges when painting, so there’s a contrast between the matte whitewashed table top and the ply-laminate edges.
Step 3
Step 4
Step 5
![]() Get inspired ! Subscribe
Get inspired ! Subscribe ![]() Get saving ! Apply for a DIY card
Get saving ! Apply for a DIY card
![]()
Can't find what you're looking for? Ask us!
Company profile | Terms | Privacy policy | Quality and environmental policy | Health and safety policy
Colours shown on this website are a representation only. Please refer to the actual paint or product sample. Resene colour charts, testpots and samples are available for ordering online. See measurements/conversions for more details on how electronic colour values are achieved.
What's new | Specifiers | Painters | DIYers | Artists | Kids | Sitemap | Home | TOP ⇧

