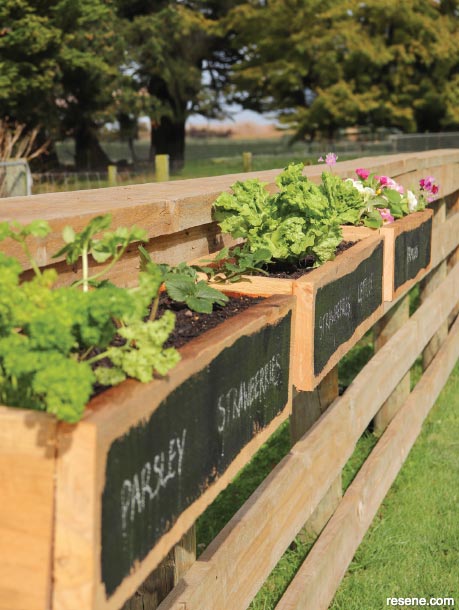
To gain extra growing space, hang these easy-to-build planters on almost any wooden fence or deck railing.
![]()
Materials:
Tools:
French cleat: This method of hanging a planter provides secure support, can be used almost anywhere and means the planters can easily be lifted off for repotting.
Here's another idea: To hang planters over metal/thin railings, attach hook brackets to the back instead of using the French cleat so you can hang planters over the rail.
How to build railing planters:
 Step one
Create each planter by screwing the end pieces onto each end of the macrocarpa base timber. Then, screw the side panels to the long sides of the base and the affixed end pieces to form the planter. Repeat to create as many planters as you require. (If you have one, you can also use a nail gun to attach the planter timber together.)
 Step two
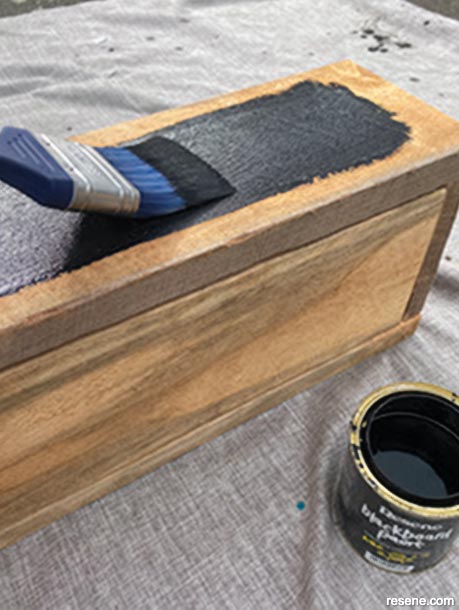
Paint a large brush stroke onto the front of each planter using Resene FX Blackboard Paint and allow to dry.
 Step three
Drill drainage holes in the base of each planter. Cut the weed mat to size using scissors and staple the weed mat to the inside of each planter to stop the soil falling through.
 Step four
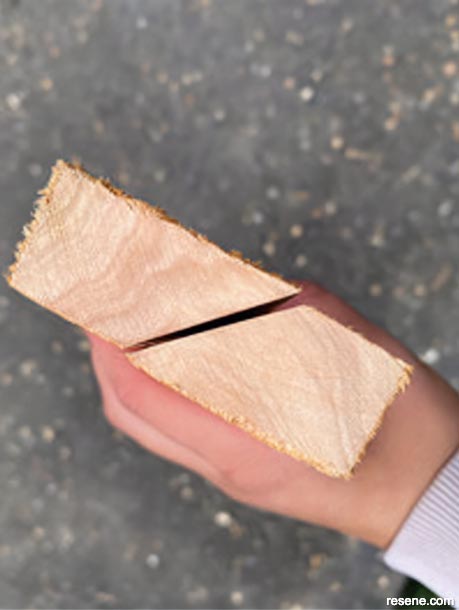
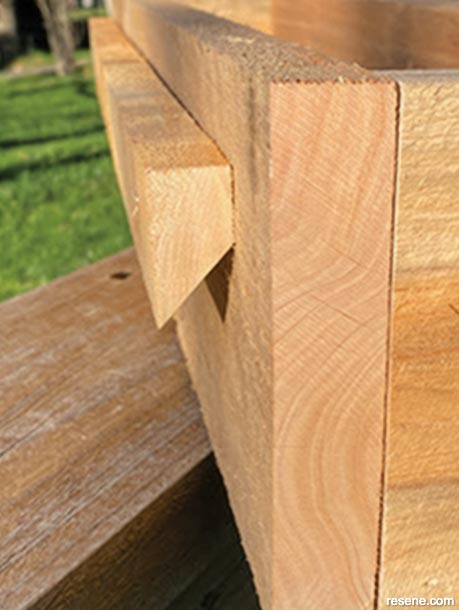
Cut the timber batten(s) in half lengthways at 45 degrees, as shown.
 Step five
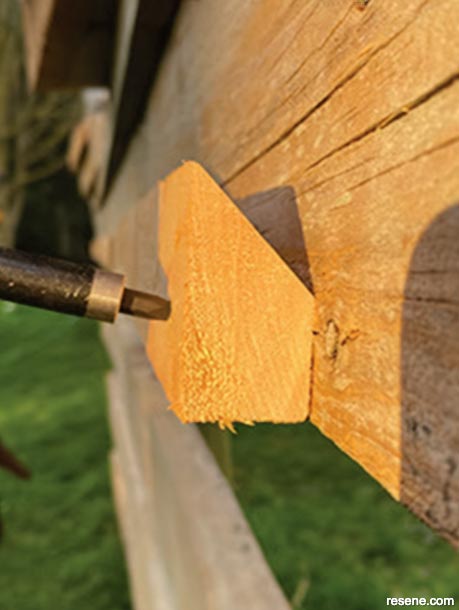
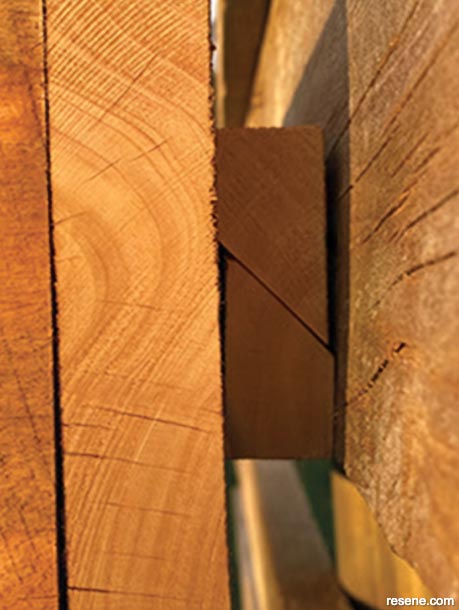
To hang each planter, you will use a method called the ‘French cleat’. Screw the cut batten halves into position on your fence or railing, cut side up and facing in, as shown.
 Step six
Screw the other halves of each batten to the back of each planter, cut side down and facing in, as shown.
 Step seven
Hang the planter(s) in place, slotting the two battens together, as shown.
 Step eight
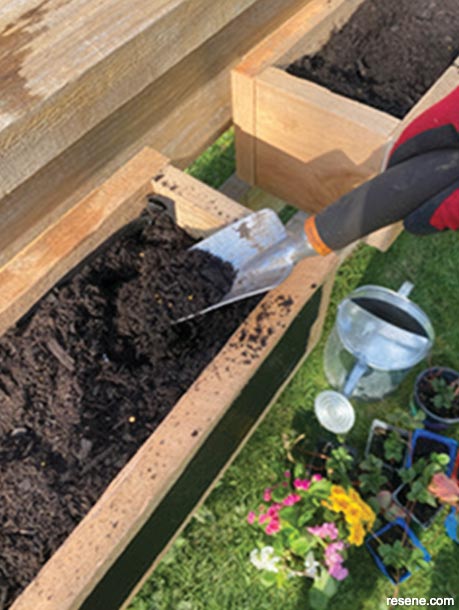
Fill each planter with potting mix and plant your selection of plants. Water well.
 Step nine
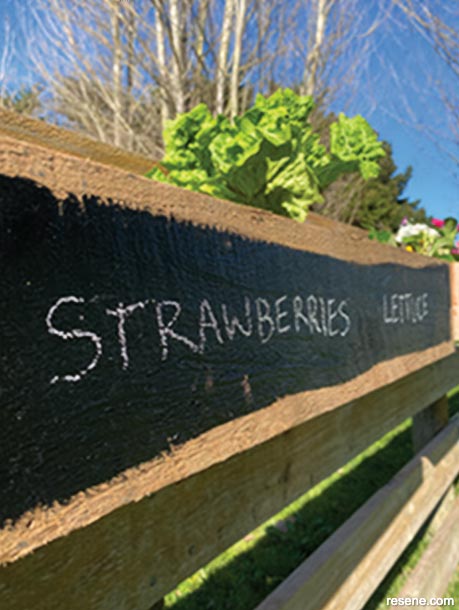
Use chalk to label your planters.
![]() Get inspired ! Subscribe
Get inspired ! Subscribe ![]() Get saving ! Apply for a DIY card
Get saving ! Apply for a DIY card
![]()
Can't find what you're looking for? Ask us!
Company profile | Terms | Privacy policy | Quality and environmental policy | Health and safety policy
Colours shown on this website are a representation only. Please refer to the actual paint or product sample. Resene colour charts, testpots and samples are available for ordering online. See measurements/conversions for more details on how electronic colour values are achieved.
What's new | Specifiers | Painters | DIYers | Artists | Kids | Sitemap | Home | TOP ⇧

