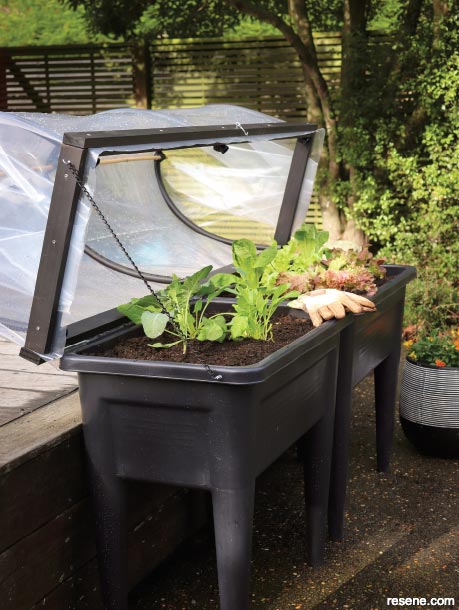
Create a mini glasshouse environment to extend your growing season – perfect for early spring planting, hardening off seedlings and making the most of small growing spaces.
![]()
Materials:
Resene products:
Tools:
How to build a covered planter:
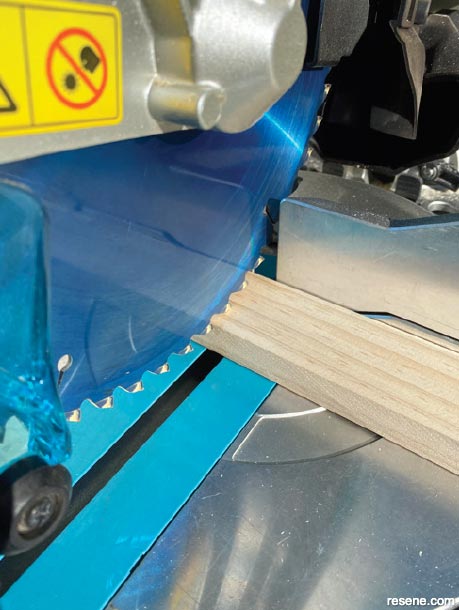 Step one
Cut the timber to the lengths listed. If you’re making a frame for different planters or for a different number of planters, adjust all measurements accordingly.
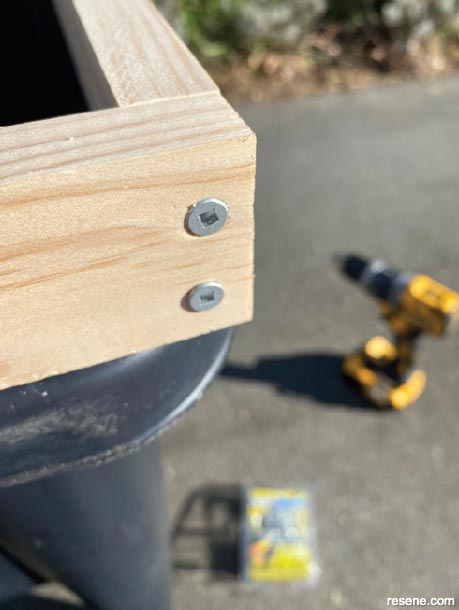 Step two
Assemble a rectangle using the four lengths of timber for the inner frame, ensuring that the shorter ends are inside the longer lengths. Screw the frame together as shown.
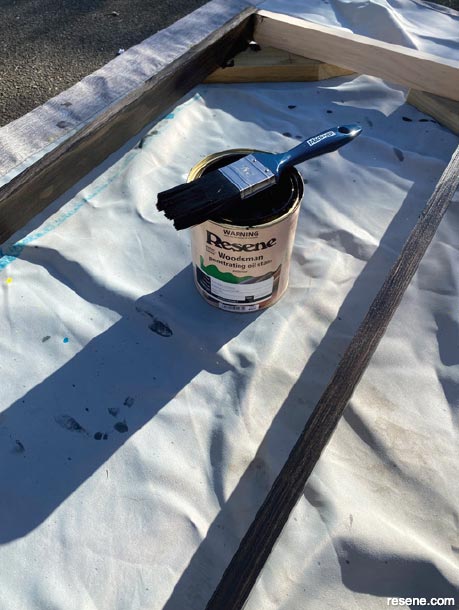 Step three
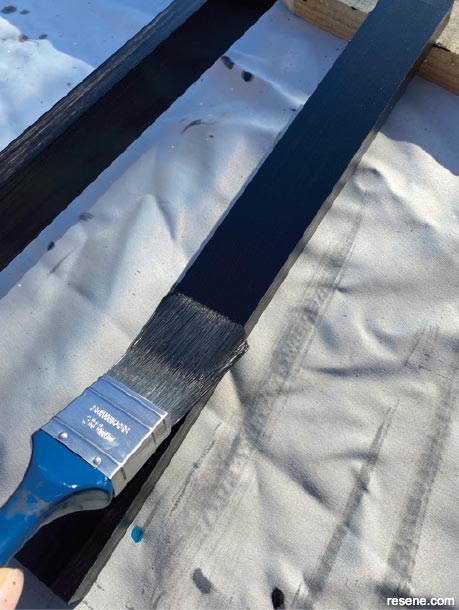
Apply a coat of Resene Waterborne Woodsman to the assembled inner frame and the individual pieces of timber for the outer frame.
 Step four
Once the first coat has dried, apply a second coat of Resene Waterborne Woodsman to the inner frame and the timber for the outer frame and allow to dry.
 Step five
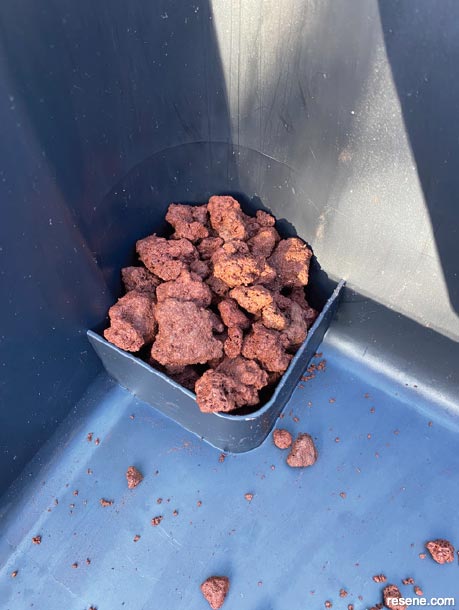
While the painted timber dries, move the planters into position and fill the legs with scoria rock. This will prevent soil compacting in the legs and help with drainage.
 Step six
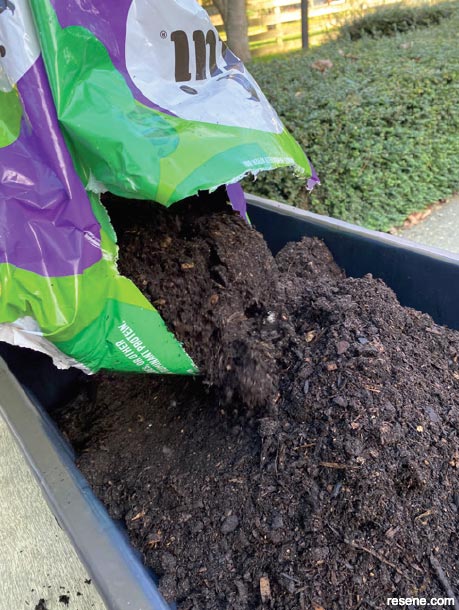
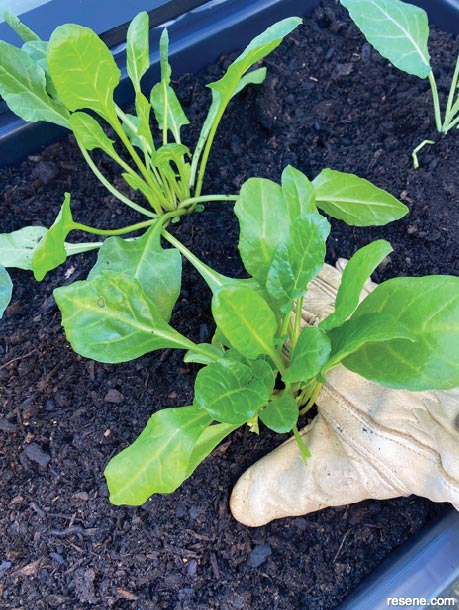
Fill both planters with vegetable potting mix (we used one and a half 40L bags per planter).
 Step seven
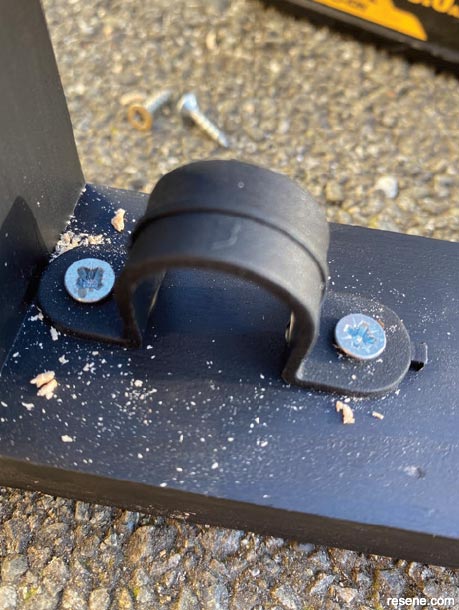
Loosely screw saddle clips to the inside of the long edges of the inner frame, placing one in each corner and one in the middle of each long edge.
 Step eight
Push the three pieces of irrigation tubing into the saddle clips to create three arches, then tighten the screws holding the saddle clips. If necessary, add an extra screw through the tube into the frame to hold it in place, as shown.
 Step nine
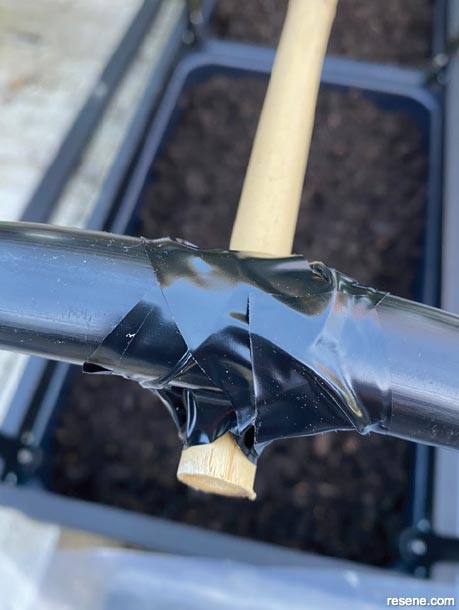
Tape the bamboo stake to the top of the arches to hold them in place.
 Step ten
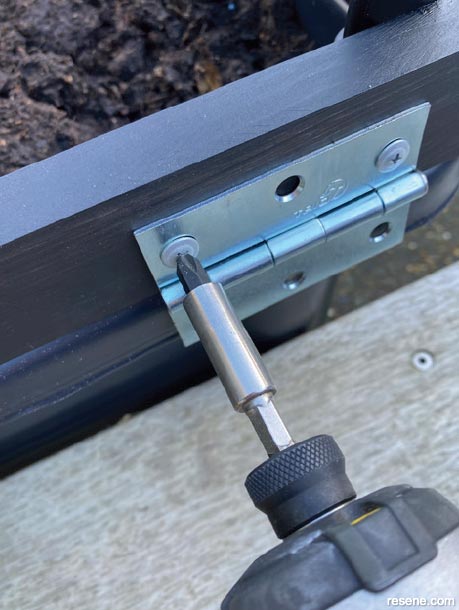
Screw a hinge to each outside corner of one long edge of the inner frame, ensuring the screws avoid any screws already in place.
 Step eleven
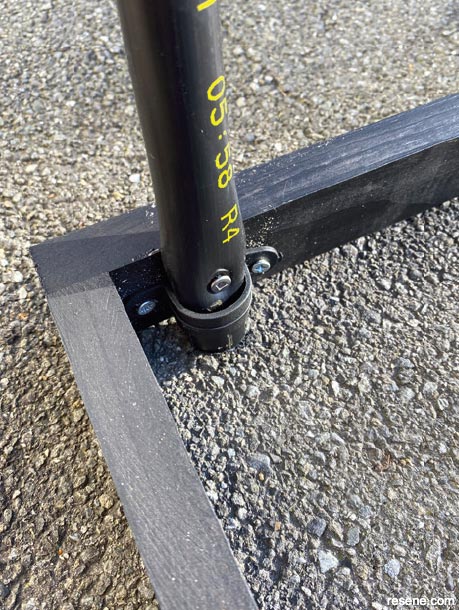
Place the inner frame on top of your planters and ensure they are perfectly aligned. Drill holes for the two hinges in the planters and attach them using nuts and bolts with washers.
 Step twelve
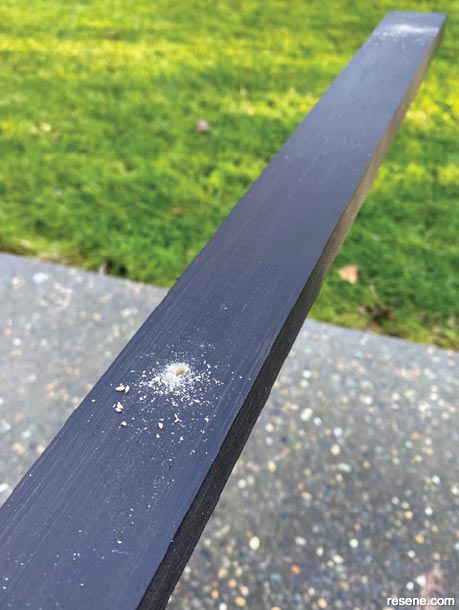
Drill pilot holes along each of the outer frame pieces of timber, five for each long length and three for each short length.
 Step thirteen
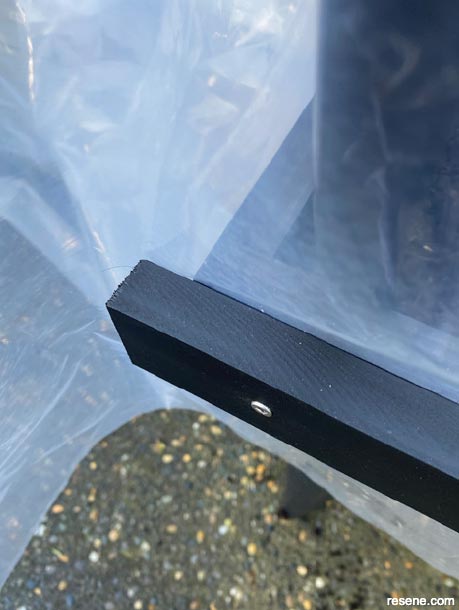
Place the clear plastic sheeting over the top of the three arches attached to the inner frame. Secure the plastic to the inner frame along the long edges by screwing the two long lengths of outer frame timber into position, using the pre-drilled holes as guides. Pull the plastic tight as you secure the second long edge. Leave a 19mm overhang on each end.
 Step fourteen
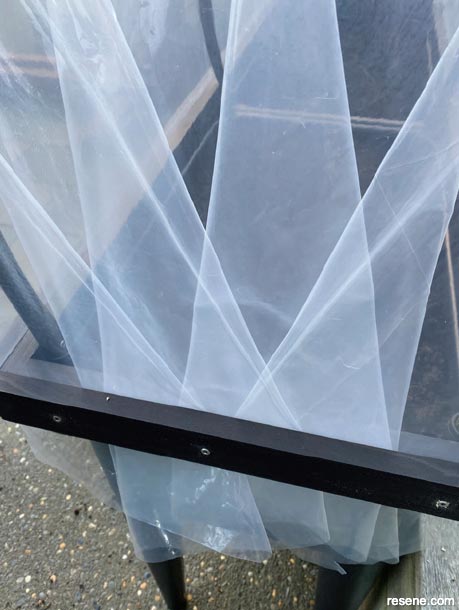
In the same way, secure the plastic sheeting on both short sides with the two short lengths of the outer frame, folding the plastic neatly towards the middle while pulling it tight.
 Step fifteen
Cut off any excess plastic sheeting along all sides.
 Step sixteen
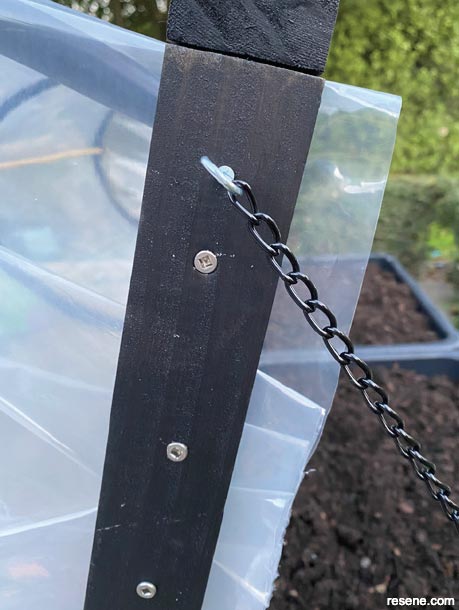
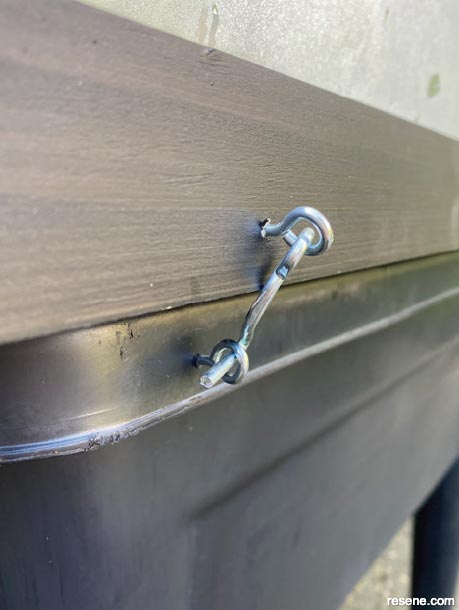
Attach a hook at the front of each short side, both on the frame and the planter. Hook the chain between them to prevent the lid from opening too wide.
Step seventeen
Screw a latch into position at the front of the planter to hold the lid closed.
Step eighteen
Plant a selection of vegetable seeds or seedlings and water them well.
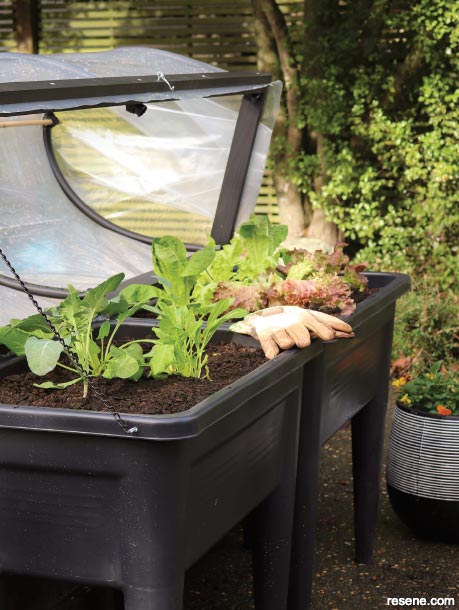
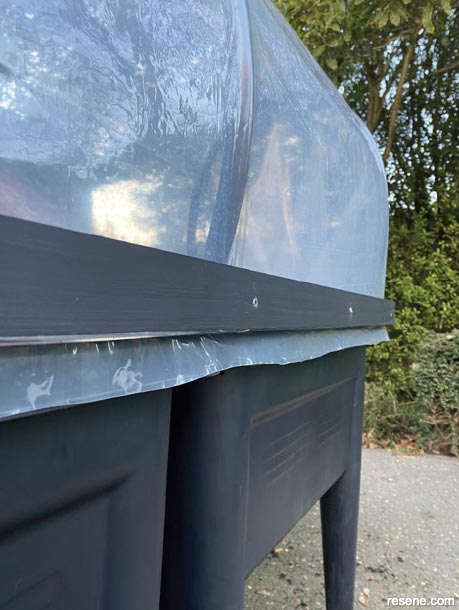
Finished project
A close-up of the finished project.
![]() Get inspired ! Subscribe
Get inspired ! Subscribe ![]() Get saving ! Apply for a DIY card
Get saving ! Apply for a DIY card
![]()
Can't find what you're looking for? Ask us!
Company profile | Terms | Privacy policy | Quality and environmental policy | Health and safety policy
Colours shown on this website are a representation only. Please refer to the actual paint or product sample. Resene colour charts, testpots and samples are available for ordering online. See measurements/conversions for more details on how electronic colour values are achieved.
What's new | Specifiers | Painters | DIYers | Artists | Kids | Sitemap | Home | TOP ⇧

