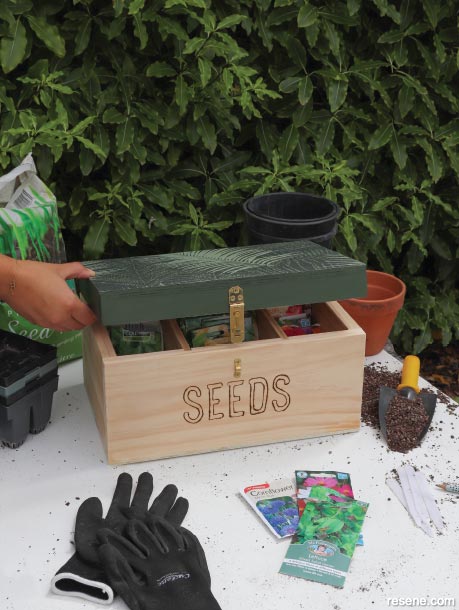
Build a sturdy little box to keep your seed packets organised and easily accessible.
![]()
Materials:
Tools:
For extra protection from the elements, add a coat of Resene Aquaclear.
How to build a seed storage box:
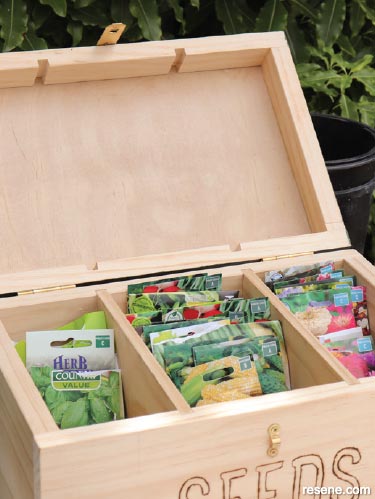
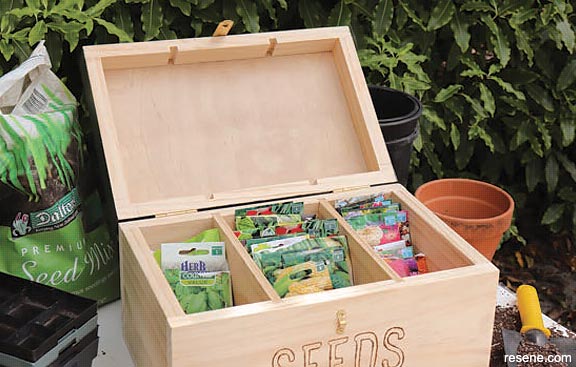
Adjust your measurements to create a box large or small enough to fit your seed collection. We created three sections to allow us to split our seeds into flowers, herbs and edibles, but you can create as many sections as needed.
 Step one
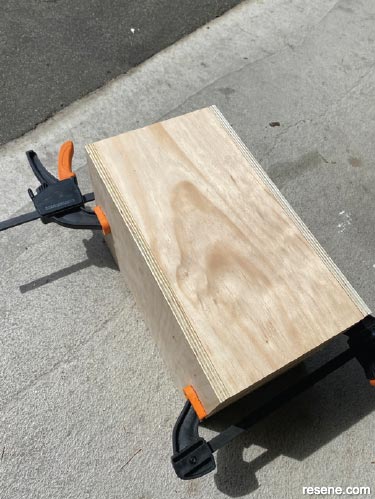
Cut your timber to the sizes listed, or to your plans. (We used pine and plywood offcuts.)
 Step two
Cut out a 5mm-deep groove, 120mm in from each short edge of the front and back panels. This will be where the dividers slide into, so make sure the groove is wide enough for them to slot in place.
 Step three
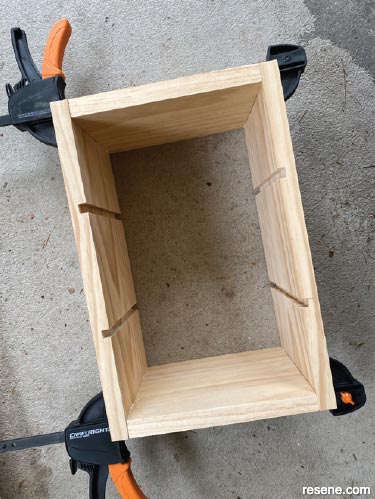
Using wood glue, join the two side panels and the front and back panels together. Strengthen with a few small nails and clamp together.
 Step four
Once dry, use the same method to attach the top and bottom panels to the box, once again clamping together and allowing to dry.
 Step five
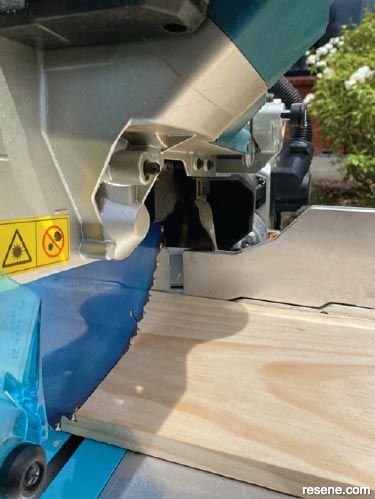
Using a table saw (or a hand saw), cut off the top of the box to create a lid (approx. 4cm from the top). Rotate the box to cut one side at a time and make sure you avoid any nails.
 Step six
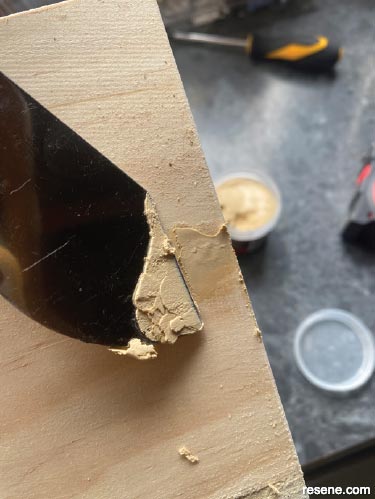
Use wood filler to fill in all the nail holes.
 Step seven
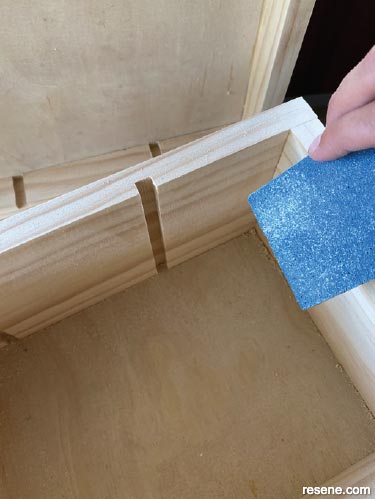
Once the filler has dried, sand over the filler until you get a smooth finish, flush with the surface of the wood. Also sand any sharp edges and corners.
 Step eight
Cut the Resene wallpaper to size and glue it onto the top of the lid.
 Step nine
Apply two coats of Resene Seaweed to all four sides of the lid, allowing each coat to dry.
 Step ten
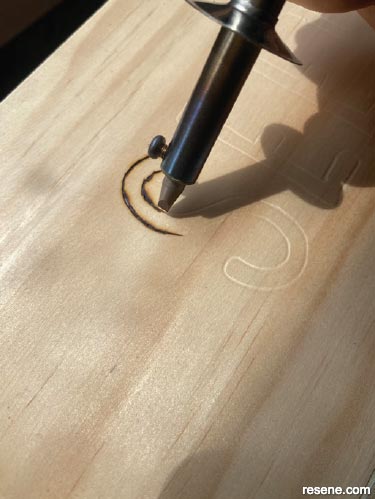
Either use a wood burning pen to burn the word ‘seeds’ on the front of the box or paint it on with a Resene testpot (either way, use a pencil to sketch the letters out first).
 Step eleven
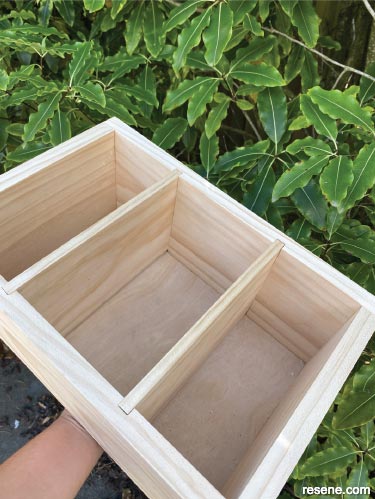
Slot the dividers in place. We made the middle section wider so that larger vegetable seed packets, such as beans, can fit.
 Step twelve
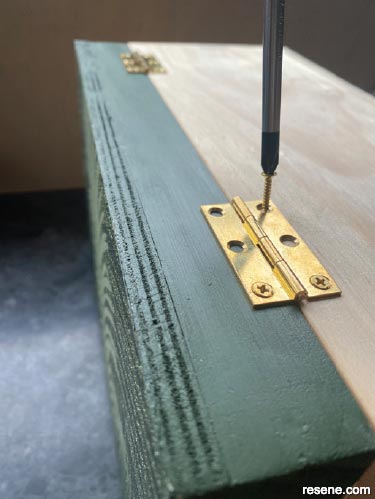
Position the lid on top of the box, the same way it was cut, for a perfect fit. Join the two together using hinges at the back, as shown.
 Step thirteen
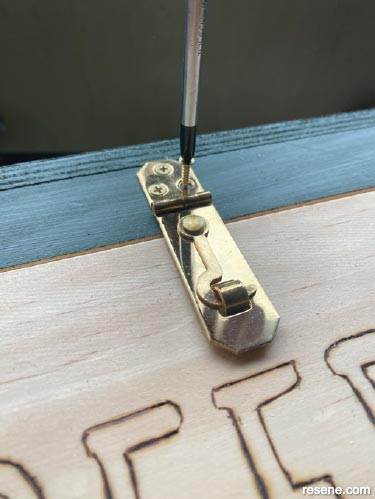
Close the lid and screw the latch into position on the opposite side to the hinges.
Step fourteen
Organise your seed packets, depending on how it will be easiest for you to find what you need. We split our seeds into three sections – veges, herbs and flowers – and sorted each alphabetically. You could also create labelled tab dividers out of cardboard to help keep things organised.
![]() Get inspired ! Subscribe
Get inspired ! Subscribe ![]() Get saving ! Apply for a DIY card
Get saving ! Apply for a DIY card
![]()
Can't find what you're looking for? Ask us!
Company profile | Terms | Privacy policy | Quality and environmental policy | Health and safety policy
Colours shown on this website are a representation only. Please refer to the actual paint or product sample. Resene colour charts, testpots and samples are available for ordering online. See measurements/conversions for more details on how electronic colour values are achieved.
What's new | Specifiers | Painters | DIYers | Artists | Kids | Sitemap | Home | TOP ⇧

