DIY projects from Your Home and Garden
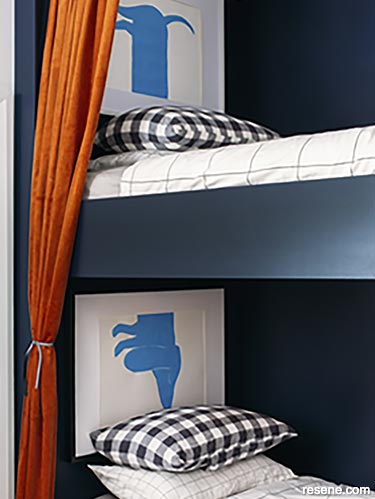
Building framed bunk beds and finishing with curtains elevates the bach classic. Kids also love them at home.
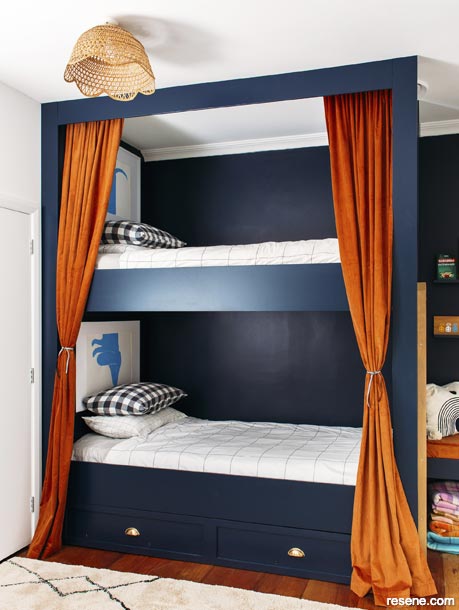
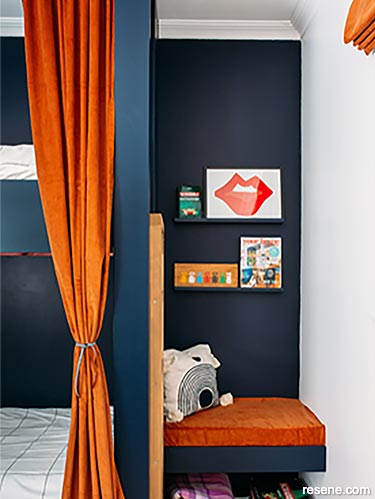
Tip: Add to the cosy atmosphere with personalised artwork at the head of each bunk bed and consider attaching clip-on LED rechargeable reading lights.
Build a frame with the framing timber by nailing or screwing the frames together. If using screws, the bunk beds will be easier to dismantle at a later date. This frame was made to suit the ceiling height and to fit a king single mattress inside, allowing a bit extra for bedding. I fixed the frames into the walls, floor and ceiling, making sure everything was level and plumb.
Add joists (the horizontal structure) to build a platform for the mattress. I used a skillsaw and chisel to notch the joists into the upright framework for strength. Alternatively, you could butt them in flush and fit the joist hangers. I only needed one level of joists because I put an existing bed and trundler at the bottom, but if you require two or three levels, simply repeat this step. Don’t forget to consider factors such as head height, access and safety when designing multiple level bunks.
Fit the platform for the bed. I used a 12mm sheet of MDF, but you could also use plywood. Fix this down to the joists using either short nails or screws.
Measure and cut MDF to encase all the framing timber. Try and have all the smooth faces towards the front of the bunks and the cut edges towards the back.
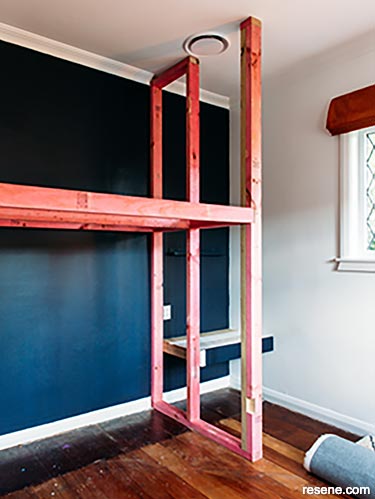
Photo (1)
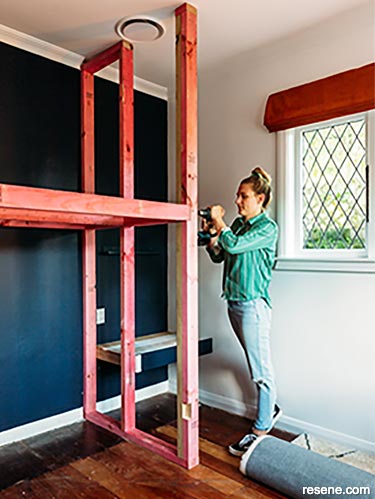
Photo (2)
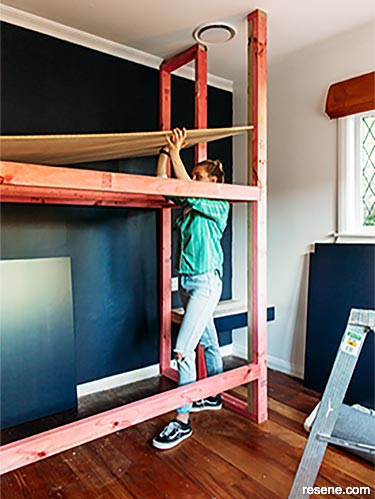
Photo (3)
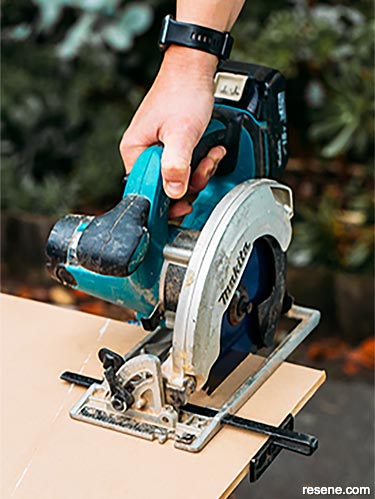
Photo (4)
Before fixing the MDF to the framework, give everything a really good sand, then prime with Resene Quick Dry primer. I used Resene Indian Ink to paint two top coats.
Fix the MDF to the framework. I used a finishing gun or bradder. I made sure I numbered the back of each piece when I measured and cut it so I would know where it would go back on. Fill nail holes with Resene EzyFill Quick. Lightly sand and paint one more top coat to finish it off.
For the ladder, I used 40mm x 40mm dressed pine, notching in each of the rungs like the joists. The ladder was painted with Resene Colorwood in Resene Bark and fixed to the end of the bunks with four large screws.
Provide privacy for your guests by adding curtains to create that enclosed feeling seen in old-style Scandinavian bunks. This look is cosy if you have multiple sets of bunks in one room. I hung the curtain rod on the inside of the framework and added corduroy curtains.
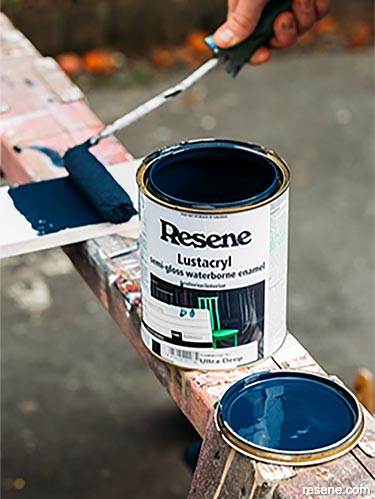
Photo (5)
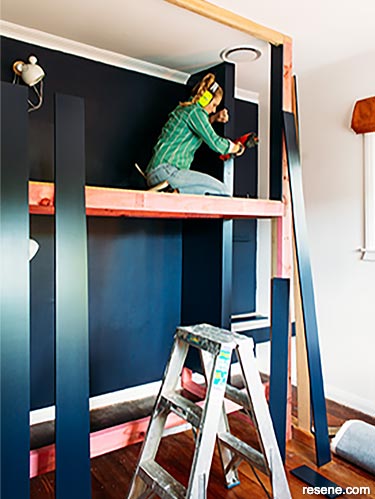
Photo (6)
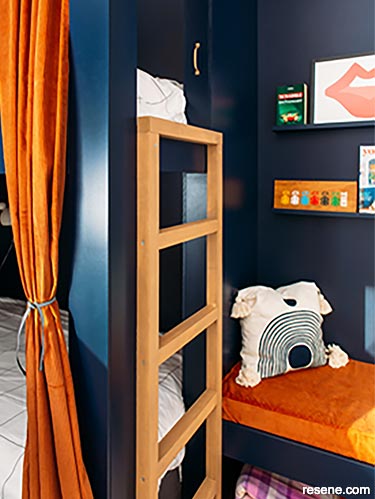
Photo (7)
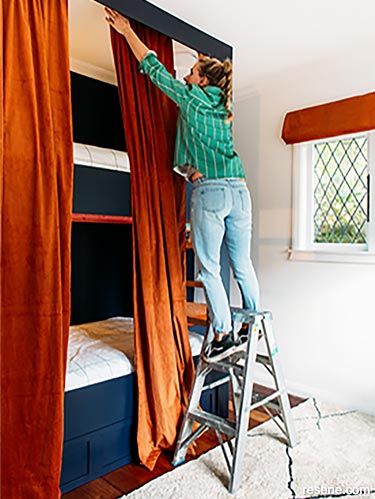
Photo (8)
Create a front for the trundler, it’s an optional step but great if the bed is unsightly. Cut the face/cover for the front face of the trundler bed. I used 18mm MDF and fixed a border on it, then repeated the sanding, priming and painting process as described in Step 5.
Add handles, then drill four holes and use four bolts (as pictured) to fix the face piece to the metal frame.
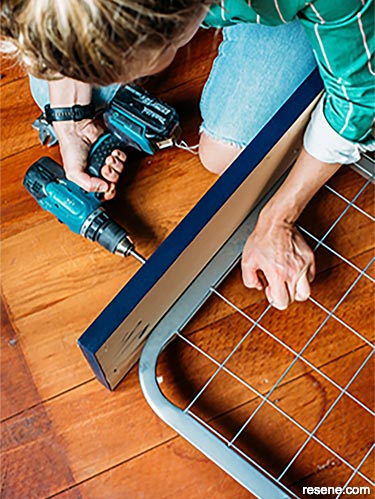
Photo (9)
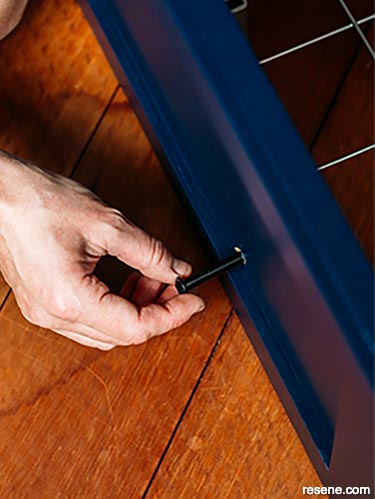
Photo (10)
Project detail
Project detail (2)
Lightly sanding in between each coat of paint (especially on the cut edges) gives the MDF a perfect finish.
Choose a waterborne enamel, such as Resene SpaceCote Low Sheen, for walls in high contact areas, such as this bunk bed. This will make it easier to wipe them clean later. You can also apply Resene SpaceCote Clear for extra protection.
Project colours...
More colours to try...
Project: Nikki Kettle. Photography: Anna Briggs. May 2022.
▸ Download a PDF of this article
Projects from Your Home and Garden
Our resident DIY expert, Nikki Kettle, shares the latest tips and DIY projects.
![]() Get inspired ! Subscribe
Get inspired ! Subscribe ![]() Get saving ! Apply for a DIY card
Get saving ! Apply for a DIY card
![]()
Can't find what you're looking for? Ask us!
Company profile | Terms | Privacy policy | Quality and environmental policy | Health and safety policy
Colours shown on this website are a representation only. Please refer to the actual paint or product sample. Resene colour charts, testpots and samples are available for ordering online. See measurements/conversions for more details on how electronic colour values are achieved.
What's new | Specifiers | Painters | DIYers | Artists | Kids | Sitemap | Home | TOP ⇧