Paint systems for earthquake affected building — select the surface you will be painting from the list below to view how to prepare and finish the surface.
Walls – preparation:
Walls – finishing (by room/s):
Other areas – preparation and finishing
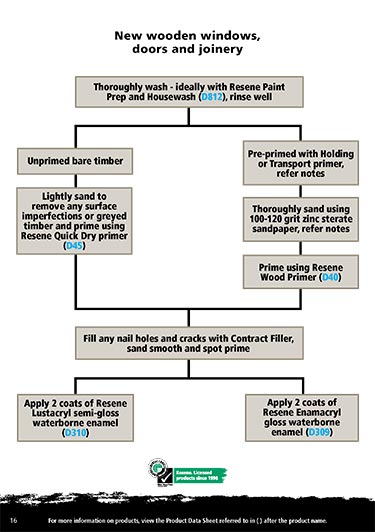
Note: For a visual of the steps below outlining how to prepare and paint new wooden windows, doors and joinery, please reference the PDF flowchart.
Thoroughly wash – ideally with Resene Paint Prep and Housewash (D812), rinse well
Fill any nail holes and cracks with Contract Filler, sand smooth and spot prime
Paint options:
Note: For more information on products, view the Product Data Sheet referred to in ( ) after the product name.
Most new windows come pre-primed and are coated in the same preprimers as weatherboards. Unfortunately the same quality issues also arise – refer to the section on new weatherboards.
If windows are puttied (as opposed to using a timber bead) wait until it is firm to touch before proceeding to the painting stage – usually after 10 days, unless a synthetic fast drying putty has been used.
It is important to paint the top, bottom and inside edges of the window to ensure a good moisture seal and help reduce swelling. We strongly recommend the full three coat system is applied to these areas.
Traditional full gloss solventborne enamels used to be our only recommendation for exterior joinery however because of the significant increase in U.V. resistance that the waterborne enamels have and their ease of application they are now preferred.
A full gloss solventborne enamel can still be used – refer later flowchart, however the waterborne equivalent would be expected to perform better.
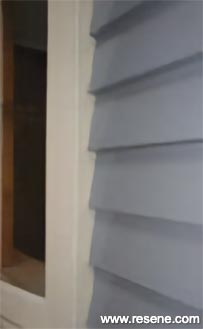
While the basis of some debate we recommend that windows are completed before the weatherboards and that the edges or scribers (see photo) are painted the same colour as the window frames rather than the weatherboard colour if different.
![]() Get inspired ! Subscribe
Get inspired ! Subscribe ![]() Get saving ! Apply for a DIY card
Get saving ! Apply for a DIY card
![]()
Can't find what you're looking for? Ask us!
Company profile | Terms | Privacy policy | Quality and environmental policy | Health and safety policy
Colours shown on this website are a representation only. Please refer to the actual paint or product sample. Resene colour charts, testpots and samples are available for ordering online. See measurements/conversions for more details on how electronic colour values are achieved.
What's new | Specifiers | Painters | DIYers | Artists | Kids | Sitemap | Home | TOP ⇧