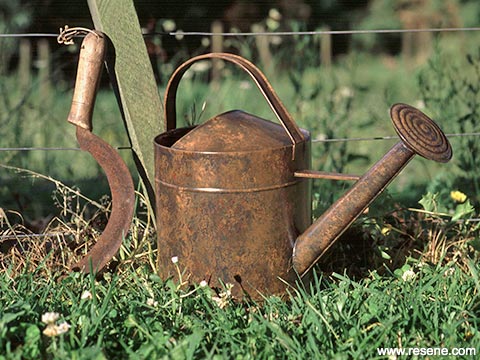
Resene paint effects projects, project 12
One of the easiest paint effects techniques is sponging. It may be used as a basis for other finishes, such as marbling, and provides a lovely textural background for hand painted designs.
Before you start working, soak the sponge in water, then squeeze out as much moisture as possible. This prevents the paint drying in the sponge.
Coarse textured sponges provide a more lacy, open pattern and finer sponges a smoother, softer look. The best effects are achieved with the more expensive natural sea sponges, but synthetic sponges also work well if you are working on a budget.
The pressure you apply when sponging will affect the size of the pattern. Practice on a piece of paper first until you are happy with the effect.
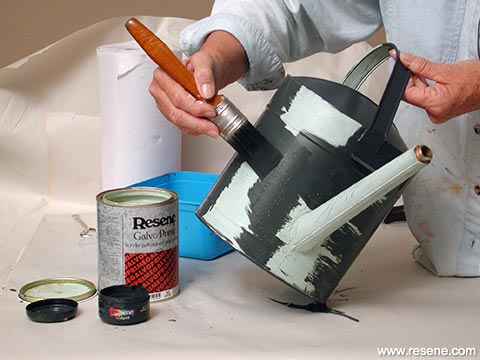
Step 1
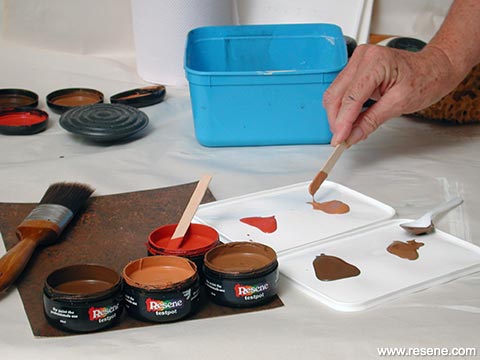
Step 2
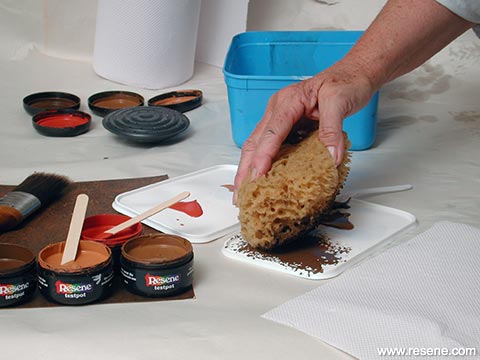
Step 3
Step 1: Apply a coat of Resene Galvo-Prime according to instructions and then two coats of Resene Cod Grey. Leave to dry.
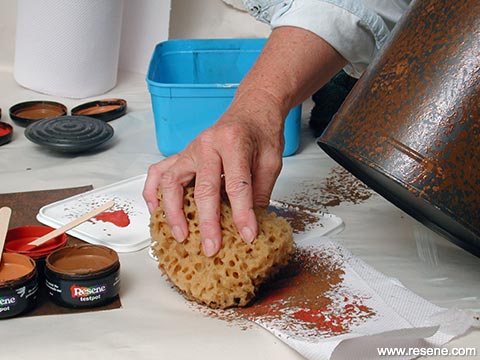
Step 2: Put a little of the four remaining colours onto dishes.
Step 3: Dab the sponge into the Resene Dark Rum paint and pounce on the edge of the dish, or a piece of paper, to distribute the paint across the sponge.
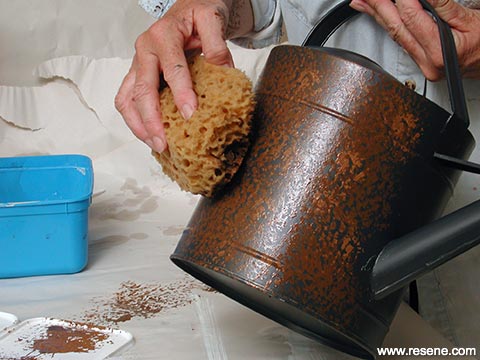
Step 4
Step 5
Step 6
Step 4: Pounce lightly over the Resene Cod Grey, in a random pattern, leaving some of the grey showing through. Apply a little of the Resene Lusty in the same manner. Let this dry. Fill the sprayer with water.
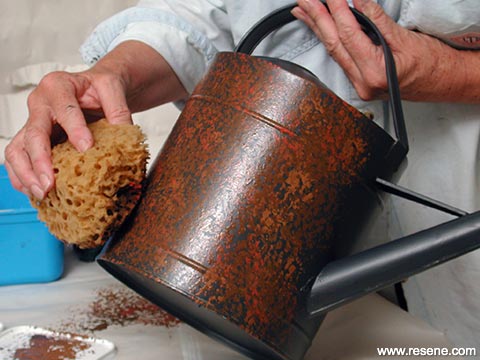
Step 5: Load the sponge with Resene Rope and Resene Irish Coffee. Blend the colours together a little on the dish or paper. Do a small section at a time so that the paint doesn’t dry before you mist it with the water. Apply over the other colours on the watering can.
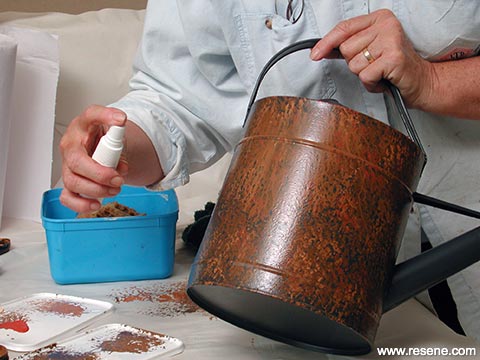
Step 6: While it is still wet, spray a fine mist of water onto the paint – be careful not to overwet the surface! The paint will start to run gently down the can. The colours will merge to give a softer, rusty appearance. If it runs too much, gently lift some of it off with the sponge. Let it run into the crevices where rust residue would have accumulated had the can been left out in the weather.
Step 7
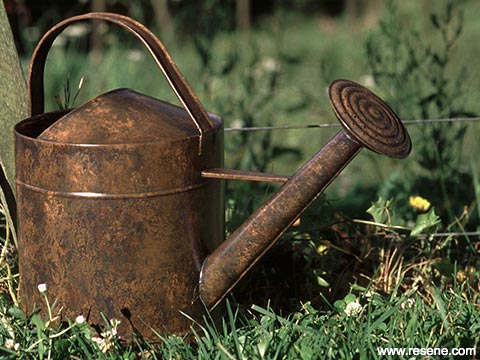
Finished project
Step 7: More colour may be sponged on at any time, until you are happy with the colour combinations and the effect. Once you have achieved the desired effect and it is thoroughly dry, seal with two or three coats of Resene Concrete Clear to protect the paint finish.
› Download this project as a PDF
Project by Janet Scard. Photography by Joseph Zou.
![]() Get inspired ! Subscribe
Get inspired ! Subscribe ![]() Get saving ! Apply for a DIY card
Get saving ! Apply for a DIY card
![]()
Can't find what you're looking for? Ask us!
Company profile | Terms | Privacy policy | Quality and environmental policy | Health and safety policy
Colours shown on this website are a representation only. Please refer to the actual paint or product sample. Resene colour charts, testpots and samples are available for ordering online. See measurements/conversions for more details on how electronic colour values are achieved.
What's new | Specifiers | Painters | DIYers | Artists | Kids | Sitemap | Home | TOP ⇧


