Habitat bright ideas with Fleur Thorpe – DIY projects
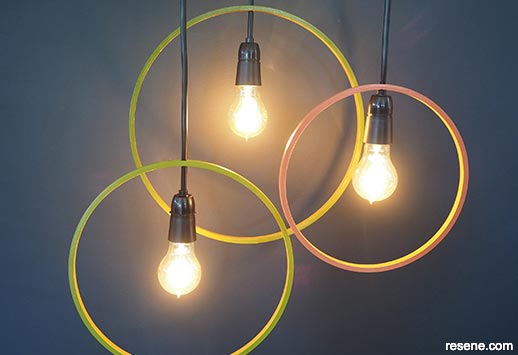
Use wooden embroidery hoops to create colourful hoop shaped lights. Fleur Thorpe shows you how.
Wall colour – Resene Dark Knight
Step 1: For this project you need three wooden embroidery hoops. Fleur used three different sizes - 35cm, 30cm and 25cm. (Photo 1).
Step 2: Use a pair of pliers to remove the metal attachments from the embroidery hoops. This can damage the wood a bit, but don’t worry as most of that gets cut off in the next step. (Photo 2).
Step 3: Put the larger outer hoop inside the inner hoop. Measure where the ends of the outer hoop overlap, take the hoop back out and use a craft knife to cut the overlapping ends off the outer hoop so that the ends meet.
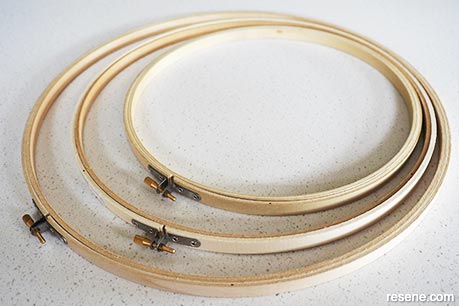
Photo one
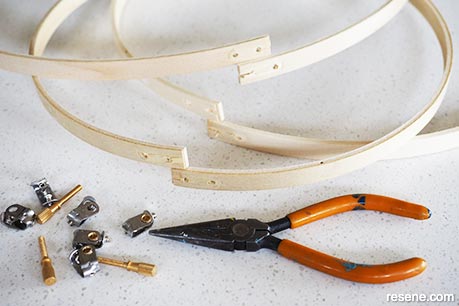
Photo two
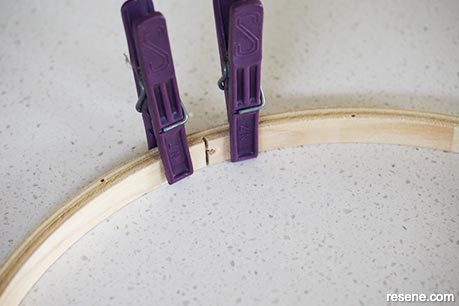
Photo three
Step 4: Run a line of wood glue on the inside of the inner hoop and put the outer hoop back in. Fleur used clothes pegs to hold it in place while the glue dried. (Photo 3).
Step 5: Once the glue has dried, if you have some gaps between the two hoops you can use some wood filler to fill the gaps. Sand this smooth once it has dried.
Step 6: Carefully drill a hole through the hoops where the join of the outer hoop meets. Drill the hole big enough for the electrical cord to fit through.
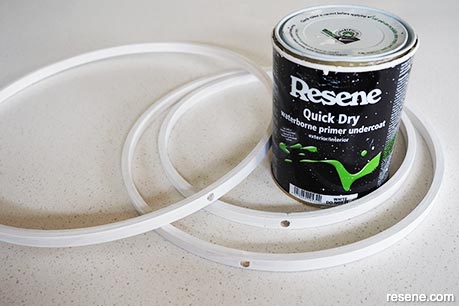
Photo four
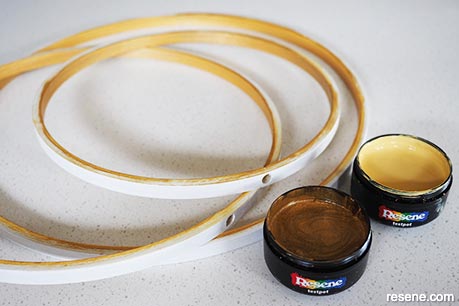
Photo five
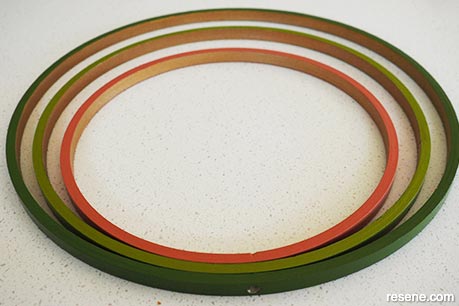
Photo six
Step 7: Paint the hoops with Resene Quick Dry and give this a light sand once dry. (Photo 4).
Step 8: Paint one layer of Resene Apache on the inside of all three hoops, followed by two coats of Resene Gold Dust, allowing for the first coat to dry before applying the second coat. (Photo 5).
Step 9: Once the Resene Gold Dust is dry, put some painter’s tape around the inside of the hoop so that the paint is covered by the tape and paint the sides and outside of the hoop with a different colour. For the biggest hoop Fleur used Resene Untamed, for the medium sized hoop Resene Grass Hopper and for the smallest hoop Resene Apple Blossom. (Photo 6).

Photo seven
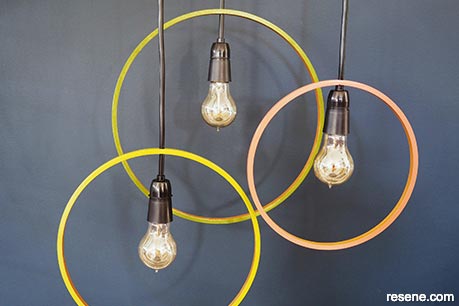
Photo eight
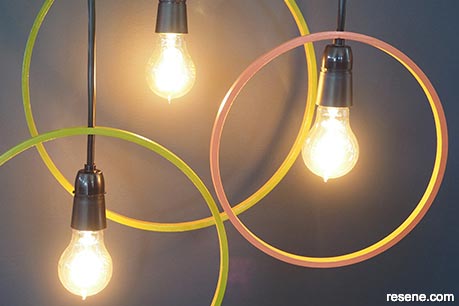
Detail lights
Step 10: Once the paint is dry, thread the electrical cord through the drilled hole and wire up/have an electrician wire up the light. Hang the lights clustered in a group. (Photos 7 and 8).
Top tip: For a metallic style effect on your hoop lights, choose a range of Resene FX Metallic colours instead. To apply, paint on the recommended basecoat colour for each metallic colour, allow to dry, then paint on the Resene FX Metallic. The metallic effect will help reflect light around the room.

Project and images by Fleur Thorpe. September 2021.
Habitat bright ideas
Need to add colour, pattern or a little creativity to your place? Check out these easy step by step DIY project ideas created in collaboration with Fleur Thorpe. We hope you enjoy making and painting these bright ideas and bringing colour to your home inside or out.
![]() Get inspired ! Subscribe
Get inspired ! Subscribe ![]() Get saving ! Apply for a DIY card
Get saving ! Apply for a DIY card
![]()
Can't find what you're looking for? Ask us!
Company profile | Terms | Privacy policy | Quality and environmental policy | Health and safety policy
Colours shown on this website are a representation only. Please refer to the actual paint or product sample. Resene colour charts, testpots and samples are available for ordering online. See measurements/conversions for more details on how electronic colour values are achieved.
What's new | Specifiers | Painters | DIYers | Artists | Kids | Sitemap | Home | TOP ⇧