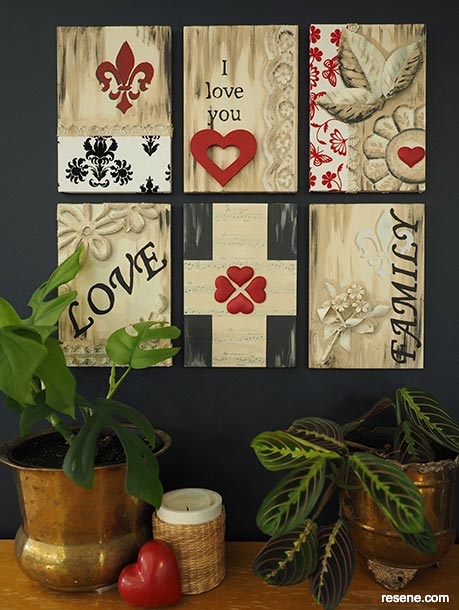
Habitat bright ideas with Fleur Thorpe – DIY projects
Get creative with your craft supplies and make family inspired wall tiles for Mother's Day. Fleur Thorpe shows you how.
 Wall colour: Resene Dark Knight
Step 1: Start by cutting your 1.2m length of wood into 6 equal lengths of 20cm each. Use sandpaper to sand the cut edges smooth. (Photo 1).
Step 2: Use Resene Quick Dry to prime the wood (Photo 2), followed by a coat of Resene Quarter Canterbury Clay. (Photo 3).
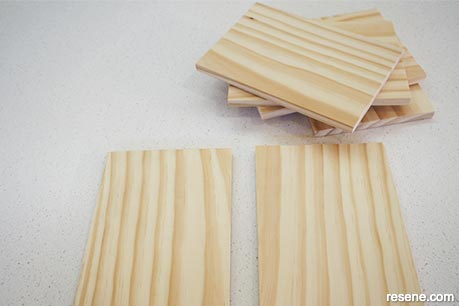
Photo one
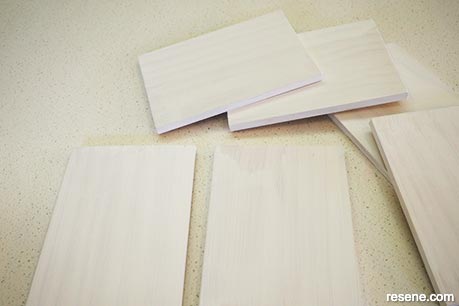
Photo two
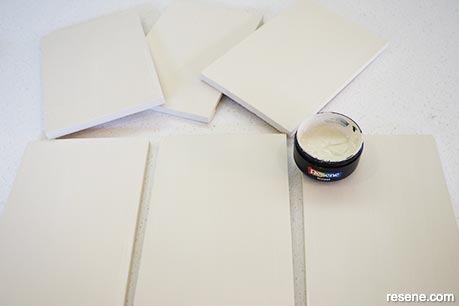
Photo three
Step 3: Collect together a bunch of craft supplies, such as felt shapes, lace, ribbon, faux flowers and leaves, wooden craft flourishes, paper doilies and pretty paper. (Photo 4).
Step 4: Use PVA to glue your craft items to your board. Fleur started with the flattest items first, such as the paper, lace, paper doilies and felt. (Photo 5).
Step 5: Paint over these with more Resene Quarter Canterbury Clay and once dry, use some Resene Double Pavlova to make shadows and enhance the shapes. Use a dry brush to paint on some vertical streaks to give the look of wood with the Resene Double Pavlova. (Photo 6).
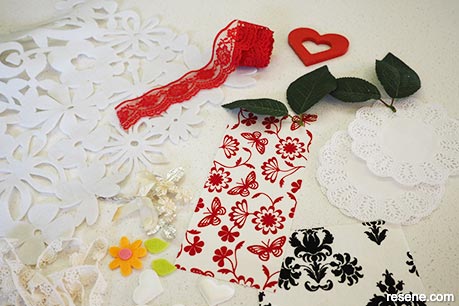
Photo four
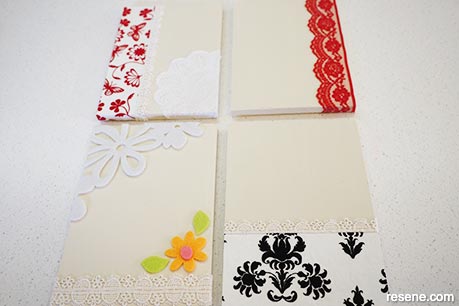
Photo five
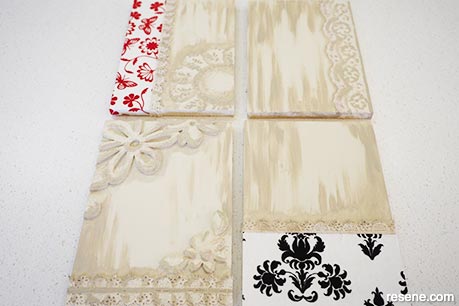
Photo six
Step 6: Paint on Resene Ebony Clay to make some shadows darker and Resene Eighth Pavlova to highlight some areas. (Photo 7).
Step 7: If you want to put words on your tiles, you can either do this free hand or you can trace over a computer printout. First, use a ruler to measure the area where you want the word to go and then print out your word to the correct size. Sellotape the printout in place and with a ball point pen, trace over the word making sure to press firmly. (Photo 8). Remove the printout and you will be left with an indentation that you can use to fill in with a small artist paintbrush and Resene Black. (Photo 9).
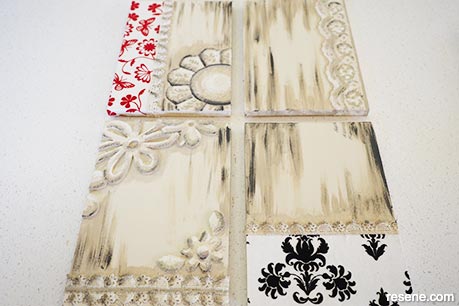
Photo seven
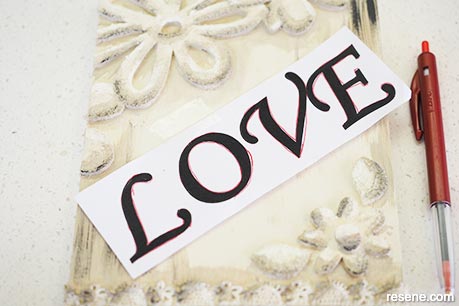
Photo eight
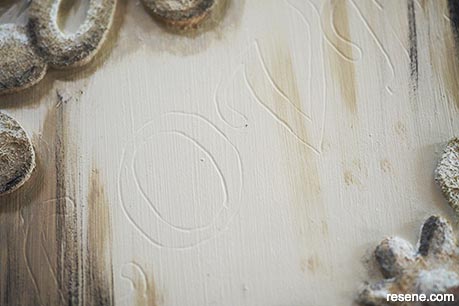
Photo nine
Step 8: To make a stencil look 3D, such as the fleur-de-lis motif Fleur used, print out a stencil image to the size you want and use a sharp craft knife to cut it out. Sellotape it in place and use a small piece of sponge and some Resene Ebony Clay to fill in the stencil. (Photo 10).
Step 9: Once dry, move the stencil slightly to one side and sellotape it down again. Repeat with the sponge but this time use Resene Pohutukawa. (Photos 11 and 12).
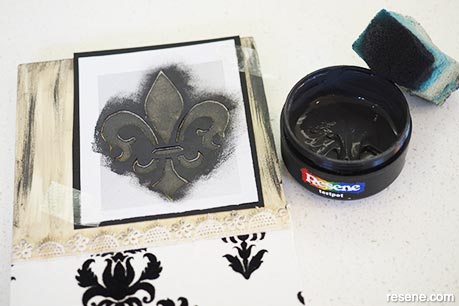
Photo ten
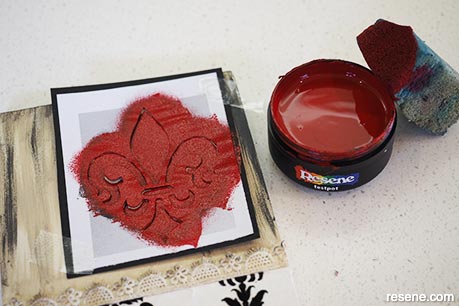
Photo eleven
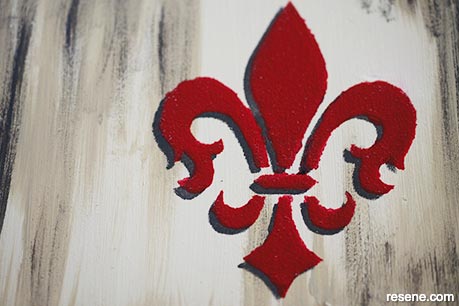
Photo twelve
Step 10: Finish by gluing the last of your craft items in place. Fleur painted some with Resene Pohutukawa and some with Resene Double Pavlova. Fleur glued sheet music to one of my tiles and brushed it over with Resene Double Pavlova with a dry brush. You could paint on a music design if you wished. If your tiles are light you can hang to the wall with Blu Tack. Otherwise use an adhesive wall mount on the back of each tile. (Finished project).
Top tip: Add a little extra sparkle to your tiles with touches of Resene FX Metallic using colours like Resene Rose Gold, Resene Copper Fire, Resene Gold Rush or Resene Silver Aluminium.
Project and images by Fleur Thorpe. April 2021.
Habitat bright ideas
Need to add colour, pattern or a little creativity to your place? Check out these easy step by step DIY project ideas created in collaboration with Fleur Thorpe. We hope you enjoy making and painting these bright ideas and bringing colour to your home inside or out.
![]() Get inspired ! Subscribe
Get inspired ! Subscribe ![]() Get saving ! Apply for a DIY card
Get saving ! Apply for a DIY card
![]()
Can't find what you're looking for? Ask us!
Company profile | Terms | Privacy policy | Quality and environmental policy | Health and safety policy
Colours shown on this website are a representation only. Please refer to the actual paint or product sample. Resene colour charts, testpots and samples are available for ordering online. See measurements/conversions for more details on how electronic colour values are achieved.
What's new | Specifiers | Painters | DIYers | Artists | Kids | Sitemap | Home | TOP ⇧