Habitat bright ideas with Fleur Thorpe – DIY projects
Use the Resene colour generator to define a paint selection. Then paint a geometric pattern and upcycle an old set of drawers.
Wall colour – Resene Dark Knight
Skirting board colour – Resene Half Rice Cake
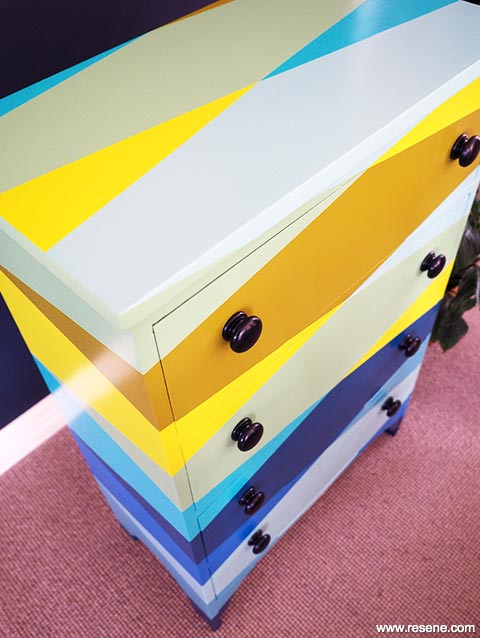
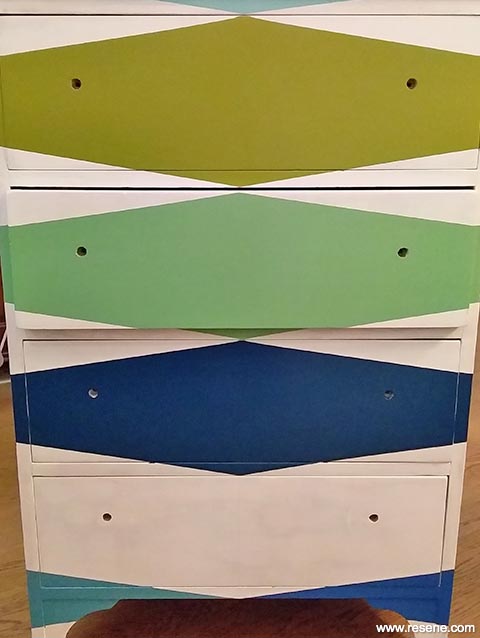
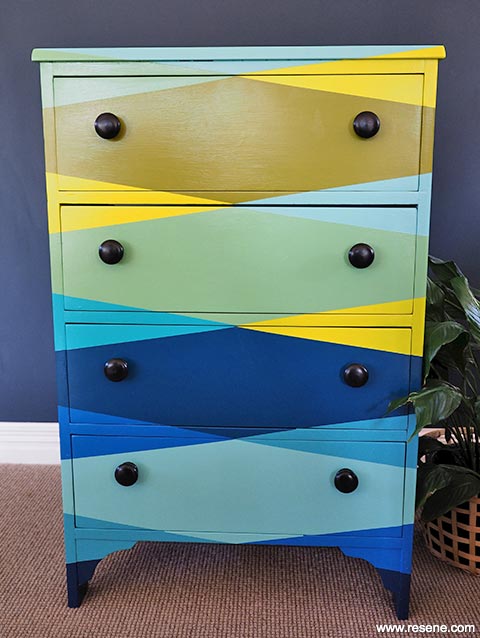
For this project, Fleur was inspired by an image found online. She loved the colours and the pattern and decided to copy it exactly on to a set of drawers. Fleur was able to get the right paint colours by using the Resene Colour Palette Generator.
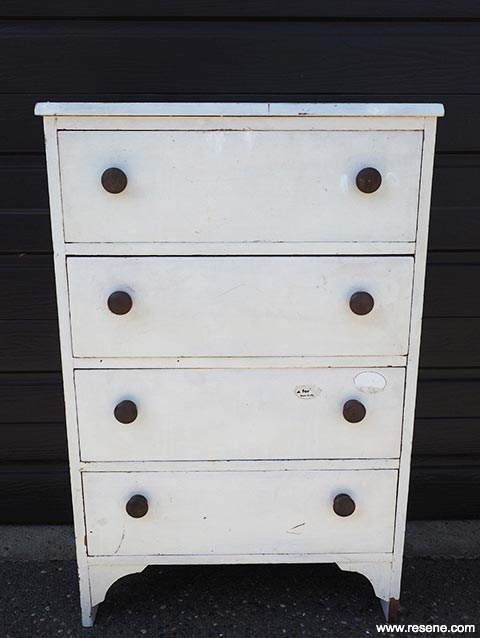 Project before
 Step one - Colour inspiration
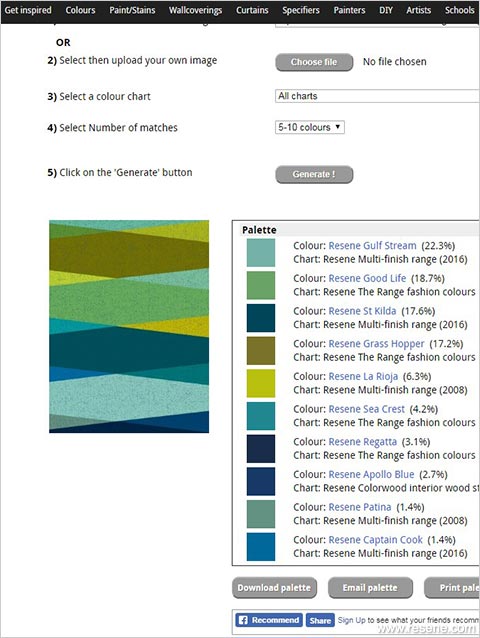 Step one - Colour generator
Step 1: Open a web browser to the Resene Colour Palette Generator.
Follow the instructions for either selecting an image from the internet by entering its URL, or by uploading an image from your own files.
At Step 3 you can choose a colour chart – I usually leave it on ‘All charts’ though you can also choose specific charts to narrow down the options.
Step 4 you can choose the number of colour/paint matches. I find that the first default option of 5-10 colours is enough, but I always check out the 5-20 colour options in case there is a colour that I like better than the first match.
Click the ‘Generate’ button.
A palette of colours is created, matching the colours from your uploaded image to the best-match Resene paint colours. You can use this list of colours to purchase paint at your nearest Resene ColorShop.
Once you have your paint sorted, you can start work on the drawers.
 Step two
 Step three
Step four
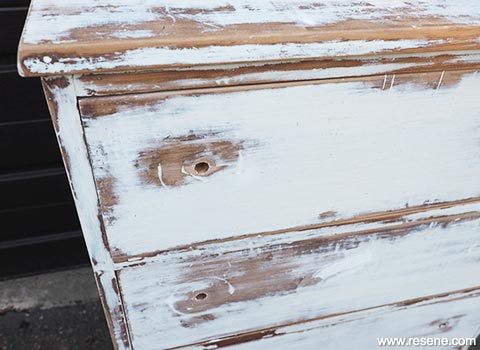
Step 2: Remove the drawers and the knobs from each drawer. Number each drawer on the back so that you know which one fits in which space when you put them back in. Using 120 grit sandpaper, sand the drawer fronts and the body of the drawers. Pay particular attention to the edges and corners where paint may be cracking and flaking. Make sure you remove all loose paint. Wipe down with a soft cloth to remove all the dust.
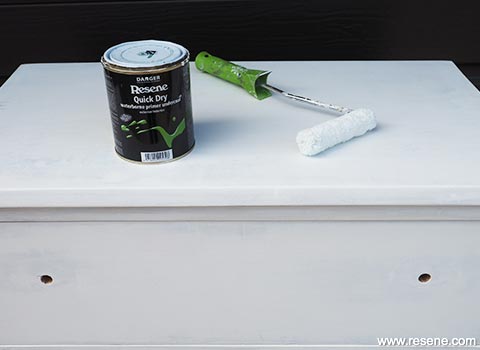
Step 3: Use a small Smooth Surfaces Microfibre Blend roller to paint the drawer fronts and the body of the drawers with Resene Quick Dry. Once dry, lightly sand everything with a soft sanding block or very fine finishing sandpaper. Dust down with a soft cloth.
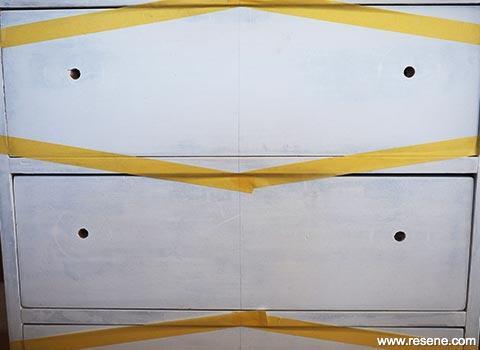
Step 4: Use a ruler/tape measure and a pencil to mark out your pattern.
 Step five
 Step six
Step seven
Step 5: Use painters’ tape to tape off sections of the pattern. Make sure to press the tape down firmly to prevent any bleed-through of paint under the tape.
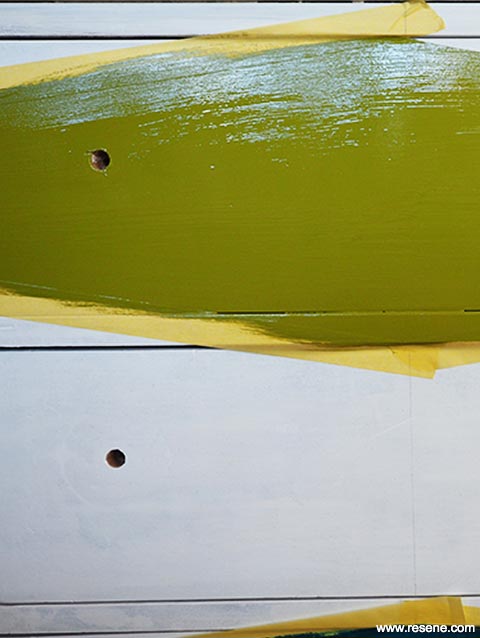
Step 6: With a good quality paintbrush, paint on two coats of your Resene paint, allowing the first to dry before applying the second coat. As soon as you have finished the second coat, remove the tape, pulling it away at a right angle, while the paint is still wet.
Step 7: Proceed with taping and painting out the rest of your pattern. It’s a good idea to do areas which aren’t adjacent to each other immediately after each other, so that the paint has time to properly dry before you put more tape on it to do the next section.
If you wish to update wooden handles, sand, prime and paint them using your chosen Resene colour and reattach with wood glue. Fleur used Resene Black.
Top tip: Give your drawers a fresh look inside too by painting them with the leftover paint. Leave them to dry well before filling them.
Styling and images by Fleur Thorpe, 2019.
Habitat bright ideas
Need to add colour, pattern or a little creativity to your place? Check out these easy step by step DIY project ideas created in collaboration with Fleur Thorpe. We hope you enjoy making and painting these bright ideas and bringing colour to your home inside or out.
![]() Get inspired ! Subscribe
Get inspired ! Subscribe ![]() Get saving ! Apply for a DIY card
Get saving ! Apply for a DIY card
![]()
Can't find what you're looking for? Ask us!
Company profile | Terms | Privacy policy | Quality and environmental policy | Health and safety policy
Colours shown on this website are a representation only. Please refer to the actual paint or product sample. Resene colour charts, testpots and samples are available for ordering online. See measurements/conversions for more details on how electronic colour values are achieved.
What's new | Specifiers | Painters | DIYers | Artists | Kids | Sitemap | Home | TOP ⇧


