Habitat bright ideas with Fleur Thorpe – DIY projects
Paint a geometric pattern in your favourite retro colours to give your desk a new upcycled look.
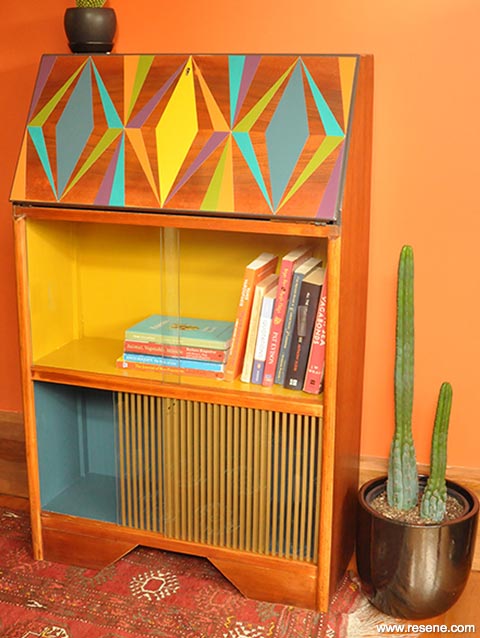
Wall colour – Resene Ayers Rock
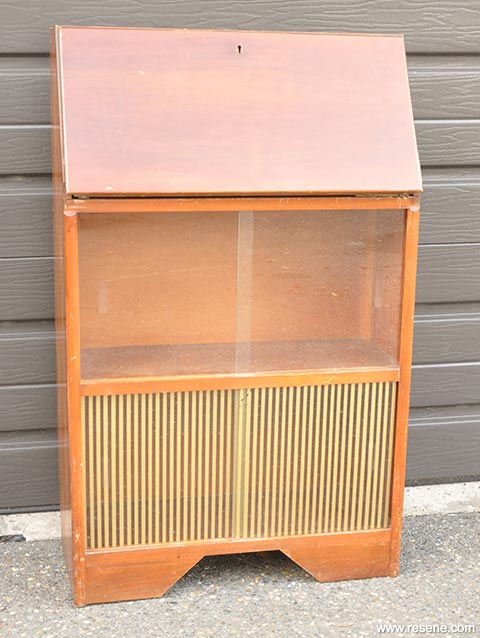 Desk before
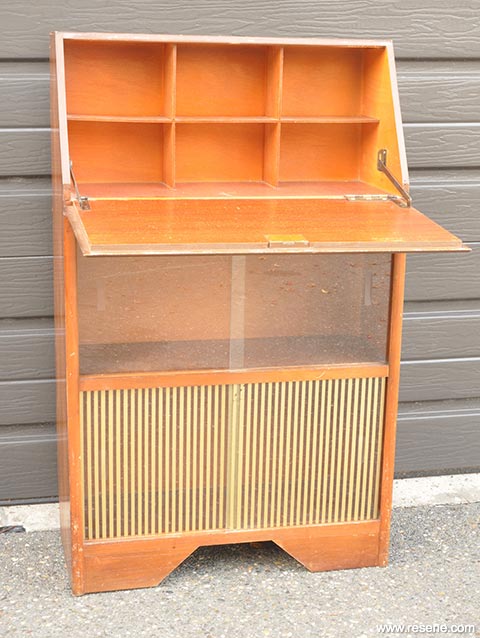 Desk before
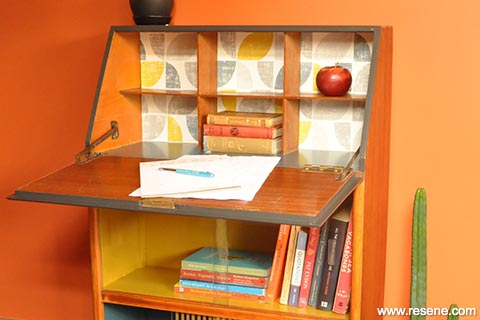
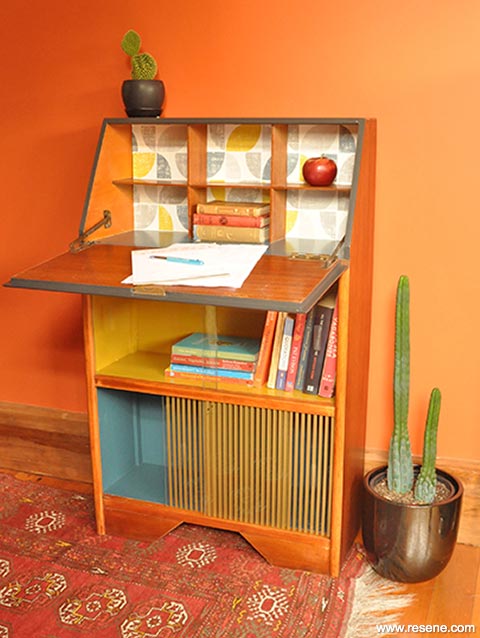 Finished project
Step 1: Start by sanding off all the old varnish from the wood areas that you want to remain as a wooden finish. Use 160 grit sandpaper to remove the old varnish, then 80 grit sandpaper to finish the wood to a smooth finish, using finer sandpapers if needed. (Paint stripper could be used on thick/stubborn varnish).
Step 2: For the areas of wood that are going to be painted, lightly sand the wood to create a ‘key’ for the paint to adhere to. Dust the sanded areas down with a soft clean cloth.
 Step three
 Step four
 Step five
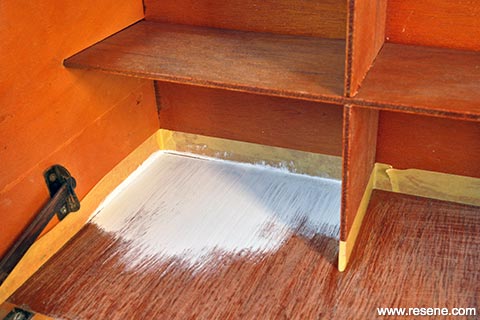
Step 3: For the areas that are going to be painted, tape them off using painters’ tape and apply one coat of Resene Quick Dry. Once dry, lightly sand with a soft sanding block or very fine sandpaper. Dust down with a clean, dry cloth.
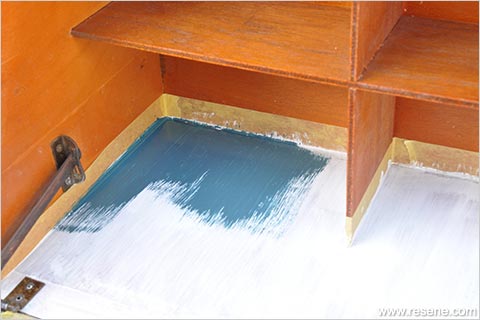
Step 4: Apply two coats of Resene Lustacryl, allowing the first coat to dry before applying the second coat. Fleur used Resene Fast Forward inside the desk and on the bottom shelf and Resene Influential on the top shelf. Remove the tape as soon as you have finished the second coat and while the paint is still wet.
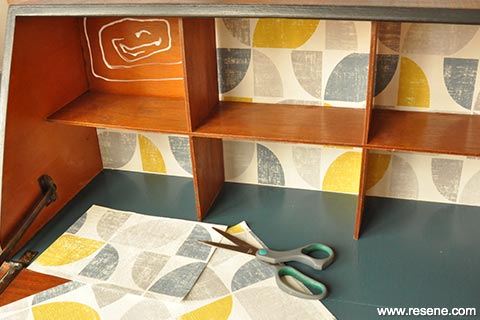
Step 5: Measure the cubby holes and cut Resene wallpaper to fit. Glue in place with PVA glue.
 Step six
 Step seven
 Step eight
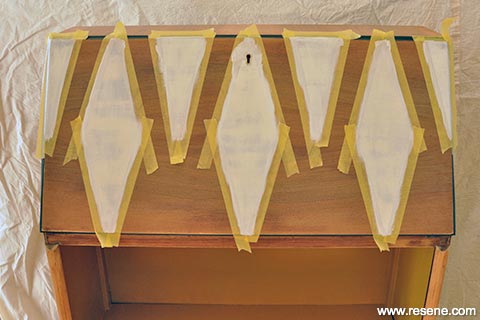
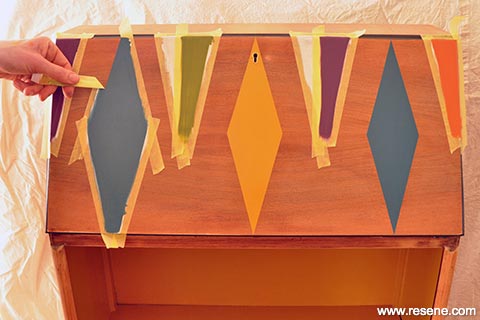
Step 6: For making the pattern on the front of the desk lid, measure carefully and divide the lid into equally sized diamonds. Use painters’ tape to make the pattern and be sure to firmly press the tape into place to prevent bleed through of paint under the tape.
Step 7: Apply one coat of Resene Quick Dry. Once dry, carefully sand the primer with a soft sanding block or very fine finishing sandpaper and take care not to disturb the tape. Wipe down with a soft dry cloth.
Step 8: Apply two layers of Resene Lustacryl, allowing the first coat to dry before applying the second coat. Remove the tape as soon as you have finished the second coat and while the paint is still wet. Once finished, leave over night for the paint to cure.
 Step nine
 Project detail
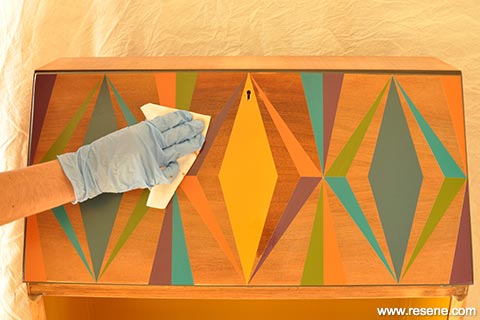
Step 9: Using a soft dry cloth, rub Resene Danska Teak Oil on to the wooden areas. Wipe off any excess oil with another cloth.
Top tip: If the wooden finish is looking a little the worse for wear and you’d prefer to hide it, paint the entire desk in a Resene Lustacryl colour first, before applying the accent colours.
Styling and images by Fleur Thorpe, 2019.
Habitat bright ideas
Need to add colour, pattern or a little creativity to your place? Check out these easy step by step DIY project ideas created in collaboration with Fleur Thorpe. We hope you enjoy making and painting these bright ideas and bringing colour to your home inside or out.
![]() Get inspired ! Subscribe
Get inspired ! Subscribe ![]() Get saving ! Apply for a DIY card
Get saving ! Apply for a DIY card
![]()
Can't find what you're looking for? Ask us!
Company profile | Terms | Privacy policy | Quality and environmental policy | Health and safety policy
Colours shown on this website are a representation only. Please refer to the actual paint or product sample. Resene colour charts, testpots and samples are available for ordering online. See measurements/conversions for more details on how electronic colour values are achieved.
What's new | Specifiers | Painters | DIYers | Artists | Kids | Sitemap | Home | TOP ⇧


