Habitat bright ideas with Fleur Thorpe – DIY projects
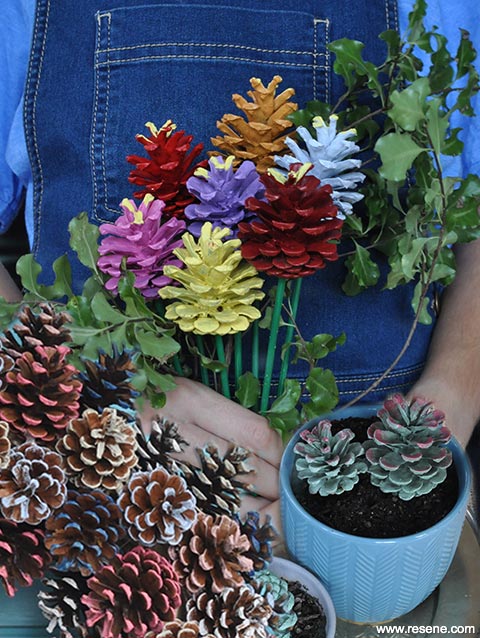
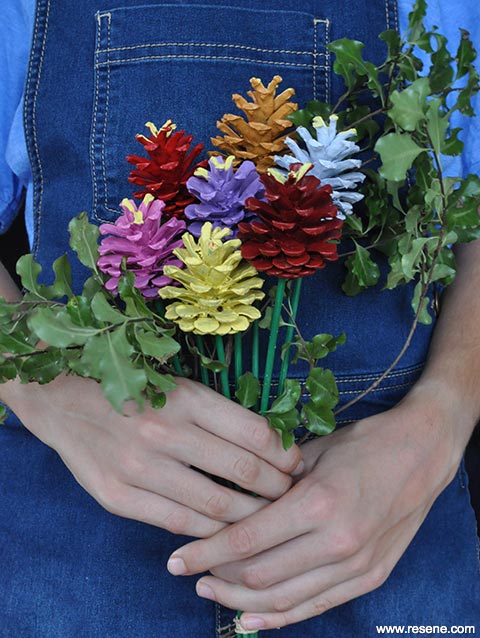
Collect pinecones and paint in your favourite colours to create flowers, succulents and a colourfull wreath to decorate your home.
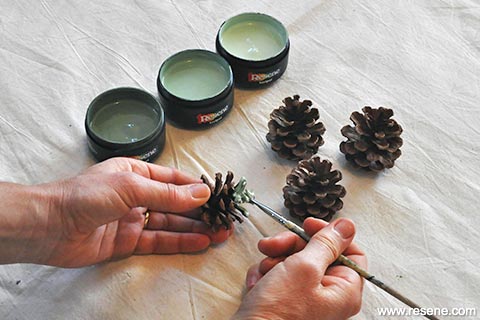
Step 1: Using a small craft paintbrush, paint each pinecone a different grey-green colour. Fleur used Resene Laurel, Resene Spring Rain and Resene Rivergum.
Step 2: Paint a contrasting colour on the ends of some of the ‘leaves’ of the pinecones. Fleur painted Resene Merlot ends onto the pinecones she had painted Resene Rivergum. Allow the paint to dry.
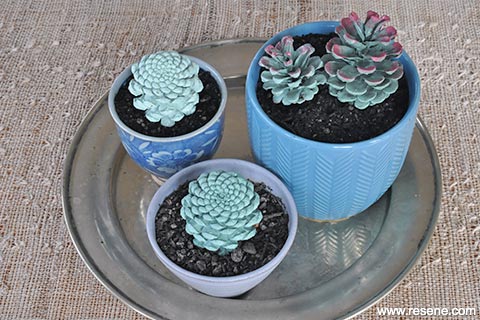
Fill a plant pot with potting mix and push a pinecone into each pot. No need to water!
Top tip: Use a Christmas themed colour palette using Resene testpots to create easy Christmas tree decorations.
 Step one
 Step two
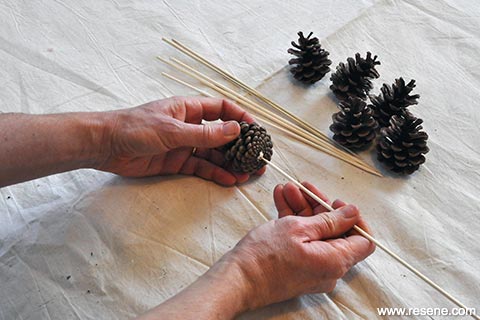
Step 1: Using an electric drill and a drill bit that is the same diameter as the bamboo skewers, drill a hole about 1.5cm deep into the base of each of the pinecones. Squirt some PVA glue into each hole and insert a skewer.
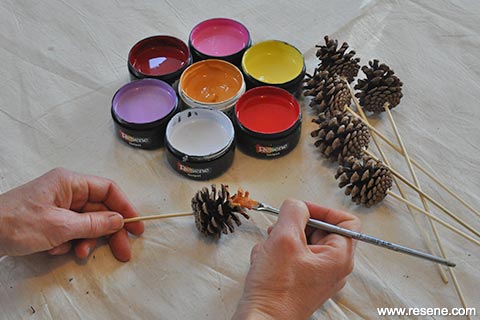
Step 2: Once the glue is dry, use a small craft paintbrush to paint each of the pinecones a different colour. Fleur used Resene Jalapeno, Resene Boogie Wonderland, Resene Salsa, Resene Weathered Orange, Resene Festival, Resene Smitten and Resene Alaska.
 Step one
 Step two
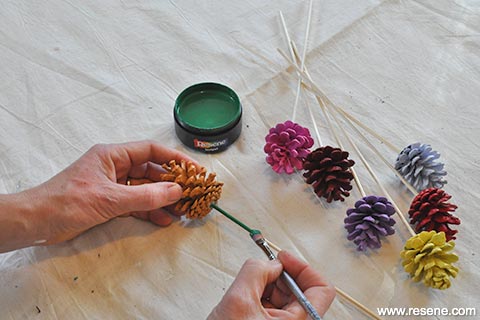
Step 3: After the paint has dried, paint the skewer with Resene Kaitoke Green.
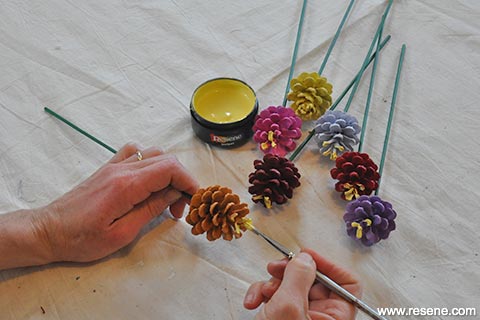
Step 4: You can finish off by painting the very top of the pinecones with your choice of yellow Resene paint. Fleur used Resene Festival.
Top tip: Adjust your Resene colour palette to suit the season… think pastel colours for spring and woodsy, orange and weathered greens for autumn.
 Step three
 Step four

Door colour: Resene Shakespeare
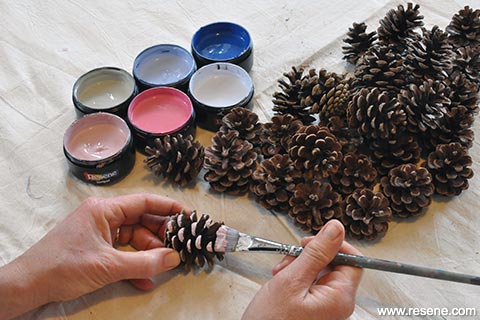
Step 1: Using a medium sized craft paintbrush, paint the sides of the pinecones using your chosen Resene testpot colours by brushing from the base up towards the top of the pinecone. Fleur used Resene Vintage, Resene Rouge, Resene Alaska, Resene Zephyr, Resene Submerge and Resene Grey Area.
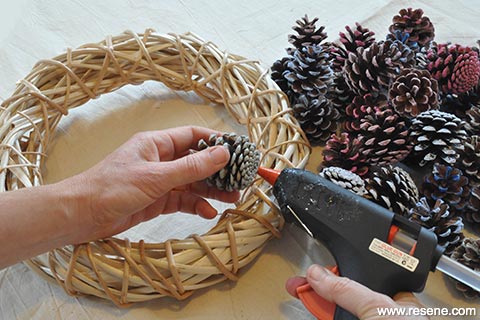
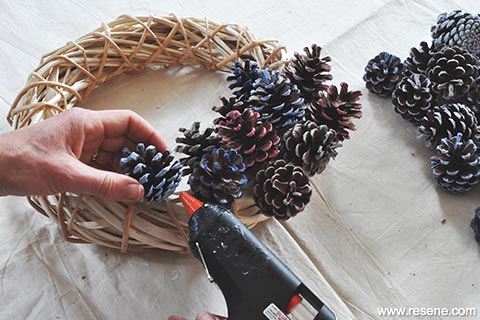
Step 2: Once the paint is dry, use a hot glue gun to glue the pinecones to your wreath frame.
Step 3: Use a short length of string to hang your wreath.
 Step one
 Step two
 Step two contd.
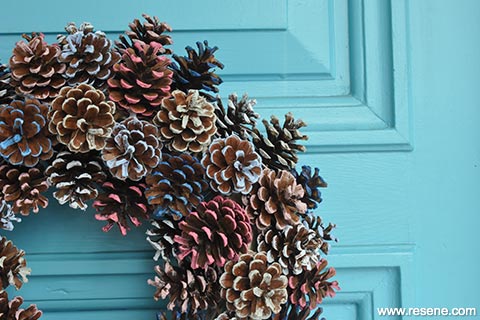 Wreath detail
Styling and images by Fleur Thorpe, 2019.
Habitat bright ideas
Need to add colour, pattern or a little creativity to your place? Check out these easy step by step DIY project ideas created in collaboration with Fleur Thorpe. We hope you enjoy making and painting these bright ideas and bringing colour to your home inside or out.
![]() Get inspired ! Subscribe
Get inspired ! Subscribe ![]() Get saving ! Apply for a DIY card
Get saving ! Apply for a DIY card
![]()
Can't find what you're looking for? Ask us!
Company profile | Terms | Privacy policy | Quality and environmental policy | Health and safety policy
Colours shown on this website are a representation only. Please refer to the actual paint or product sample. Resene colour charts, testpots and samples are available for ordering online. See measurements/conversions for more details on how electronic colour values are achieved.
What's new | Specifiers | Painters | DIYers | Artists | Kids | Sitemap | Home | TOP ⇧