Habitat bright ideas with Fleur Thorpe – DIY projects
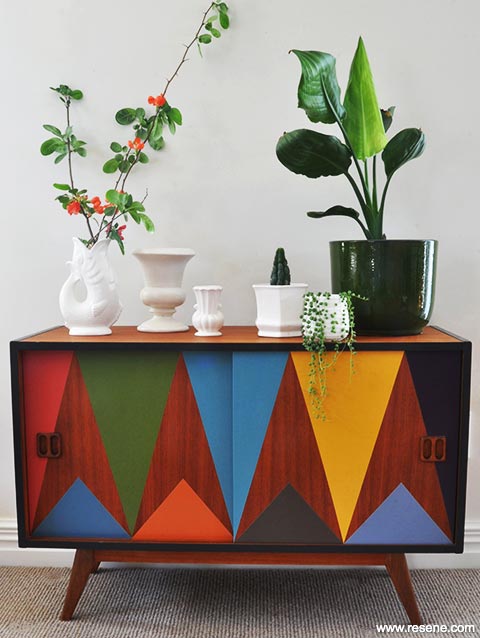
Revive an old sideboard with a striking, contemporary geometric design.
Step 1: Prepare the piece of furniture by cleaning and sanding. Start with a coarse grit sandpaper, then medium, then fine, so you get a lovely smooth finish. Dust down with a soft brush or cloth.
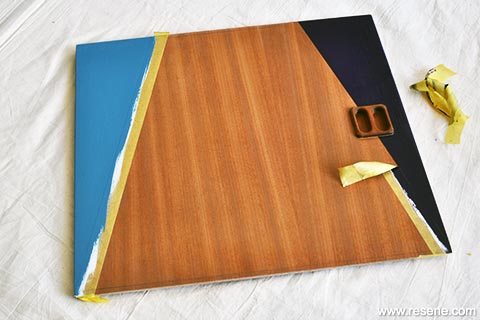
Step 2: Mask off the two side triangles, based on where you made your measurements. In this we wanted the handles left as is, so those were taped off too. Run the back of your fingernail firmly along the edge of the tape a couple of times, to stop paint bleeding under the tape.
Step 3: Paint the masked areas with Resene Quick Dry primer undercoat. Once this is dry, give it a light sand with a super-find sandpaper making sure you don’t disturb the edge of the tape. Don’t skip this step! It makes all the difference to the quality of your finished paint job. Dust down with a soft cloth.
 Project before painting
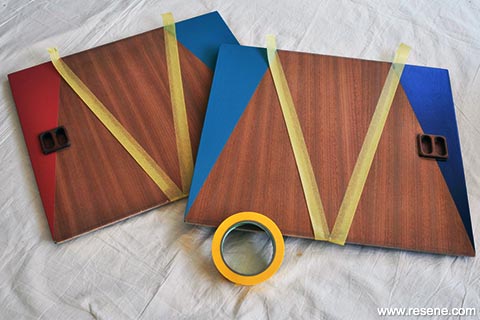
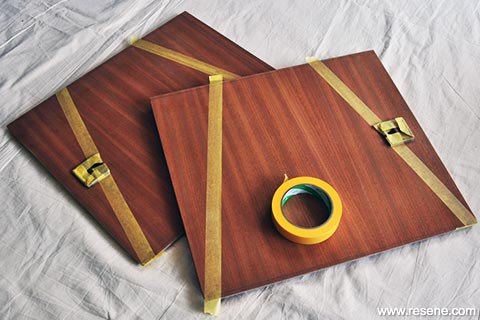 Step two
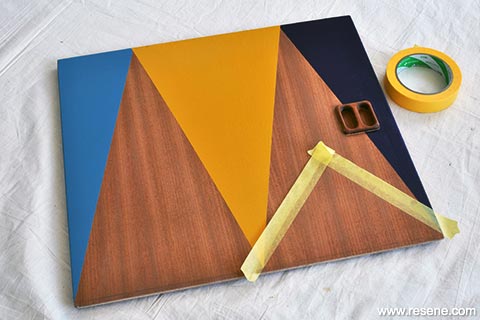
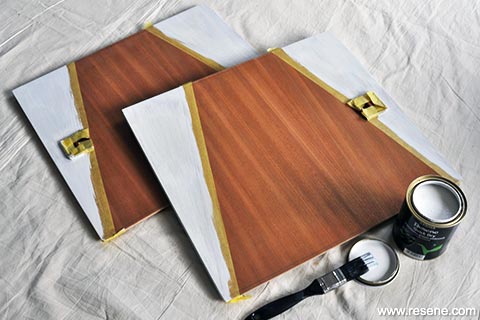 Step three
Step 4: Using a paintbrush, apply your chosen colour to each of the triangles. Sarah used Resene Red Herring, Resene Untamed, Resene Bismark, Resene Cleopatra, Resene Purple Rain, Resene Liberty, Resene Bi Hoki, Resene Thunder Road and Resene Time After Time. It might be helpful to make a mock-up on a piece of paper first to check that you like the colour combinations.
Step 5: Once the first coat is dry, apply the second coat and while that is still wet, remove the tape, pulling it away from the painted edge at a 90-degree angle. It’s important to remove the tape while the paint is still damp, otherwise the paint can rip and leave a jagged edge.
Step 6: Leave these two triangles to dry completely for two hours before starting on the next triangle. Repeat the process of taping (remembering to press it down firmly), priming, sanding, and doing two layers of the topcoat colour for the remaining triangles.
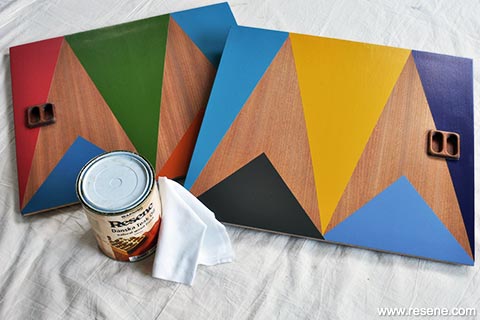
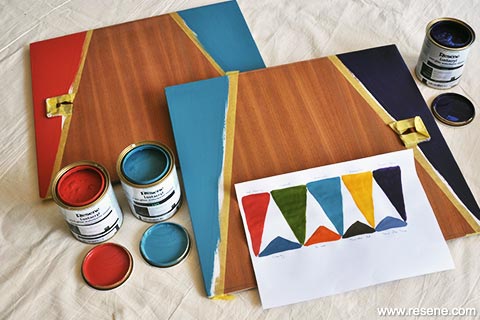 Step four
 Step five
 Step six
Step 7: On this project the bottom set of triangles are one third the height of the top triangles. Repeat the priming, sanding and painting process as before. Leave the paint to dry for 24 hours.
Step 8: To finish, oil the unpainted triangles using Resene Danska Teak Oil. Apply it with a soft lint-free cotton cloth and wear rubber or silicon gloves.
Top tip: For a subtler finish on the bare timber, use Resene Aquaclear as the final finish on all areas.
 Step seven
 Step eight
 Painted pattern detail


Styling and images by Fleur Thorpe, 2018.
Habitat bright ideas
Need to add colour, pattern or a little creativity to your place? Check out these easy step by step DIY project ideas created in collaboration with Fleur Thorpe. We hope you enjoy making and painting these bright ideas and bringing colour to your home inside or out.
![]() Get inspired ! Subscribe
Get inspired ! Subscribe ![]() Get saving ! Apply for a DIY card
Get saving ! Apply for a DIY card
![]()
Can't find what you're looking for? Ask us!
Company profile | Terms | Privacy policy | Quality and environmental policy | Health and safety policy
Colours shown on this website are a representation only. Please refer to the actual paint or product sample. Resene colour charts, testpots and samples are available for ordering online. See measurements/conversions for more details on how electronic colour values are achieved.
What's new | Specifiers | Painters | DIYers | Artists | Kids | Sitemap | Home | TOP ⇧


