From habitat magazine - issue 38, bright ideas with kids
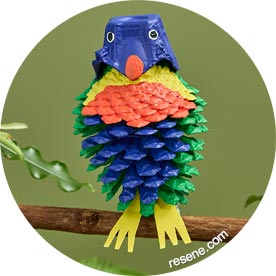
These kākāpō, rainbow lorikeet and ruru birds will be a hoot for the kids to make using pinecones and their favourite Resene colours.

Pinecone birds to set your heart a-flutter. Wall in Resene Woodland and table in Resene Woodsman Dark Oak.
Clean any dirt from your pinecone using a small paintbrush.
Apply two coats of Resene colour to the entire pinecone. We used Resene Sushi.
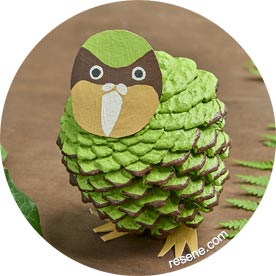
'Karrie the kākāpō'
in Resene Sushi, Resene Rebel, Resene Teak, Resene Half Blanc, Resene Black and Resene White.
Using a small brush, paint the tips of the pinecone scales in a darker colour. We used Resene Rebel.
Cut a round face shape out of cardboard.
Apply a base colour to the shape. We used Resene Teak.
Once dry, paint features in your chosen colours. We used Resene Sushi and Resene Rebel for the face, Resene Half Blanc for the beak and Resene Black and Resene White for the eyes.
Draw the outline of two feet on a piece of cardboard.
Cut out both feet, then paint them. We used Resene Teak. Secure the face and feet using Blu-Tack or a hot glue gun with an adult’s help.
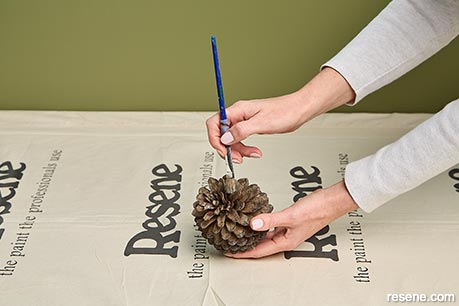
Photo (A)
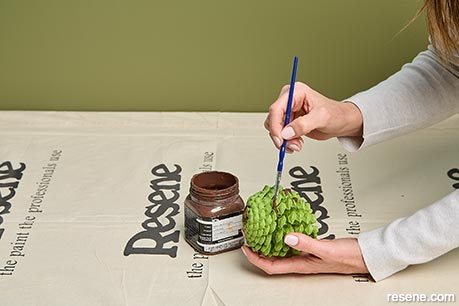
Photo (B)
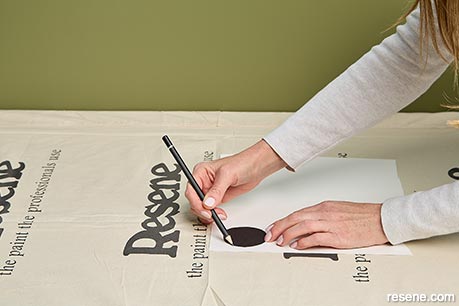
Photo (C)
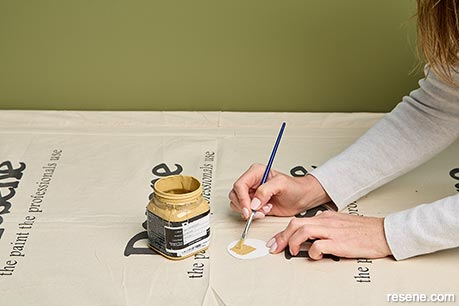
Photo (D)
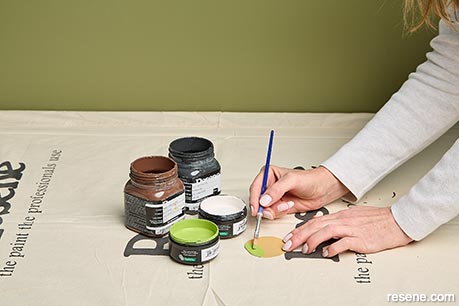
Photo (E)
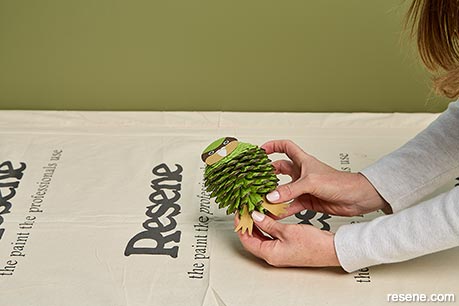
Photo (F)
Clean any dirt from your pinecone.
Paint a basecoat. We used Resene Japanese Laurel.
'Lottie the rainbow lorikeet'
in Resene Japanese Laurel, Resene Deep Koamaru, Resene Pursuit, Resene Black, Resene White and Resene Happy.
Using a small paintbrush, apply two coats of a different colour to the lower section of the pinecone for the belly. We used Resene Deep Koamaru.
Once dry, paint the lorikeet’s chest. We used two coats of Resene Pursuit and Resene Happy.
To make the lorikeet’s head, cut a cup from an egg carton. Cut out a triangular shape at the front of the egg cup to resemble a beak. Paint the head in two coats of the belly colour. We used Resene Deep Koamaru with eyes in Resene White and Resene Black.
Paint an oval shape on the front of the beak. We used Resene Pursuit.
Attach the head to the lorikeet with Blu-Tack or a glue gun. Apply to the underside so it’s not visible.
Draw the outline of two feet and a tail feather on to cardboard and cut out.
Paint your cardboard pieces. We used Resene Japanese Laurel and Resene Happy for the tail and Resene Happy for feet. Secure the tail feather to the back of the pinecone and the feet to the bottom, pushed up between the pinecone scales.
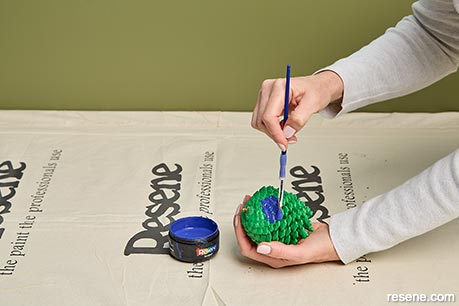
Photo (A)
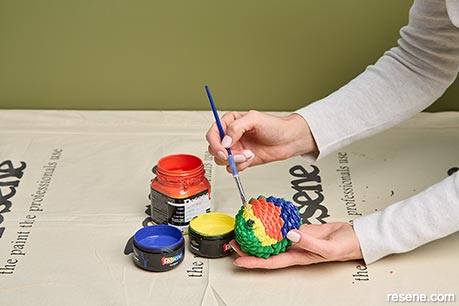
Photo (B)
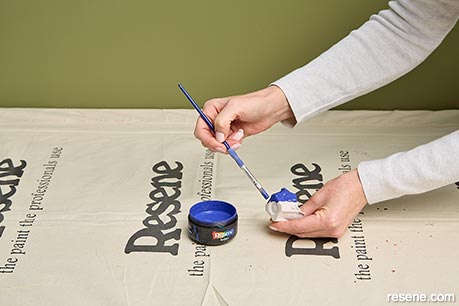
Photo (C)
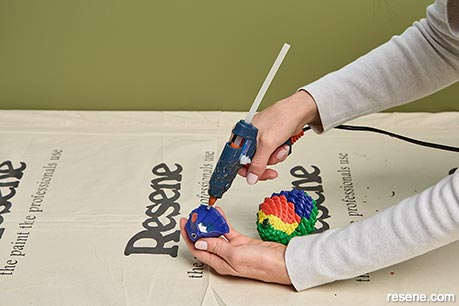
Photo (D)
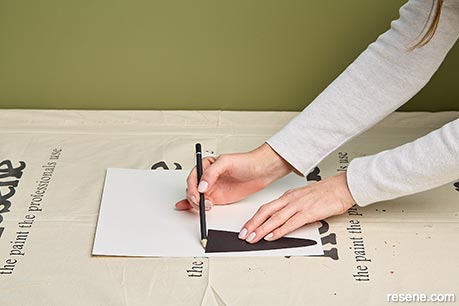
Photo (E)
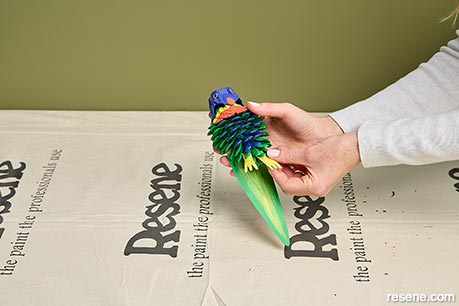
Photo (F)
Clean your pinecone.
Using a small paintbrush, apply one coat of Resene Waterborne Woodsman wood stain. We used Resene Dark Oak. Leave to dry then gently buff off any excess stain with a clean rag.
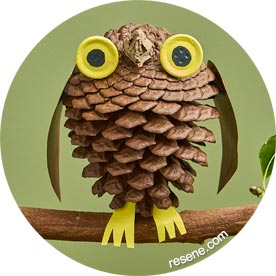
'Rolly the ruru'
in Resene Waterborne Woodsman Dark Oak, Resene Lone Ranger and Resene Happy.
Most pinecones have a wooden stem which can work as a beak. If your pinecone doesn’t have a stem, cut out a small triangular piece of cardboard and stick to the pinecone. Paint the beak with two coats of colour. We used Resene Lone Ranger.
Paint two buttons with two coats of eye colour, allowing them to dry between coats. We used Resene Happy and Resene Black for the pupils. Attach to the pinecone with Blu-Tack or glue.
Draw two teardrop shapes onto cardboard for wings and cut out.
Apply the same shade of Resene Waterborne Woodsman to the wings, using loose brushstrokes for a textured effect. Do both sides, allowing them to dry in between.
Bend the wings to create a curve and attach to the sides of the ruru with Blu-Tack or glue.
Draw the two feet onto a piece of cardboard, cut out and paint. We used Resene Happy. Attach to the bottom of the pinecone with Blu-Tack.
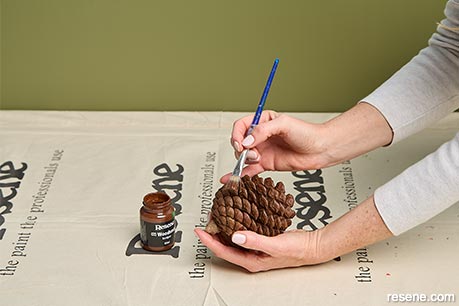
Photo (A)
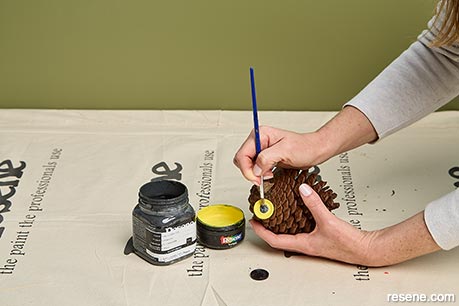
Photo (B)
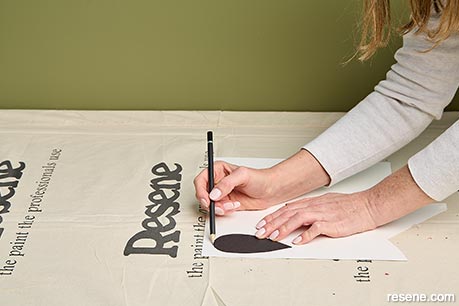
Photo (C)
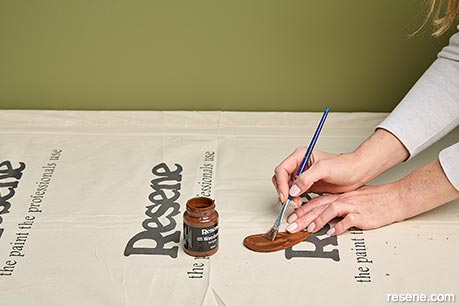
Photo (D)
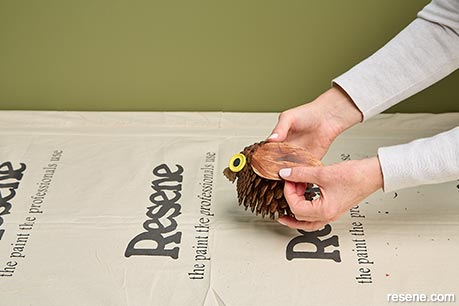
Photo (E)
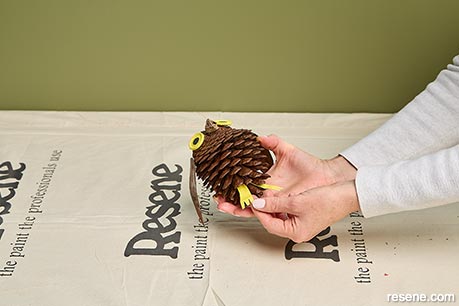
Photo (F)
Project: Shani Luckman
Images: Bryce Carleton
Search habitat magazine stories
Printed copies of habitat highlights are available from late March 2024 at Resene ColorShops and resellers, while stocks last. You can view back issues of habitat magazine online.
Specifiers:
If you have an idea, project or story that you think would suit habitat, we’d love to hear from you. Please drop us an email with your details and include photos if submitting a project.
Sign up for a DIY card and Save! Australia | New Zealand
![]() Get inspired ! Subscribe
Get inspired ! Subscribe ![]() Get saving ! Apply for a DIY card
Get saving ! Apply for a DIY card
![]()
Can't find what you're looking for? Ask us!
Company profile | Terms | Privacy policy | Quality and environmental policy | Health and safety policy
Colours shown on this website are a representation only. Please refer to the actual paint or product sample. Resene colour charts, testpots and samples are available for ordering online. See measurements/conversions for more details on how electronic colour values are achieved.
What's new | Specifiers | Painters | DIYers | Artists | Kids | Sitemap | Home | TOP ⇧