From habitat magazine - issue 37, bright ideas with kids
There’s lots to explore on the ocean floor by transforming terracotta pots into sensational sea creatures using Resene paint.

Make a splash with sea creatures made from terracotta pots, saucers and Resene products.*
Resene products:
* 'Chrissie the Crab' in Resene Bright Red with swirls in Resene Sauvignon. 'Terry the Turtle' in Resene Surfie Green and Resene Aqua with shell details in Resene White, Resene Wistful and Resene Polo Blue. 'Jerry the Jellyfish' painted with a basecoat of Resene Kingfisher Daisy with topcoat in Resene Funtasia metallic and star in Resene Golden Sand with topcoat of Resene Gold metallic. The eyes of all the sea creatures are painted in Resene White and Resene Black. Table and cube in Resene Sea Fog with chairs in Resene Vanilla Ice and Resene Roxy.
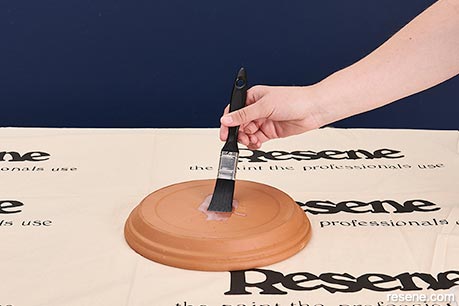
 Step one
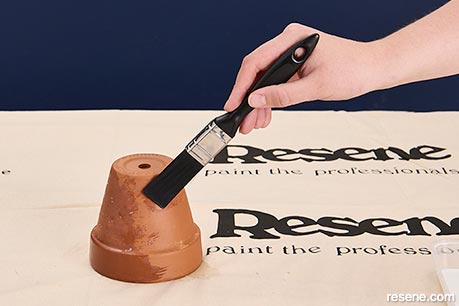
Apply one coat of Resene Aquapel & Terracotta Sealer to all sides of a terracotta pot and allow to dry.
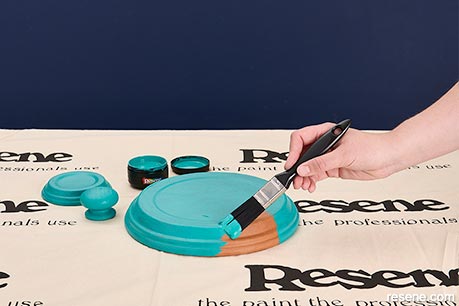
 Step two
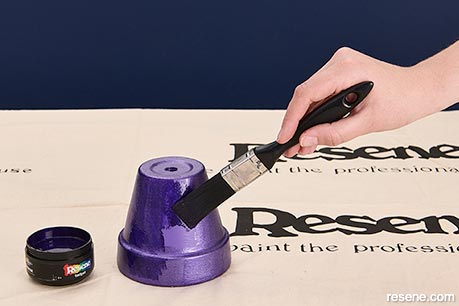
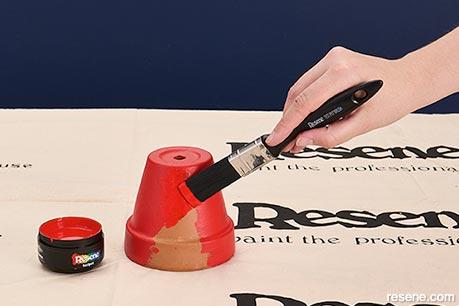
Apply two coats of your choice of Resene colour, allowing the paint to dry between layers – we used Resene Bright Red.
 Step three
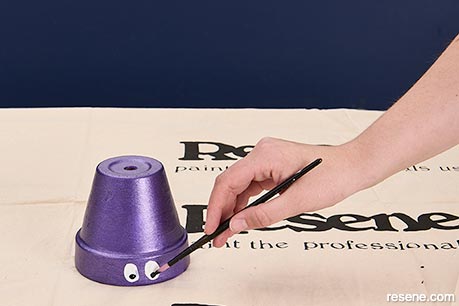
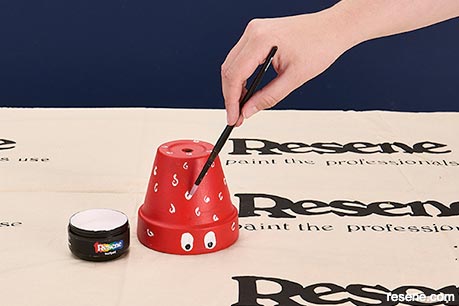
Paint small swirls in a lighter colour; we used Resene Sauvignon. Paint the eyes using Resene White and Resene Black.
 Step four
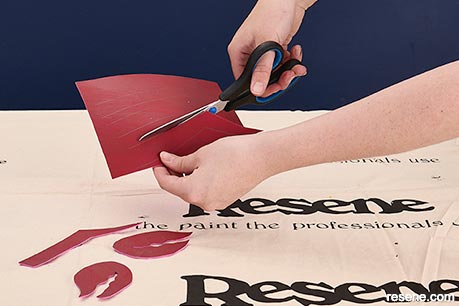
Paint your cardboard to match your pot or use another Resene testpot colour if you prefer. We used Resene Salsa. Once dry, draw four simple crab legs using cardboard, a pencil and a ruler. If you wish to keep your crab outside, you could use foam. The legs should be approximately the same length as the height of your pot. Draw two crab’s pincers on the cardboard. The claws should be half the height of your pot and about double the width of the legs.
 Step five
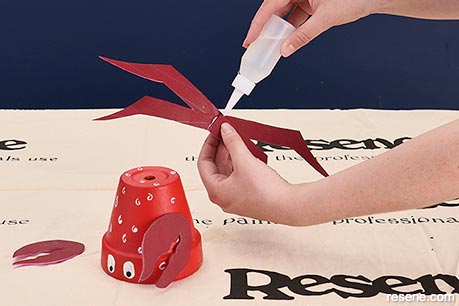
Assemble the crab by gluing the cardboard claws close to the painted eyes. ‘Fan’ out your crab legs, two on each side, and glue them to the back of your pot.
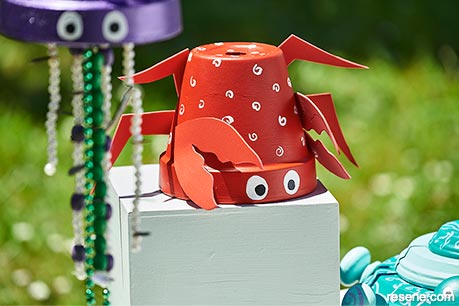 Finished project
A close-up of the finished 'Chrissie the Crab' project.
 Step one
Apply one coat of Resene Aquapel & Terracotta Sealer to all sides of four terracotta plates (2 large, 1 medium and 1 small).
 Step two
Paint two coats of your choice of Resene colour onto the plates and onto five craft knobs, allowing them to dry between layers. We used Resene Aqua for the medium craft knobs and medium plate and Resene Surfie Green for the large craft knob, two large plates and the smallest plate.
 Step three
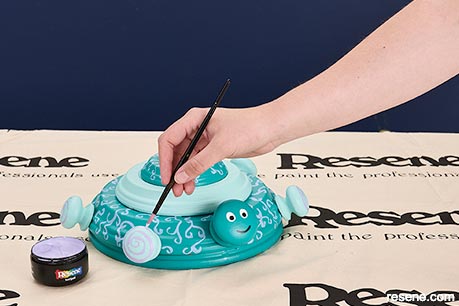
Paint the turtle’s face on the large craft knob; we used Resene White and Resene Black.
 Step four
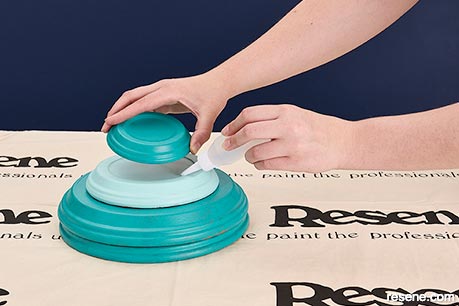
Assemble the turtle by gluing the two large plates together to form the base. Glue the medium plate on top, followed by the small plate. Glue on the craft knobs – first the large craft knob (the turtle’s head), then two more knobs on each side.
 Step five
Paint a pattern on the turtle’s shell, experimenting with spots, swirls or a hexagonal pattern in your choice of Resene colours. We used Resene White, Resene Wistful and Resene Polo Blue.
 Finished project
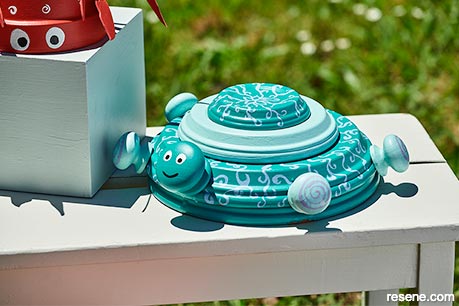
A close-up of the finished 'Terry the Turtle' project.
 Step one
Apply one coat of Resene Aquapel & Terracotta Sealer to all sides of a terracotta pot and allow to dry.
 Step two
Paint a basecoat in your chosen colour; we used Resene Kingfisher Daisy. Leave to dry, then paint one coat of Resene metallic paint onto the pot; we used Resene Funtasia metallic.
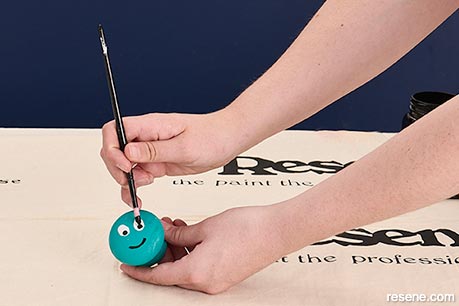
 Step three
Paint the eyes; we used Resene White and Resene Black.
 Step four
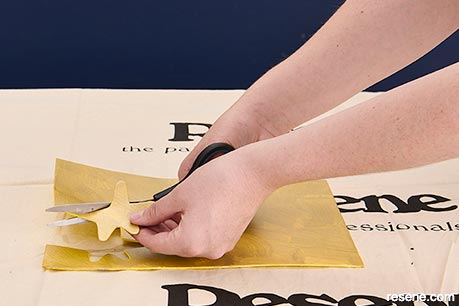
Paint the cardboard in your choice of colour for your starfish. We used a basecoat of Resene Golden Sand with a topcoat of Resene Gold metallic. Trace three starfish onto the cardboard and cut them out. If you want to keep your jellyfish outdoors, you could use craft foam. Attach a starfish to the upper side of the pot with glue.
 Step five
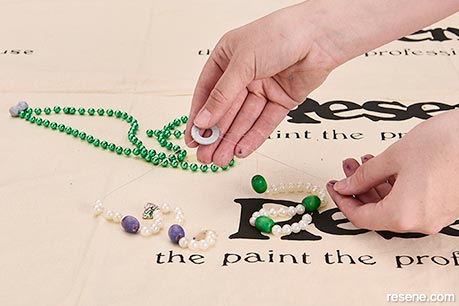
Thread seashells, pearls or beads to lengths of string. Tie all of the strings to a washer.
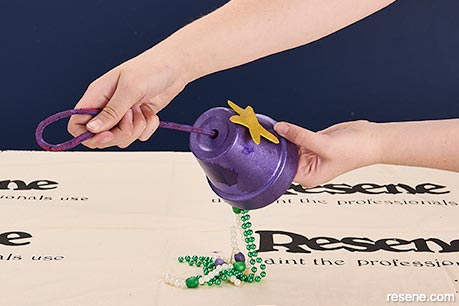 Step six
Take a length of cord (strong enough to hold your pot) and tie a knot in the end of it. Thread it through the large washer your beads are attached to and poke the cord through the hole in the pot. Glue the cord and washer to the pot, then thread another washer down the top of the cord, gluing it to the top of the pot.
 Finished project
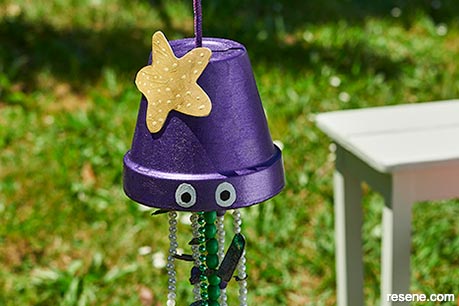
A close-up of the finished 'Jerry the Jellyfish' project
Project: Sarah Kolver
Images: Bryce Carleton
Search habitat magazine stories
Printed copies of habitat highlights are available from late March 2024 at Resene ColorShops and resellers, while stocks last. You can view back issues of habitat magazine online.
Specifiers:
If you have an idea, project or story that you think would suit habitat, we’d love to hear from you. Please drop us an email with your details and include photos if submitting a project.
Sign up for a DIY card and Save! Australia | New Zealand
![]() Get inspired ! Subscribe
Get inspired ! Subscribe ![]() Get saving ! Apply for a DIY card
Get saving ! Apply for a DIY card
![]()
Can't find what you're looking for? Ask us!
Company profile | Terms | Privacy policy | Quality and environmental policy | Health and safety policy
Colours shown on this website are a representation only. Please refer to the actual paint or product sample. Resene colour charts, testpots and samples are available for ordering online. See measurements/conversions for more details on how electronic colour values are achieved.
What's new | Specifiers | Painters | DIYers | Artists | Kids | Sitemap | Home | TOP ⇧


