From Habitat magazine - issue 32, step by step
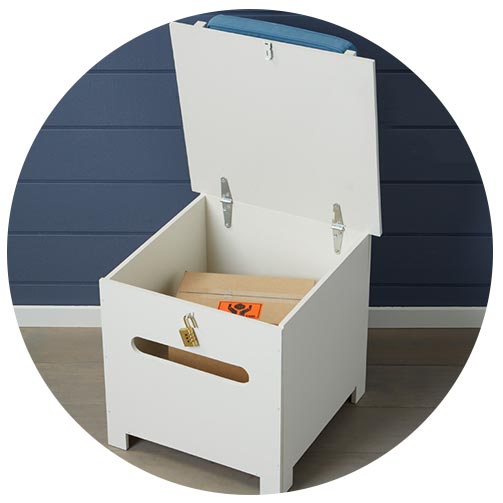
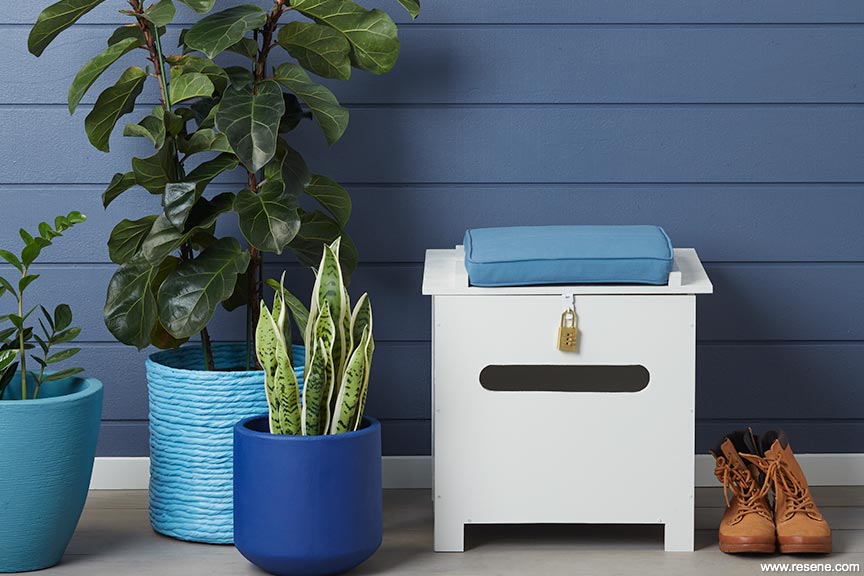
Keep daytime deliveries secure with this simple to build box that doubles as a seat.
 Top tip: Use letter stencils to label your courier box or decorate it with fun patterns using Resene testpots.
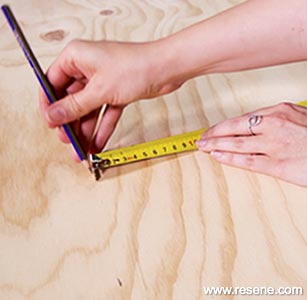

Step 1: Download the cut plan and measurements from www.habitatbyresene.com/news/diy-courier-box, which has been designed to minimise waste and the number of cuts. Measure and cut your plywood using a table saw and jig saw or similar. While you will not need a full sheet of plywood for the project, you will need a minimum surface area of 925mm x 140mm – so feel free to reuse an offcut section from another project if it is large enough. If you would like your courier box to also have a letter slot, you may choose to use a router to give the opening rounded edges.
Step 2: Fill any holes or knots with wood putty and allow it to dry before sanding down all surfaces with an electric sander and/or by hand with a sanding block. Remove any dust by wiping down the entire box with a clean, dry cloth.
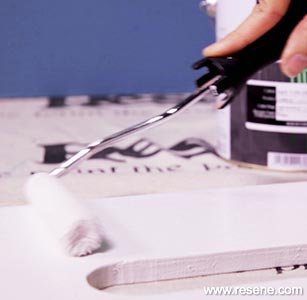
Step 3: Prime with Resene Quick Dry then apply two coats of Resene Lustacryl in a colour of your choice – we used Resene Eighth Truffle, a warm mushroom white – allowing each coat to dry completely before painting on the next one.
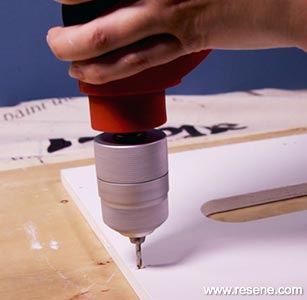
Step 4: Using an electric drill, drill holes 50mm, 200mm and 250mm from the top edge and 6mm in from the sides down the sides of the front and back panels. Then, drill holes 20mm in and 6mm up from the corner 'notches' you've cut into the bottom (which will become the feet of your box).
Optional: Attach the decorative trim to the top of the box lid with 20mm long screws attached through the bottom of the lid so that it creates a frame for where your cushion will sit.
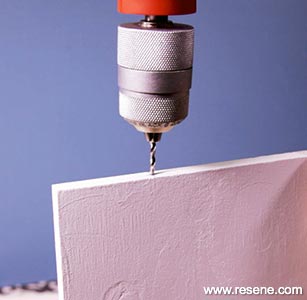
Step 5: Drill approx. 5mm into the centre of the sides of your box 50mm, 200mm and 250mm from the top edge along each vertical side.
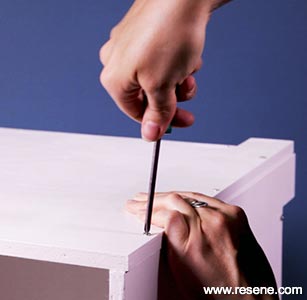
Step 6: Using a screwdriver, assemble your box with 20mm wood screws, through the front and back into the sides and base.
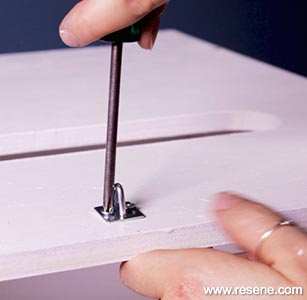
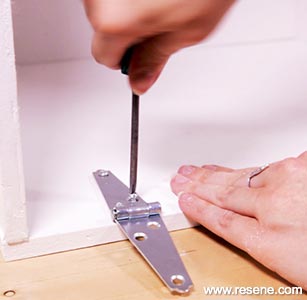
Step 7: Attach the hasp and staple to the front of your box and lid. Use 12mm long wood screws to secure them in place.
Step 8: Attach the bottom of your lid to the back side of your box with hinges secured with 12mm long wood screws. Depending on the type of hinges you choose, you may need to install them on the inside or outside.
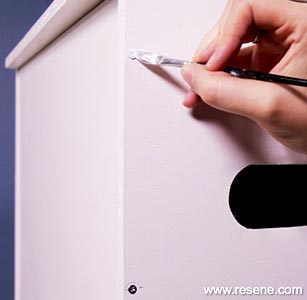
Step 9: Using a small artist's brush, paint the tops of the screws and your hardware in the same colour of Resene Lustacryl that you used for the rest of the box and touch up any areas as needed.
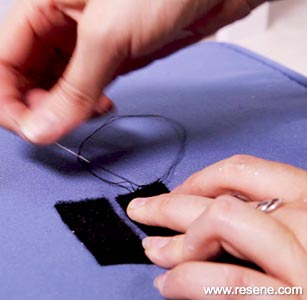
Step 10: Apply one side of the hook and loop adhesive strips to the top of your box lid and use your needle and thread to attach the other side to the base of your cushion. This will help to keep it in place when the lid is both opened and closed.
Project: Laura Lynn Johnston.
Images: Bryce Carleton, Ben Whorwood.
Search habitat magazine stories
Printed copies of habitat highlights are available from late March 2024 at Resene ColorShops and resellers, while stocks last. You can view back issues of habitat magazine online.
Specifiers:
If you have an idea, project or story that you think would suit habitat, we’d love to hear from you. Please drop us an email with your details and include photos if submitting a project.
Sign up for a DIY card and Save! Australia | New Zealand
![]() Get inspired ! Subscribe
Get inspired ! Subscribe ![]() Get saving ! Apply for a DIY card
Get saving ! Apply for a DIY card
![]()
Can't find what you're looking for? Ask us!
Company profile | Terms | Privacy policy | Quality and environmental policy | Health and safety policy
Colours shown on this website are a representation only. Please refer to the actual paint or product sample. Resene colour charts, testpots and samples are available for ordering online. See measurements/conversions for more details on how electronic colour values are achieved.
What's new | Specifiers | Painters | DIYers | Artists | Kids | Sitemap | Home | TOP ⇧


