An Antarctic fantasy where the imagination of a young penguin lover can run free.
When you’re a kid, you don’t have much to call your own so having a bedroom that’s decorated especially for you and your interests is a big deal. Most kids have an obsession – a character, animal, machine or show – that they can’t get enough of and tapping into this preference can be the perfect inspiration for starting your design. By creating a special space with Resene paint colours, you can turn every centimetre of their room into a world of discovery, exploration and play.
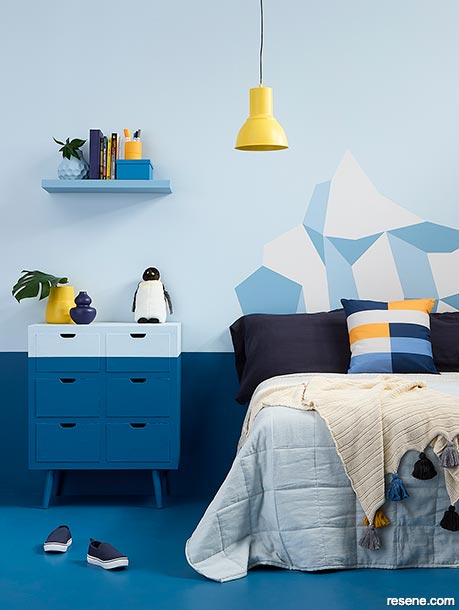
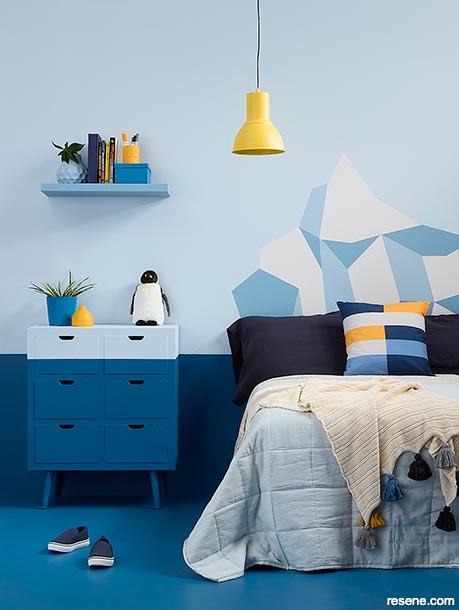
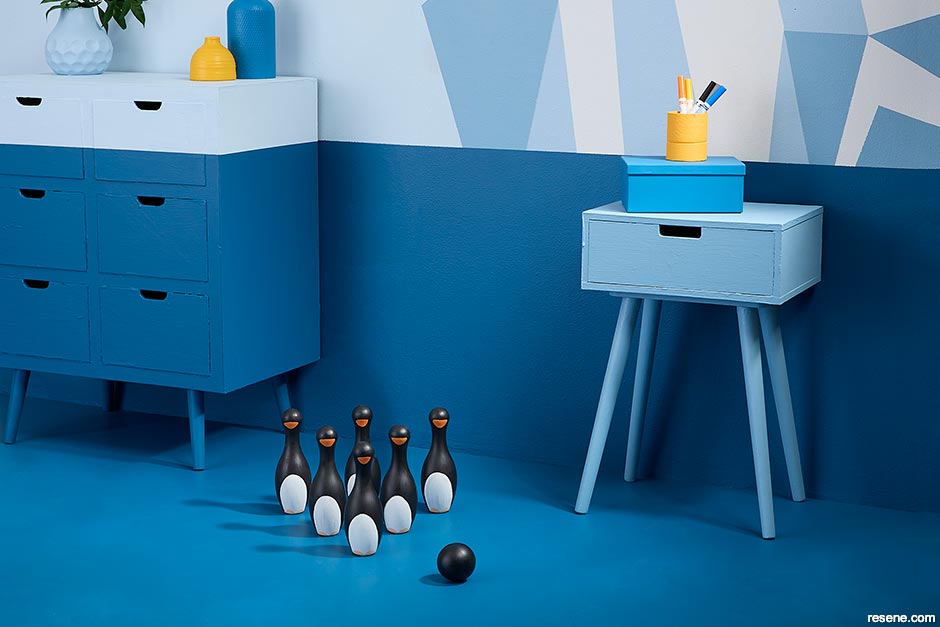
While this child’s bedroom would be quite basic without its creative coats of colour, it’s instead been transformed into an Antarctic fantasy where the imagination of a young penguin lover can run free. Part of what makes this concept so immersive is that the paint effects and colour palette are not just on the walls, floor or ceiling but have also been carried on to the furniture, accessories and even a few toys.
We started by painting our walls and ceiling in two coats of Resene SpaceCote Low Sheen waterborne enamel tinted to the aptly named Resene Quarter Frozen. For our deep Antarctic waters, we painted our floor in two coats of Resene Walk-On flooring and paving paint tinted to Resene Spinnaker. By tinting this same hue into Resene SpaceCote Low Sheen, we also brought the ‘water’ 75cm up the bottom of the wall to create an enveloping effect that the child can ‘swim’ in – just like the penguins do. Once our ‘water’ had dried, we plotted out our main feature of the room, the iceberg painted headboard design. Using a pencil and ruler, we drew the main jagged outline before drawing in the straight, angular lines that give the effect its icy form. We then used high-quality professional washi style masking tape – available from your local Resene ColorShop – to mask around the areas we wanted to paint in our lightest colour, Resene Sea Fog. Once two coats of colour were applied and dried, we removed the tape and masked off the next colour, Resene Frozen. Once that colour had dried and the masking had been removed, we masked off the areas for our third and final colour, Resene Blue Moon, and applied it to the darkest areas of our design.
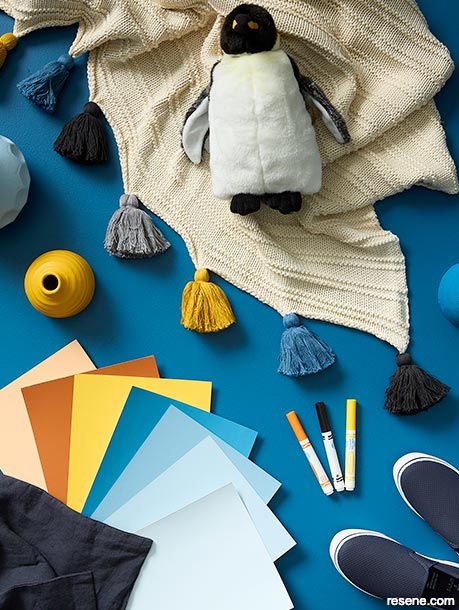
Using Resene Lustacryl semi-gloss waterborne enamel, a durable formula that’s ideal for furniture, we painted the bottom 75cm of our dresser in Resene Spinnaker and the top portion in Resene Quarter Frozen so that it would become part of the wall design. We used this same formula tinted to Resene Frozen to paint our bedside table, a stool and a floating shelf to carry that key colour from the iceberg off the wall and into the room. To infuse some energy, we painted our pendant lamp, a vase and a pencil cup in Resene Bright Spark to play off the golden yellow tones in the cushion and throw. For the other small accessories like plant pots and storage boxes, we used Resene testpots in Resene Matisse, Resene Bullitt and Resene Frozen to make them a cohesive part of the colour scheme. For an extra bit of whimsy and fun, we used Resene testpots in Resene All Black, Resene Sea Fog, Resene Bright Spark, Resene Smoke Tree, Resene Ayers Rock and Resene Roxy to paint an adorable hamper and brought a game of skittles to life to fit into the penguin theme.
Because the theme has been created with paint, it only takes a weekend to completely transform it into something new if your child outgrows it or wants a new fantasy of discovery to explore.
Convert a boring set of skittles (aka bowling pins) into a waddle of penguins with a few Resene testpots. We used Resene All Black, Resene Alabaster, Resene Rock Spray and Resene Roxy.
First, use a Resene testpot brush to paint your skittles in a basecoat of Resene Waterborne Smooth Surface Sealer (if your skittles are made of sealed wood or plastic) or Resene Quick Dry (if your skittles are made of unsealed wood). Then, apply two topcoats of Resene All Black to the entire surface of each skittle. Allow each coat to dry fully before applying the next.
Using a small flat artist’s brush, paint a large elongated semi-circle starting from the bottom of each skittle, curving upward using two coats of Resene Alabaster, allowing the first coat to dry before applying the next. This will form the penguin’s belly.
Using a small flat artist’s brush, paint two small semi-circles starting from the bottom of each skittle, curving upward so that each is placed near the sides of your ‘belly’ semi-circle using two coats of Resene Roxy. Allowing the first coat of paint to dry before applying the next. These will form the penguin’s feet.
Using a small round artist’s brush, paint a small triangle with rounded corners on the top section of each skittle centred above the belly using two coats of Resene Rock Spray, allowing the first coat to dry before applying the next. This will form the penguin’s beak.
While we took a more minimalist approach to our penguins, you can decorate yours however you like. Add eyes, expressions, wings, toes or another other details you desire. You can paint each of your penguins to be identical like we did or give each one its own personality!
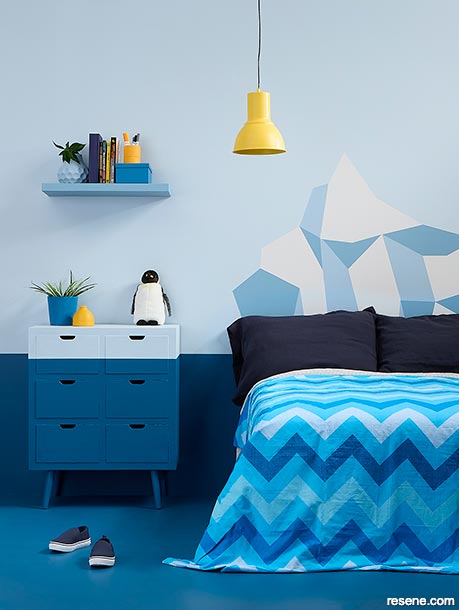
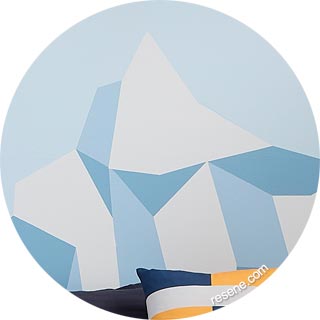
Bring the magic and wonder of the Antarctic to your child’s bedroom with this simple painted wall mural, featuring a stylised iceberg that works great as a headboard.
Start with two basecoats of Resene SpaceCote Low Sheen waterborne enamel tinted to the aptly named Resene Quarter Frozen. Apply these over the entire surface of your wall, from floor to ceiling.
For the water, before you mark out the placement of your ‘tideline’, measure the height of your child’s bed from the floor to the top of the mattress. Most beds typically range from 45-90cm tall. Our bed was on the lower side of that range, so we painted our tideline at 70cm from the floor. Use a ruler or measuring tape to mark out the height at a few places along the wall then use a straight edge and level to lightly draw your line with a pencil. Apply high quality painter’s masking tape, available from your Resene ColorShop, to the top edge of this line, pressing it down smoothly as you go. Paint two coats of Resene SpaceCote Low Sheen waterborne enamel tinted to Resene Spinnaker below your masking down to the floor. If you would like to carry this colour on to your floor like we did to create a more immersive effect, use Resene Walk-On flooring paint tinted to Resene Spinnaker. Once your ‘water’ has dried to the touch, remove your masking.
Plan out the design of your iceberg first on paper with a pencil and label what paint colour you will use to colour each section. We used three colours – Resene Sea Fog, Resene Frozen and Resene Blue Moon – to give our iceberg dimension. Once you’re happy with how it looks, use your pencil or a piece of chalk to transfer your design to the wall. The highest tip of our iceberg was approximately 150cm from the ground.
Use high quality painter’s tape to mask around the areas where you will be applying your first iceberg colour then paint each of those sections in 2-3 coats of Resene SpaceCote Low Sheen waterborne enamel tinted to the Resene hue of your choosing. Allow each coat of paint to dry before applying the next. Once the topcoat is dry to the touch, remove your masking and allow the paint to dry fully.
Use high quality painter’s tape to mask around the areas where you will be applying your second colour. If you want your second colour to butt up against your first colour, apply your masking tape overtop of your first colour along the edge. Paint each of those sections in 2-3 coats of Resene SpaceCote Low Sheen waterborne enamel tinted to the Resene hue of your choosing. Allow each coat of paint to dry before applying the next. Once the topcoat is dry to the touch, remove your masking and allow the paint to dry fully. Repeat for your third and final colour.
Top tip: Resene SpaceCote Low Sheen waterborne enamel can be used as a chalkboard. Simply wipe the surface with a damp cloth whenever your child wants a clean slate to create on.
Are penguins your child’s favourite animal? Turn a plain, lidded clothes hamper into a cute, stylised yellow-eyed penguin (hoiho) using some favourite Resene paint colours.
First, plan your design out on paper. Depending the texture of your hamper, it can be challenging to create ‘clean’ lines and you may not be able to rely on masking tape. Keep this in mind as you may need to simplify your design – and be sure to approach your project with plenty of patience if you’re a perfectionist! Our hamper had a heavy woven texture and was made of thick water hyacinth, so we relied on a mix of smaller artists’ brushes and a few Resene testpot brushes to create our design.
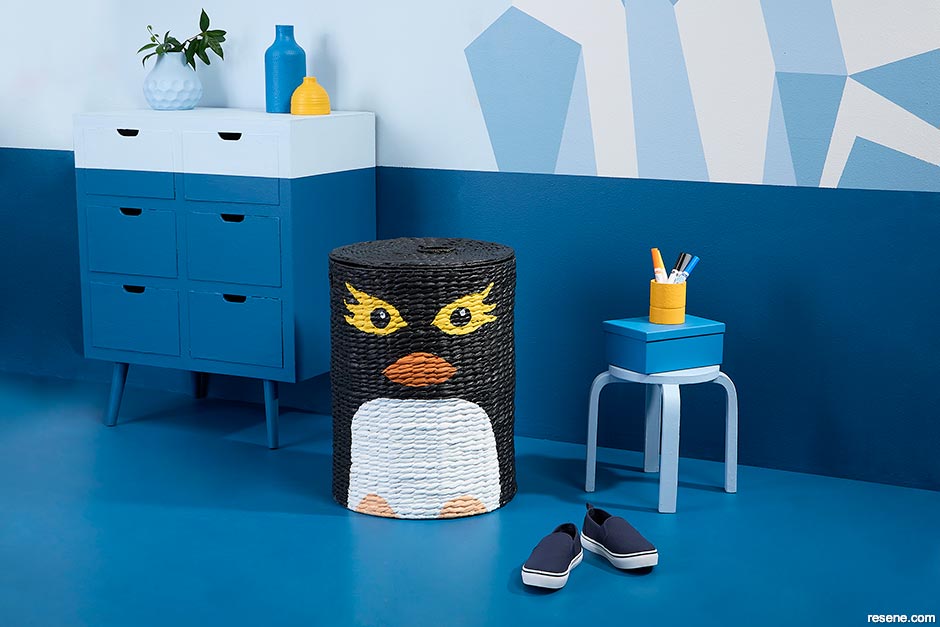
Draw out your design on to the surface of your hamper using chalk or charcoal. Begin ‘roughing in’ the larger sections of each of your colours using Resene testpot brushes, stopping short of your lines so that there is a bare gap where each colour will eventually meet. We used Resene All Black for the body of the penguin, Resene Alabaster for the tummy, Resene Bright Spark for the eyes, Resene Rock Spray for the top of the beak, Resene Ayers Rock for the bottom of the beak and Resene Roxy for the feet. Once your first coat of paint has dried, apply a second coat in each colour.
Using a small, flat artist’s brush, work from your lightest colour to your darkest colour to fill in the gaps – that way, it will be easier to make touch ups with your darker colours as you go.
Once your main colour sections have dried, use a small, flat artist’s brush to add the eyeballs in Resene All Black. Once they have dried, add some small light reflections to them with a touch of Resene Alabaster.
Styling by Laura Lynn Johnston. Photography by Bryce Carleton. 2022
Colour inspiration - latest looks gallery
Get inspired with colour and the latest decorating and colour trends! Select just the right look and mood for your space.
Filter: kids & teens | greens | blues | yellows | neutrals | oranges/browns | pinks/reds | greys/blacks | violets | pops-of-colour/multi-colour
Where the wild things slumber
A kid's adventure bedroom
Pretty in pastel
There’s a reason why pastel colours are so popular
![]() Get inspired ! Subscribe
Get inspired ! Subscribe ![]() Get saving ! Apply for a DIY card
Get saving ! Apply for a DIY card
![]()
Can't find what you're looking for? Ask us!
Company profile | Terms | Privacy policy | Quality and environmental policy | Health and safety policy
Colours shown on this website are a representation only. Please refer to the actual paint or product sample. Resene colour charts, testpots and samples are available for ordering online. See measurements/conversions for more details on how electronic colour values are achieved.
What's new | Specifiers | Painters | DIYers | Artists | Kids | Sitemap | Home | TOP ⇧