From the Resene colour inspiration – latest looks gallery
A tonal brown lounge proves it’s not just light, soft colours that can create a nurturing, soothing space.
When it comes to designing a room that’s relaxing, welcoming and very on-trend, you can’t go past tonal decorating. It’s the key to a soothing space without being too boring or sterile. This lounge, adorned with smoky browns, is proof that dark colours can work just as well in a tonal scheme as light colours. Despite this, it’s not always as easy as it sounds to embrace an entirely dark and sumptuous colour scheme.
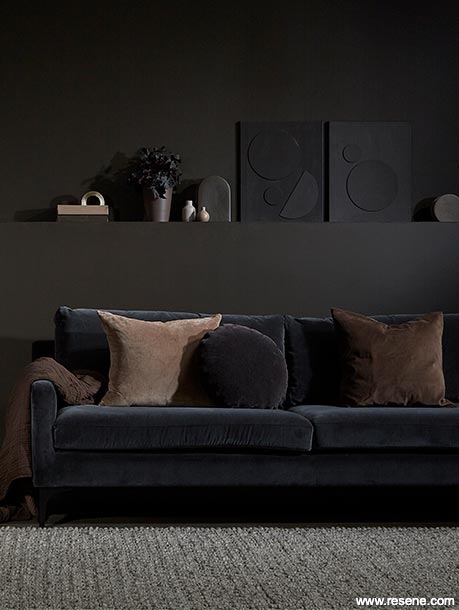

In this room, the walls, painted in Resene Monkey, set the tone for the entire palette – dark, nutty and warm. This tone of brown is extremely versatile, working especially well with timber flooring and natural materials. If you don’t have timber flooring, painting the floor in Resene Space Shuttle will replicate the look.
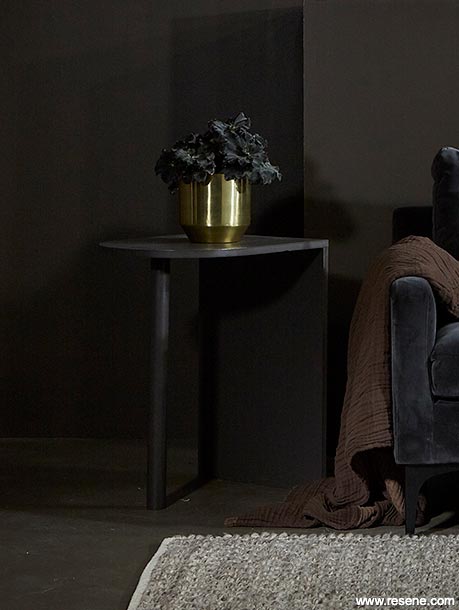
Texture is very important in a dark tonal room as it provides much-need contrast to help break-up the crepuscular vibe. Velvet is a texture that works particularly well within this tonal style. In this room, both the couch and the cushions are velvet, lending themselves to the luxe appeal of the lounge.
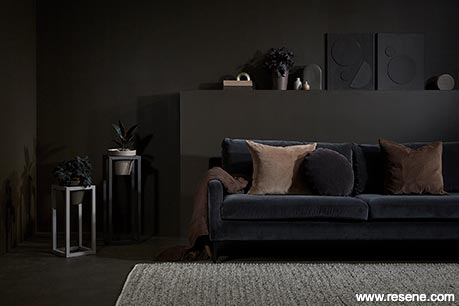
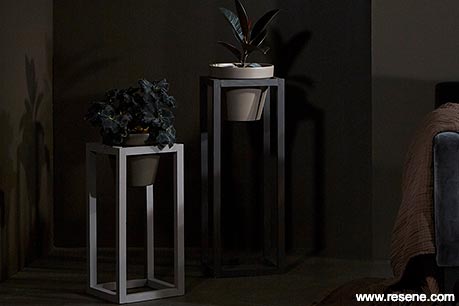
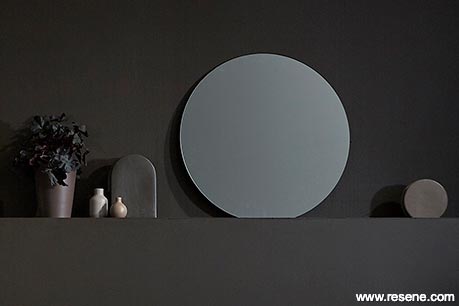
Indoor plants also help to add texture and interest. In this room, two pot plants are elevated off the ground by two DIY plant holders painted in Resene Kilamanjaro (tall) with pot in Resene Kabul and Resene Americano (short) with pot in Resene Space Shuttle. Their alternating heights also add depth to the space. Subtle texture can also be found in the DIY artwork, painted in Resene Kilamanjaro, sitting on the shelf. The 3D rounded shapes, despite their dark colour, catch the light, and therefore catch your eye.
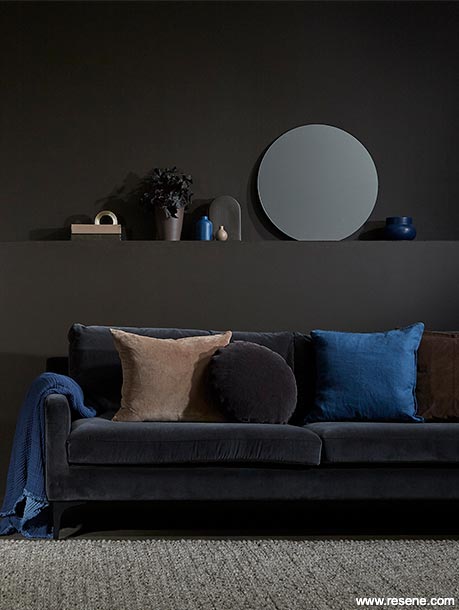
As with any tonal scheme, contrast needs to be added to prevent it from being too flat and uninspiring. In a dark room, like this lounge, lighter elements are essential. A light grey rug on the floor is the perfect addition to lift the light in the room, keeping it cosy, but not gloomy. This colour is echoed in the accessories thoughtfully placed around the room; in the short pot plant stand painted in Resene Americano, the small vases sitting on the shelf, painted in the taupe browns of Resene Kabul and Resene Americano and the lighter cushions on the couch.
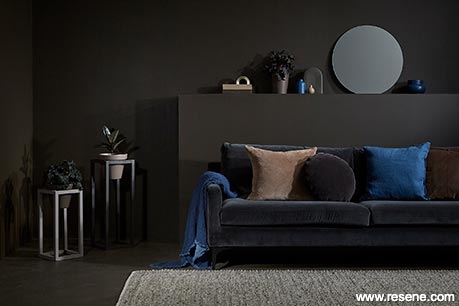
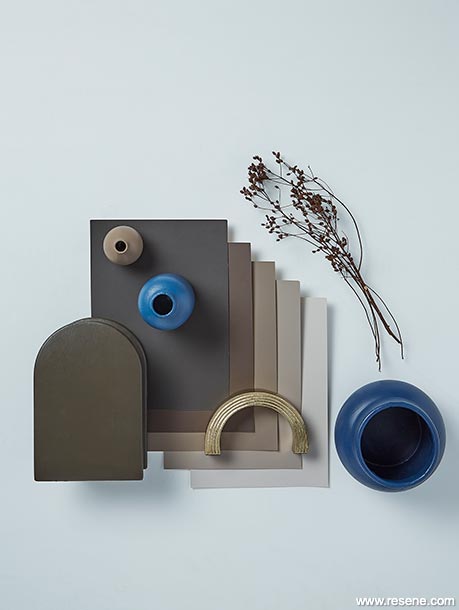
Blue is a great accent colour to work with this decadent brown colour scheme, Resene Coast or Resene New Denim Blue are excellent options to try for a more smoky, subtle addition. For a blue that pops against the brown backdrop, try Resene Bunting – but, use these hues sparingly, so as not to detract from the tonal brown feature.
You will need:
Note: The height of our tall planter is 70cm and the smaller one in 50cm. However, you can make them whatever height you like.
Step by step instructions:
Measure the exterior diameter of your pot just below the lip, this will determine the length of the small pieces of wood that the pot will sit into. For our big plant stand, the diameter of the large pot was 20.5cm and the small pot was 19cm.
Cut four pieces of the wood at 70cm in length and 4 pieces at 50cm in length for the sides of the plant stand
Cut eight pieces of wood 19cm in length and eight pieces at 20.5cm in length. These are the ‘frames’ at the tops and bottom of your planter. Remember, these lengths are determined by the size of your pot. If your pots are bigger or smaller, you will need to cut these lengths accordingly.
Once all the wood has been cut, sand off any rough edges then wipe away any dust with a clean, dry cloth.
Lay your pieces of wood on the ground and take one of the lengths and one of the short pieces of wood and secure the pieces together using construction glue and a nail. Repeat this process for the whole plant stand.
Paint your wood in Resene Quick Dry primer and allow to dry before moving on.
Paint each stand and pot in 1-2 topcoats using testpots of one or more of your favourite Resene colours, allowing the first coat to dry completely before applying the second.
Once the stands have dried, pop in your plant pots and plants and enjoy!
You will need:
Step by step instructions:
Start with your 50 x 40cm piece of MDF and draw a half circle at the end using the ‘pencil pin method’ to get a perfect curved shape.
Using a jig saw, cut the round edge you have pencilled and sanded off edges.
Measure 8cm from the edge of the curve back and make a mark.
Attach the dowel with two 40mm counter-sink screws at the mark.
Attach the 60x 40cm piece of MDF to the flat edge of the tabletop with five 40mm counter sunk screws. Be sure all screws are sunk in far enough so that they will be below the surface of the wood. Use a clean, dry cloth to wipe all surfaces and ensure your table is dust-free before moving on.
Fill sunken screw holes with wood filler and allow to dry.
Once dry, sand wood filler until surface is smooth and level then wipe with a clean, dry cloth to remove any dust.
Paint all surfaces of your table in Resene Quick Dry primer and allow it to dry completely before moving on.
Paint your table by applying at least two topcoats of your desired colour in Resene Lustacryl semi-gloss enamel, allowing the first to dry before moving on to the second coat. For best results, allow the paint to cure completely before placing anything on your table.
To make a hall table/desk version, repeat the same steps with longer sections of wood. Our hall table dimensions are 75cm high x 120cm long x 40cm wide.
You will need:
Paint the canvases, you will need at least two coats.
Cut one of the round wooden placemats in half using a jig saw, hand saw or similar.
Paint your coasters and placemats and in the same colours as the canvases. We painted two canvases with Resene Kilamanjaro backgrounds and wooden pieces and then painted one canvas in Resene Monkey with a Resene Madison half circle piece).
Once canvases and wood pieces are dry, glue them onto your canvas using construction glue. Leave this to dry overnight before hanging.
Accessories: Sofa and chair from Contempa, brown velvet cushion cover, throws and blue linen cushions from H&M Home, rug and tumbler from Freedom, round cushion from Country Road.
Project by Vanessa Nouwens. Images by Bryce Carleton. 2021
Colour inspiration - latest looks gallery
Get inspired with colour and the latest decorating and colour trends! Select just the right look and mood for your space.
Filter: kids & teens | greens | blues | yellows | neutrals | oranges/browns | pinks/reds | greys/blacks | violets | pops-of-colour/multi-colour
A sunny disposition
A joyful bedroom with a sunny yellow hue
Green with envy
A sophisticated room in deep emerald green
![]() Get inspired ! Subscribe
Get inspired ! Subscribe ![]() Get saving ! Apply for a DIY card
Get saving ! Apply for a DIY card
![]()
Can't find what you're looking for? Ask us!
Company profile | Terms | Privacy policy | Quality and environmental policy | Health and safety policy
Colours shown on this website are a representation only. Please refer to the actual paint or product sample. Resene colour charts, testpots and samples are available for ordering online. See measurements/conversions for more details on how electronic colour values are achieved.
What's new | Specifiers | Painters | DIYers | Artists | Kids | Sitemap | Home | TOP ⇧


