Project ideas and inspiration from Good magazine
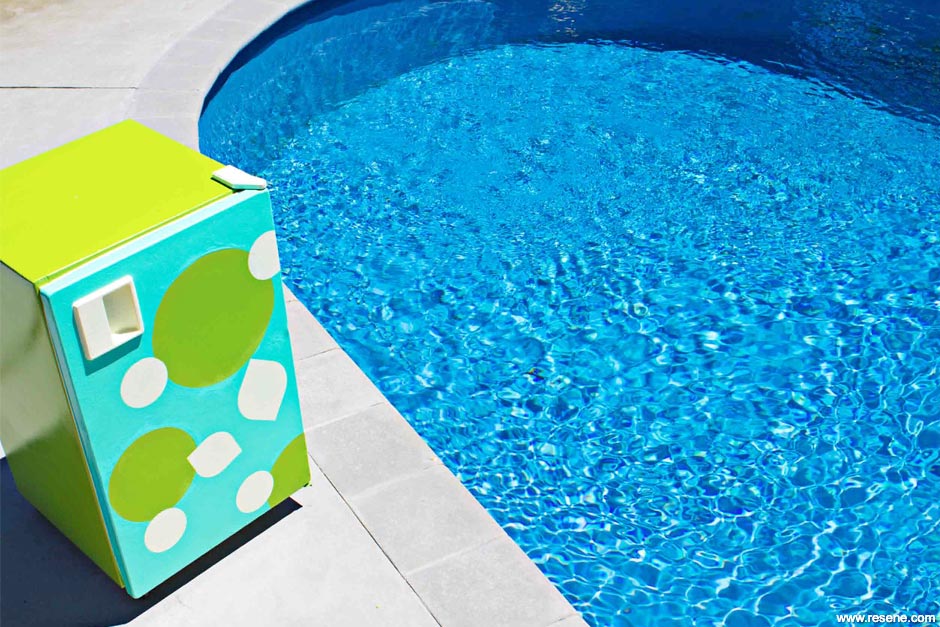
An old bar fridge gets souped up with wheels and a shiny new paint job, ready for a summer of fun.
Nothing says depressing landfill like a dead old fridge on the side of the road waiting for collection. But if the motor’s still running and the seals are intact, a splash of paint can take a tatty old fridge from junk to jubilant.
Our little bar fridge had seen long years of service (it was already secondhand when we bought it ages ago) and it was looking decidedly worse for wear when it was dragged out the garage in a recent clear out. We could have sent the fridge to the tip, but it is still working and though shabby looking, it does come in handy during Christmas and other big gatherings as a place to stash those extra salads and pavs. It’s equally useful for dealing with the abundance of food created for Good food shoots. But what to do with an extra fridge in between times?
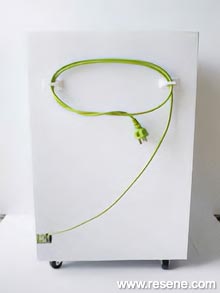
Applying the principle that things need to be beautiful as well as functional, it was clearly time for the fridge to have a makeover. Given its diminutive size and handiness as temporary chiller, what if we were to also mount it on wheels and devise a way to hook up the cord out of harms way...? Why, then we could load it up with chilled drinks and treats, unplug it and wheel it outside as a mobile garden chiller. Perfect for lazy-day outdoor meals when the ice cubes are melting in a puddle and the salad greens are wilting before you can say “Hey everyone, lunch is ready.”

Before refurbishment
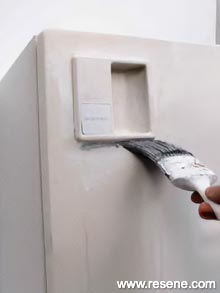
Step 1
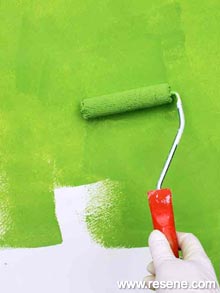
Step 2
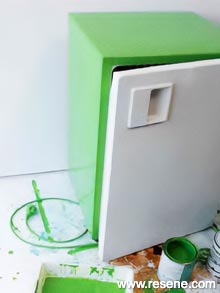
Step 2b
Step 1 Lightly sand the entire paintable surface. Clean off any dust or debris and apply a light coat of Resene Waterborne Smooth Surface Sealer, including on rubber seals. Allow to dry.
Step 1 Resene Waterborne Smooth Surface Sealer is an adhesive primer – ideal as an undercoat treatment for otherwise difficult surfaces. This waterborne product is fast drying, easy to apply and is compatible with a range of topcoats
Step 2 Paint a base colour using Resene waterborne enamel in a shade of your choice. I used Resene Kakapo for an intense green, matched with Resene Dali for the door. Use a mini roller where possible for a smooth paint finish. Allow to dry.
Step 3
Step 4
Step 5
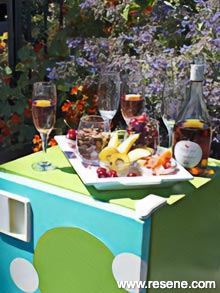
Finished project
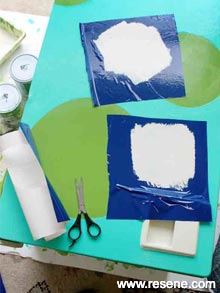
Step 3 For extra detailing, make stencils using stick-on vinyl (a similar product to what you use to cover school books). Use a mini roller to paint over areas in a contrasting shade. I used Resene Chill out for details and for the fridge handle. Peel off the stencils when the paint is tacky but not completely dry. Use a small paintbrush and damp cloth to tidy any edges.
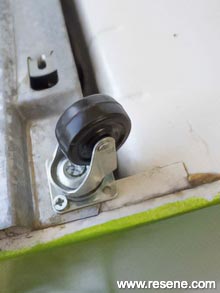
Step 4 Turn the fridge upside down and use screws (and if necessary a drill with a small drill bit) to attach swiveling caster wheels. Take care to attach these without puncturing the fridge unit!
Step 5 Tidy up the back of the fridge by cutting a piece of corflute to size and attaching it using Velcro dots. (Ask your local real Estate agent for old corflute signs).
Words and photography Sarah Heeringa. Portrait Jane Ussher. 2014
Good magazine projects
Wanting to tackle a project at your place but only have a weekend to spare? Get inspired with these projects from Good magazine. Reclaim and upcycle with paint.
![]() Get inspired ! Subscribe
Get inspired ! Subscribe ![]() Get saving ! Apply for a DIY card
Get saving ! Apply for a DIY card
![]()
Can't find what you're looking for? Ask us!
Company profile | Terms | Privacy policy | Quality and environmental policy | Health and safety policy
Colours shown on this website are a representation only. Please refer to the actual paint or product sample. Resene colour charts, testpots and samples are available for ordering online. See measurements/conversions for more details on how electronic colour values are achieved.
What's new | Specifiers | Painters | DIYers | Artists | Kids | Sitemap | Home | TOP ⇧


