As soon as you realise how easy it is to paint your own home in virtually any colour you please, you might start to wonder how to take your home paint job even further, and start considering how to work in some special effects.
Here is how to try the ragging effect at home. For more ideas, visit our special effects page for more ideas.
Ragging
This technique will give your walls a marbled or crushed velvet finish, and can be used effectively to disguise imperfections like uneven walls, odd angles or a botched plastering job!
Using two colours together, you use a rag to 'mix' the colours on the wall – just be sure to test your colour combination on a card first to make sure they look good together. A popular combination is white and a pastel or pale colour, or for a sumptuous look, think warm deep reds, yellows and oranges.
Start with a basecoat, then mix your chosen colour in a ratio of one part colour, two parts Resene Paint Effects Medium, and one part water.
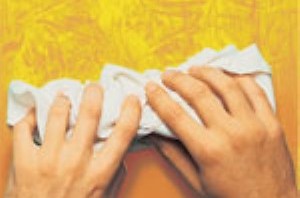
Brush or roll the glaze onto a small section of the wall to start with, then use a cloth in an 'S' wiping motion to create the feathered, velvety look. Remember not to leave hard edges of paint to dry for too long, as it will be very difficult to blend once dry.
To finish the look, roll up the rag and roll across the wall. You can experiment with turning it slightly or adjusting the rag for different effects and patterns. Once you have the look you are after make sure you create a sample panel so you can reproduce it in other areas if you wish.
There are a wide range of paint effects techniques you can try – from ragging to sponging or opt for aged effects like distressing. See the project ideas in the Resene Paint effects project section or don't be afraid to ask the professionals in our Resene ColorShops for more ideas and advice.


