DIY project from NZ Gardener magazine
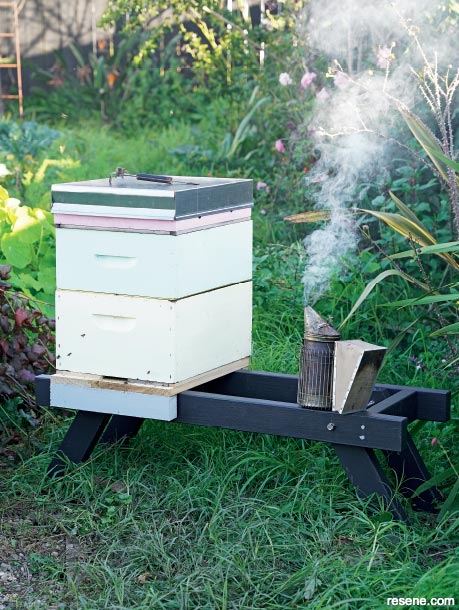
Jacob Leaf buzzes with excitement over a foldaway double hive stand.
Materials:
Cut list:
Paint:
Tools:
Cost: $120 excluding Resene products.
Learn how to make a hive stand for your garden:
Step 1 & 1b: Cut your wood to size. Then sand, prime and paint. To assemble the base, drill pilot holes to stop the wood splitting then attach the side bars to the crossbars with 4 x M6 x 90mm galv coach screws (I set mine in 90mm from the ends to keep the overall footprint of the splayed legs within the dimensions of the hive stand).
Step 2: Trim the legs so they sit flush with the ground (I cut mine to 30 degrees).
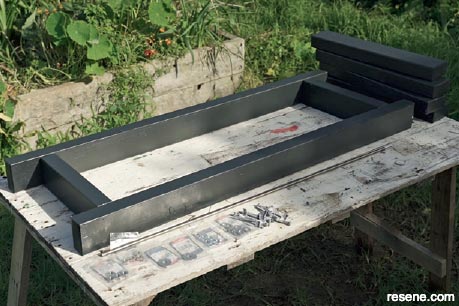
Step 1
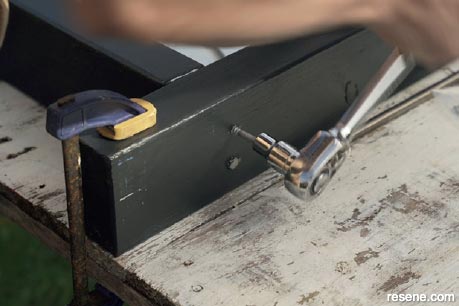
Step 1b
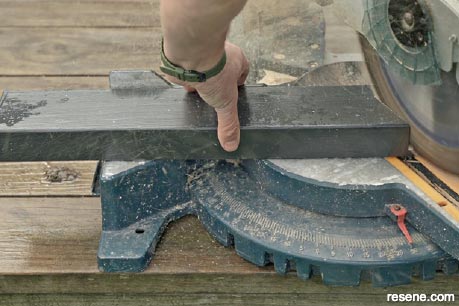
Step 2
Step 3: Clamp the legs in place, then drill 12mm holes for the threaded rod through the centre of each side bar and through to the centre of each leg.
Step 4: Cut the threaded rod to fit through from one side to the other, leaving just enough extra on each end to fit the nuts. You need to deburr the cuts with a file to thread the nuts on.
Step 5: To attach the legs, push the rod through the side bars and into the legs with a large panel washer between them. This will allow the legs to easily fold away when everything is tightened. Lock each leg in place with a flat washer, spring washer and nut at each end.
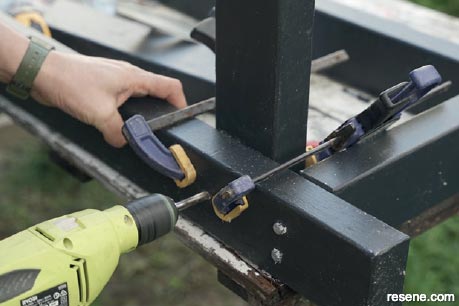
Step 3
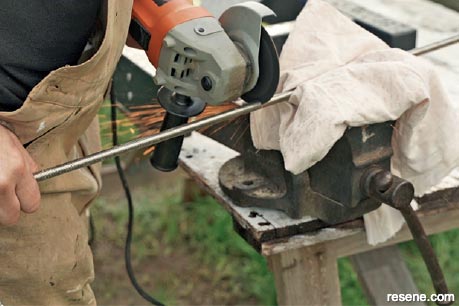
Step 4
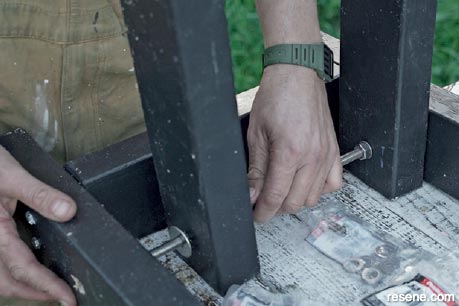
Step 5
![]() Get inspired ! Subscribe
Get inspired ! Subscribe ![]() Get saving ! Apply for a DIY card
Get saving ! Apply for a DIY card
![]()
Can't find what you're looking for? Ask us!
Company profile | Terms | Privacy policy | Quality and environmental policy | Health and safety policy
Colours shown on this website are a representation only. Please refer to the actual paint or product sample. Resene colour charts, testpots and samples are available for ordering online. See measurements/conversions for more details on how electronic colour values are achieved.
What's new | Specifiers | Painters | DIYers | Artists | Kids | Sitemap | Home | TOP ⇧

