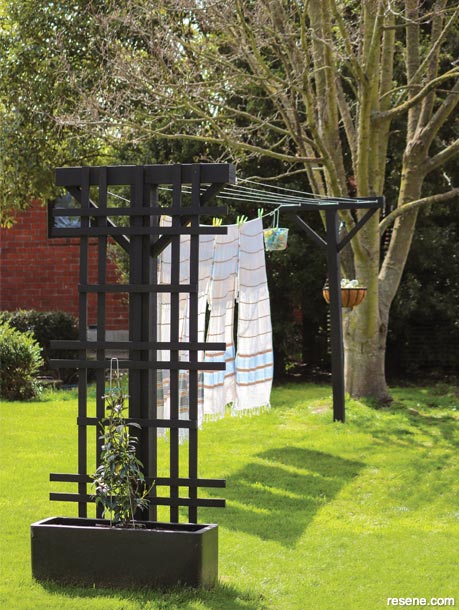
Turn a tired old clothesline into a stylish garden feature that brings joy to the chore of getting your washing out in the sun.
![]()
Materials:
Tools:
Here's another idea: If you prefer a more coastal inspired look, use Resene Woodsman Whitewash for your stained finish.
Edible ideas: For a clothesline that is even more practical, try growing beans or peas up your trellis and plant herbs in the hanging basket.
How to upgrade your clothesline:
 Step one
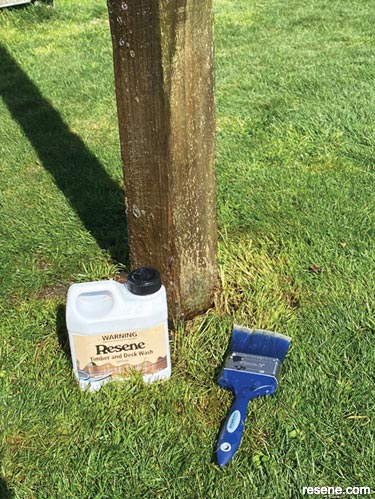
Tidy up your existing area by removing the old clothesline so you are left with only two posts. If your posts are too tall, cut them down to be 1.7m high. Clean both posts with Resene Timber and Deck Wash.
If you need to install new posts, do so now, ensuring they are the correct height and sunk deep enough in the ground to be sturdy (use concrete if needed to secure your posts in the ground).
 Step two
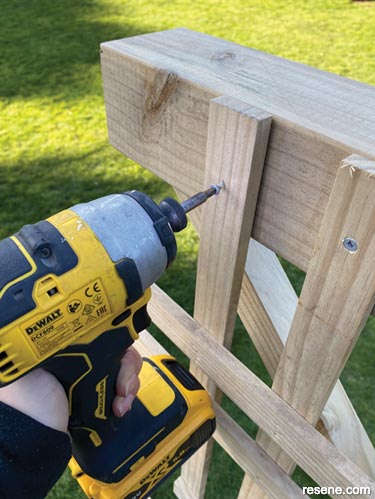
Using a ladder and impact driver, screw a crossbeam to the top of each post, ensuring it is centred. Use two 170mm bugle screws per post for strength. An extra pair of hands may be helpful.
 Step three
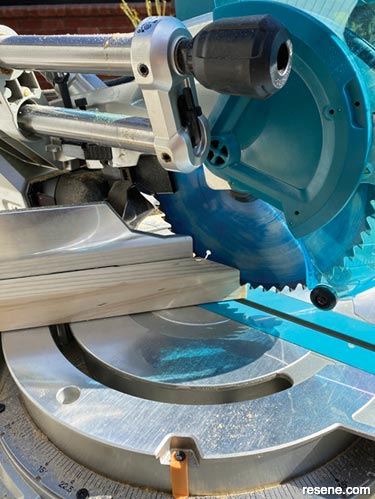
Using a drop saw set to 45 degrees, cut the ends off each 400mm length (for the support beams). Make sure the cuts are intersecting (not parallel), creating a short edge and a long edge.
 Step four
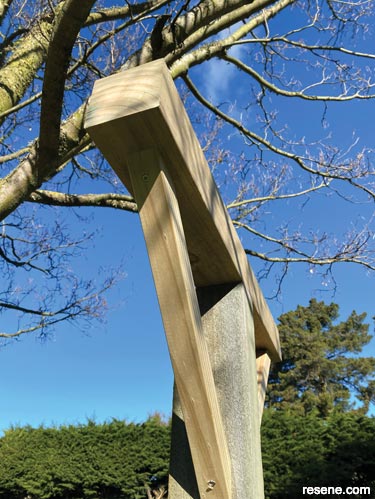
Secure each support beam in place, as shown.
 Step five
Screw the trellis into position on the outside of one of the posts, aligning it with the top of the crossbeam.
 Step six
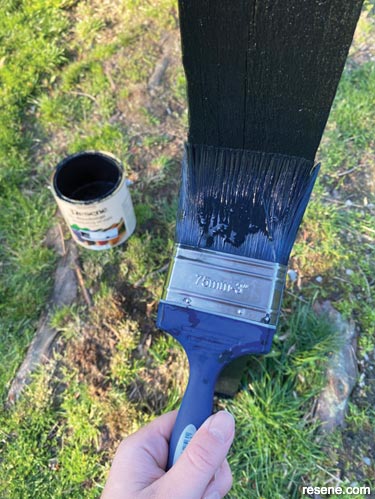
Stain both posts and the attached beams and trellis with two coats of Resene Waterborne Woodsman penetrating oil stain, allowing each coat to dry.
 Step seven
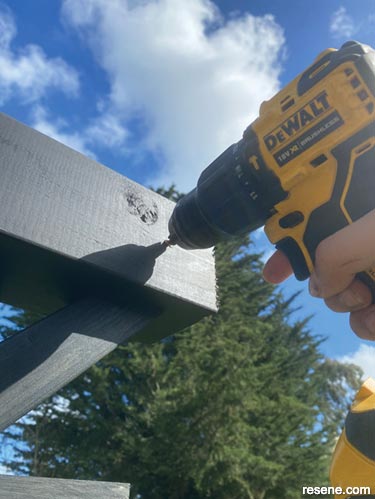
Draw a horizontal line on the inside middle of the crossbeam. Using the line as a guide, make a mark 45mm in from the left and then mark five more points 152mm apart. Drill pilot holes at each of the marked points and then screw in the eye hooks. Repeat with the second post.
 Step eight
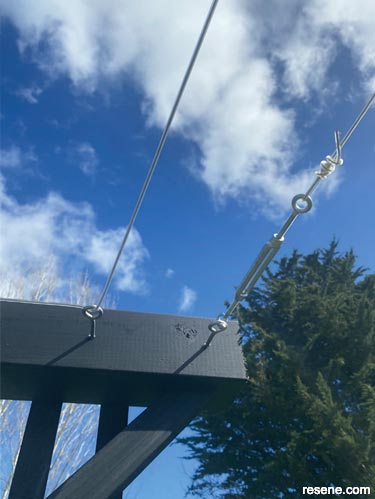
String the clothesline through the eye hooks. Use a turnbuckle at each end to tighten the line.
 Step nine
Make a mark 4cm down from the top of the trellis-free post. Align the top of the hanging basket bracket with the mark and screw the bracket into position with 75mm exterior screws (or similar), drilling pilot holes first.
 Step ten
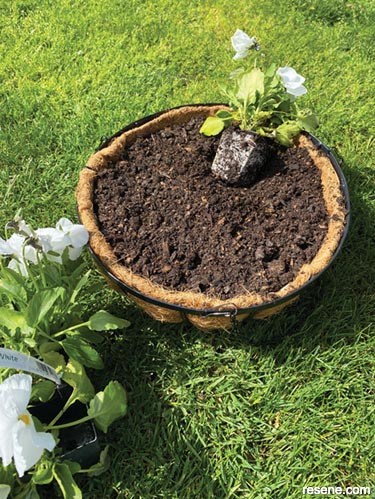
Fill the hanging basket with potting mix and plant your flowers (we planted pansies). Hang the basket on the bracket.
 Step eleven
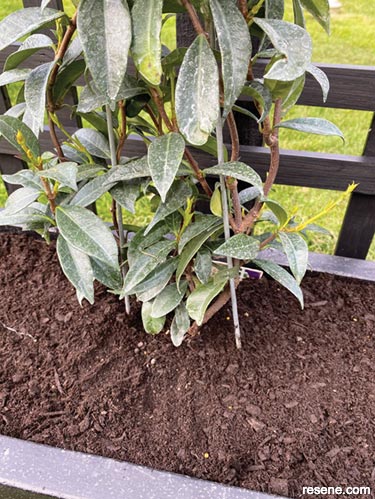
Plant your choice of climbing plant at the base of the trellis (we planted star jasmine: Trachelospermum jasminoides), either directly into the ground or into a trough pot.
 Step twelve
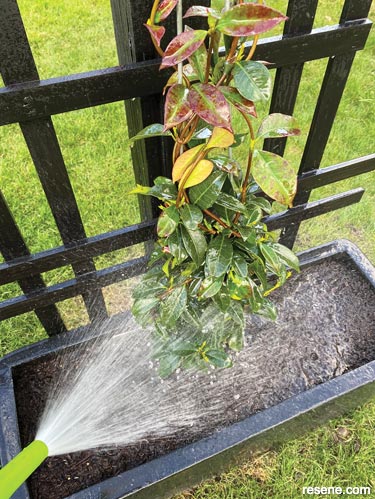
Water both the hanging basket flowers and the climbing plants well.
![]() Get inspired ! Subscribe
Get inspired ! Subscribe ![]() Get saving ! Apply for a DIY card
Get saving ! Apply for a DIY card
![]()
Can't find what you're looking for? Ask us!
Company profile | Terms | Privacy policy | Quality and environmental policy | Health and safety policy
Colours shown on this website are a representation only. Please refer to the actual paint or product sample. Resene colour charts, testpots and samples are available for ordering online. See measurements/conversions for more details on how electronic colour values are achieved.
What's new | Specifiers | Painters | DIYers | Artists | Kids | Sitemap | Home | TOP ⇧

