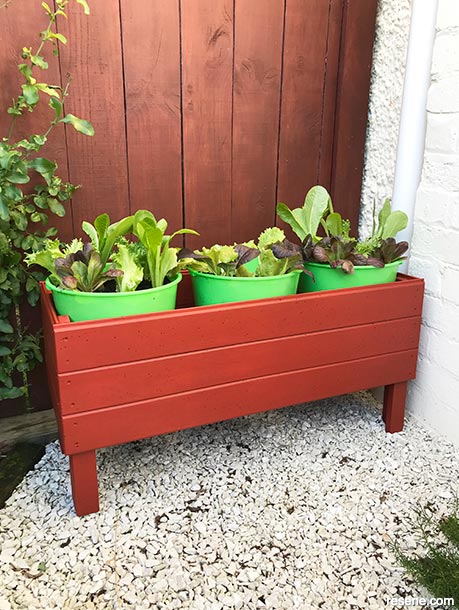
It's easy to be green if you use recycled timber to create this smart planter box.
![]()
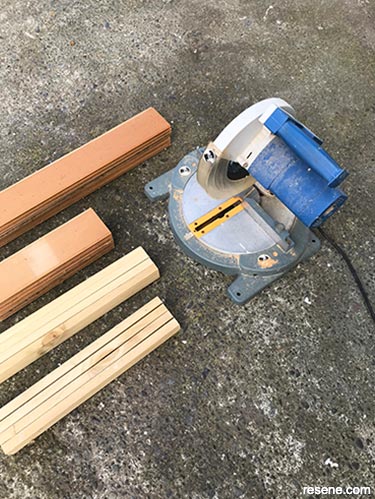
Materials:
Tools:
To get the look: Mark stained the background fence with Resene Woodsman tinted to Resene Warm Kwilla.
Top tip: We used recycled timber and plywood that we had available but this design can easily be modified if your recycled timber measures slightly differently or if you want to construct the unit entirely from new treated timber.
Here's another idea: Use your planter for an ongoing display of seasonal colour by having twelve pre-planted buckets which you can change as each display comes into flower. Spring bulbs can be followed by summer and then autumn perennials and then a display of evergreen favourites over winter.
Nurture know-how — how to build a recycled planter box:
 Step one
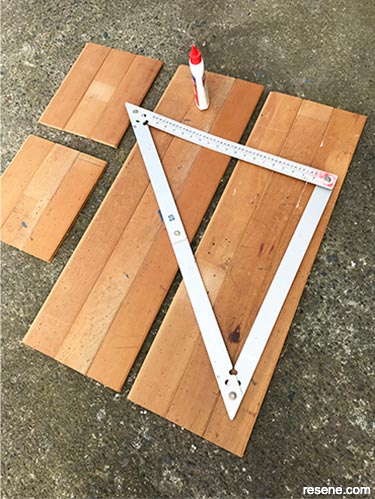
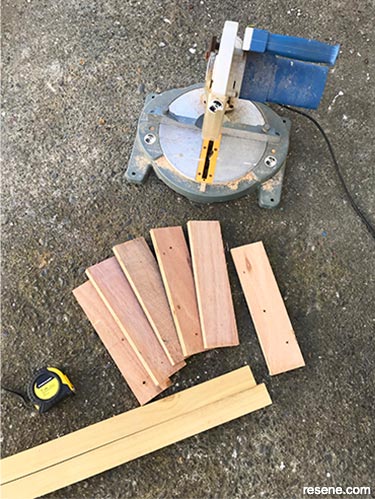
Measure, mark and cut six 850mm lengths and six 300mm lengths from the tongue and groove timber, and then measure, mark and cut eight 400mm lengths from the 45mm x 20mm timber.
 Step two
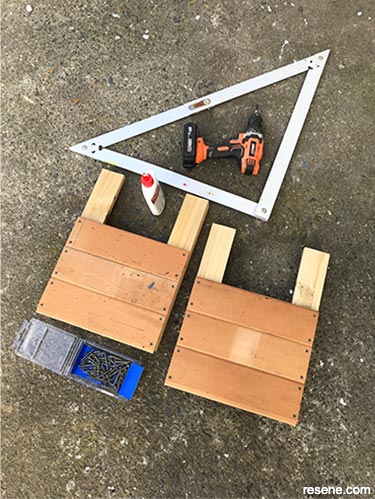
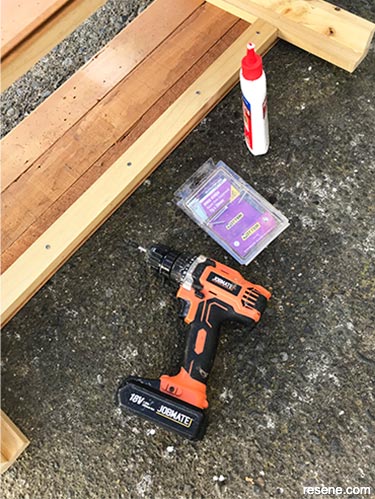
Attach the eight 400mm lengths of timber together at right angles to form the four legs, as shown. Fix these with PVA glue and 40mm screws, drilling pilot holes first.
 Step three
Attach the cut pieces of tongue and groove timber together to form four panels, as shown. Fix these with PVA glue along the tongue and groove joints and use the set square to ensure sides are at ninety degrees. Allow the glue to dry.
 Step four
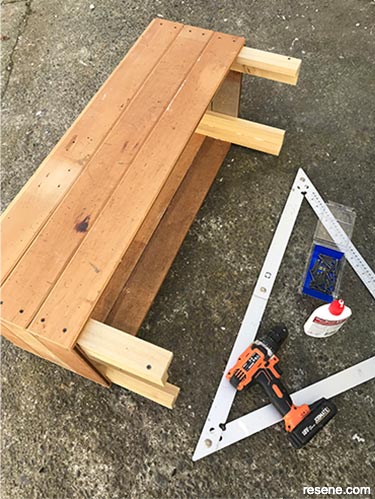
Attach the four legs to the two smaller panels to form the sides of the planter box, as shown, fixing with PVA glue and 40mm screws, drilling pilot holes first.
 Step five
Attach the two remaining panels into position to form the front and back of the planter box, as shown, fixing with PVA glue and 40mm screws, drilling pilot holes first.
 Step six
Measure, mark and cut six 300mm lengths from the plywood strip, and then measure, mark and cut two 730mm lengths from the 45mm x 20mm timber.
 Step seven
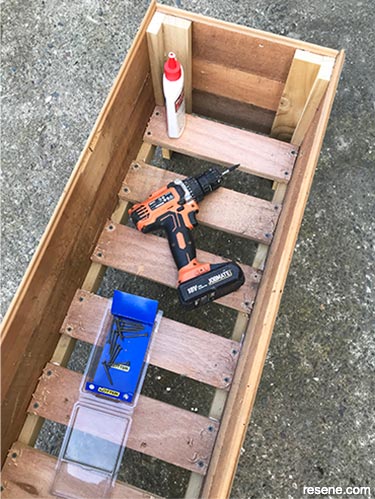
Attach the two 730mm lengths along the inside bottom edge of the front and back of the planter, as shown, fixing with PVA glue and 30mm screws, drilling pilot holes first.
 Step eight
Attach the six pieces of plywood into position to form the base of the planter, as shown, fixing with PVA glue and 40mm screws, drilling pilot holes first. Allow glue to dry.
 Step nine
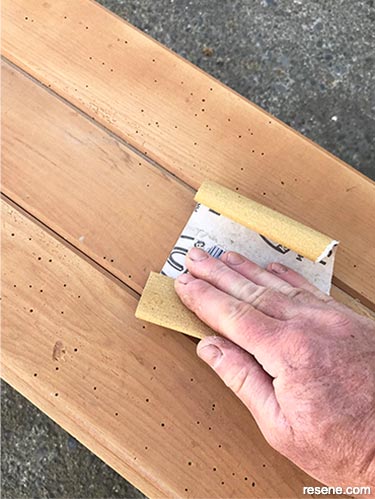
Sand the entire planter and then wipe off any sanding residue with a clean cloth.
 Step ten
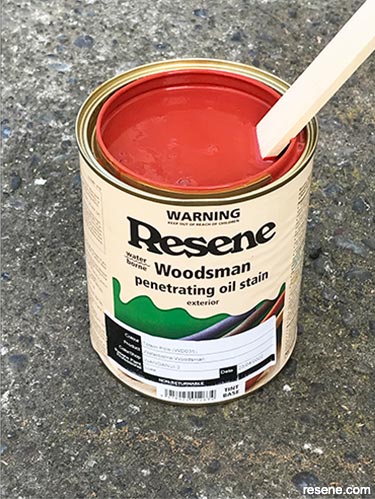
Carefully stir the Resene Woodsman tinted to Resene Totem Pole.
 Step eleven
Apply two coats of Resene Woodsman tinted to Resene Totem Pole to the entire planter, allowing two hours for each coat to dry.
 Step twelve
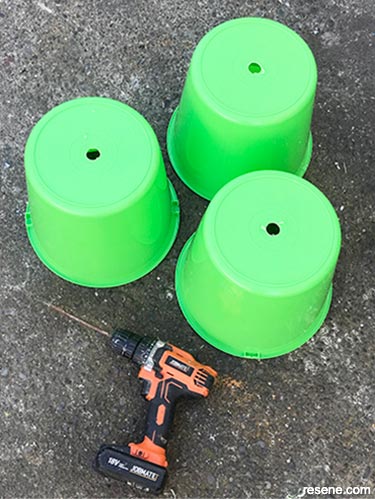
Carefully drill a 20mm drainage hole in the bottom of each plastic bucket. Place the buckets into the planter and then plant up with seasonal salad greens or potted colour.
![]() Get inspired ! Subscribe
Get inspired ! Subscribe ![]() Get saving ! Apply for a DIY card
Get saving ! Apply for a DIY card
![]()
Can't find what you're looking for? Ask us!
Company profile | Terms | Privacy policy | Quality and environmental policy | Health and safety policy
Colours shown on this website are a representation only. Please refer to the actual paint or product sample. Resene colour charts, testpots and samples are available for ordering online. See measurements/conversions for more details on how electronic colour values are achieved.
What's new | Specifiers | Painters | DIYers | Artists | Kids | Sitemap | Home | TOP ⇧

