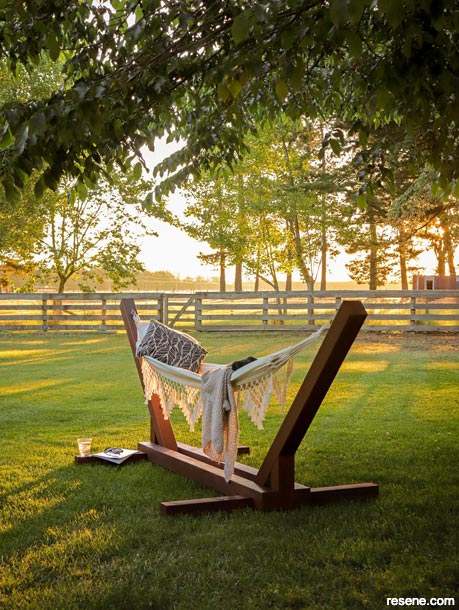
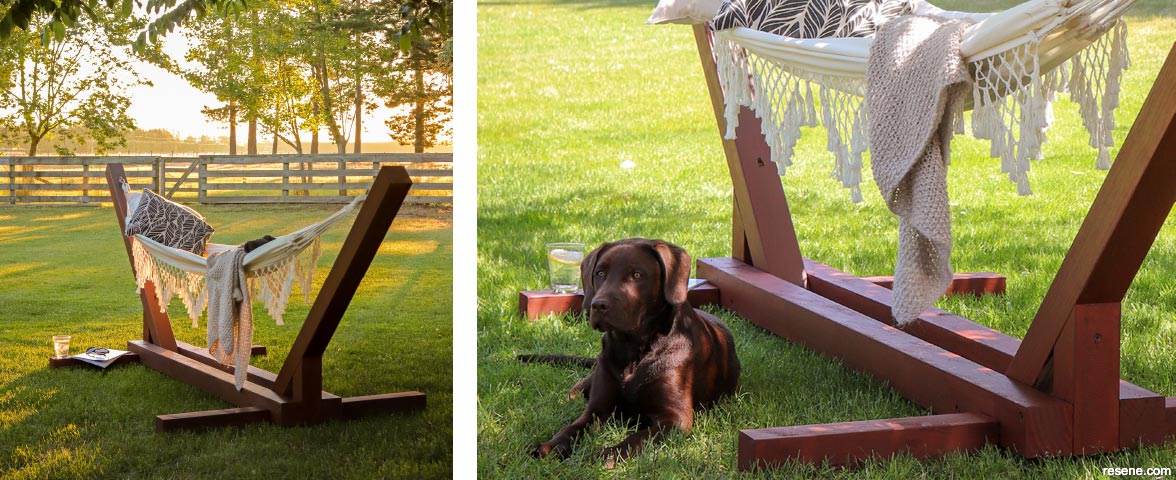
Don't have two strong trees close enough together to hang a hammock? No problem. Build this sturdy hammock stand and create a place to relax in just a few hours.
![]()
Materials:
Tools:
Handy hint: When purchasing your timber, you can get it pre-cut to the correct lengths at Mitre 10.
Top tip: We based our stand size off a total hammock length of 3m (when fully extended). If your hammock is a different length then adjust your measurements to suit.
Here's another idea: Add some wheels to the base to make this stand easily portable.
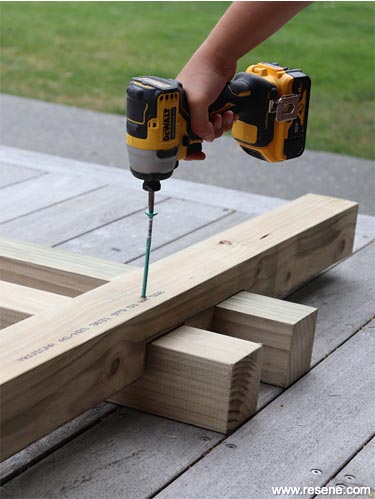
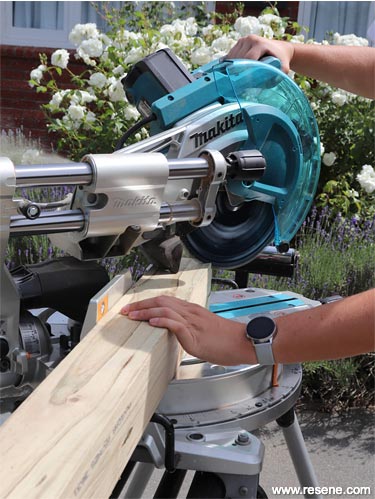 Step one
Using your drop saw, cut one end of the 1500mm and 265mm timber lengths to 45 degrees.
 Step two
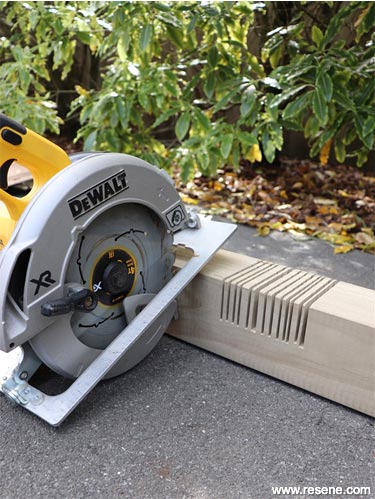
Take both the 1200mm lengths of timber and mark a line 45mm in each direction from the middle (making two lines 90mm apart). Mark two more lines 90mm along to the left and right of these two lines, which creates three 90mm sections on each piece of timber. With a circular saw set to 4cm, cut along the marked lines and make several small cuts in between the left and right sections, creating two notched sections in both pieces of wood.
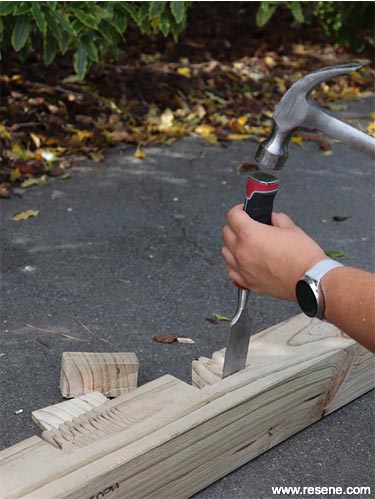 Step three
Using a hammer and chisel, knock out the cut wood slices to create two notches in each 1200mm length of timber.
 Step four
Lay the two 2000mm lengths of timber parallel to each other and position the 1200mm lengths with the notches slotting in at 110mm from each end. Using your 125mm screws and an impact driver, screw the base together at each end.
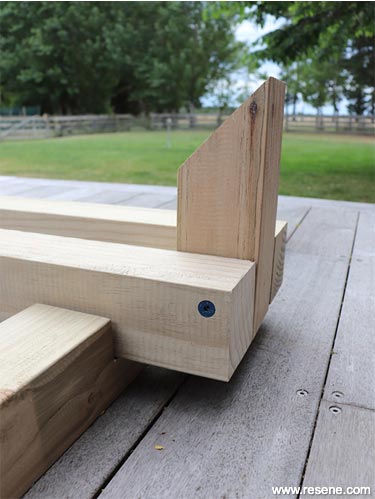 Step five
Flip the base over and attach the angled 265mm lengths of timber in the gap between the 2000mm lengths at each end of the base. Put a long screw in from each side, making sure they are not directly opposite to avoid them touching. you may need someone to hold the timber in place, or you can use large clamps.
 Step six
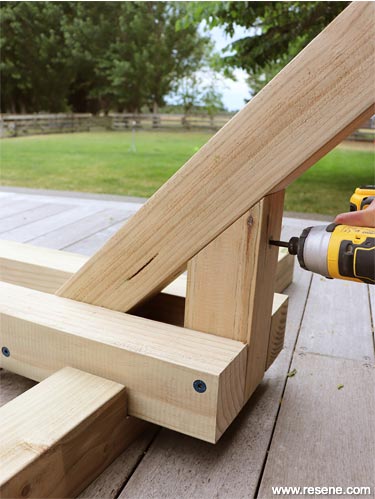
Take the two 1500mm lengths of timber and attach them on an angle as shown. Make sure they are flush with the upright support and aligned at the bottom of the base lengths. Use a 125mm screw from the back of the support as well as 170mm screws from the top and from each side of the base.
 Step seven
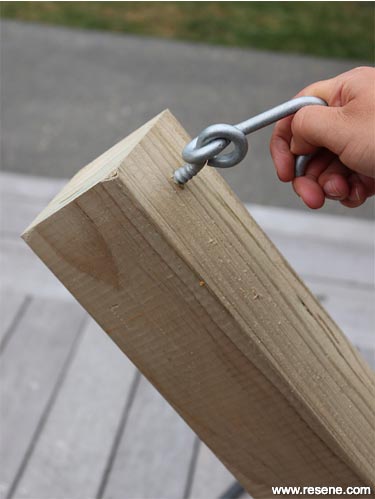
Drill some pilot holes for your hooks on the diagonal beams, about 70mm down from the top, and screw the hooks in.
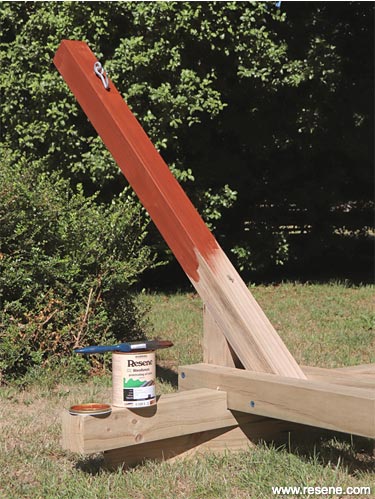 Step eight
Stain your stand with Resene Waterborne Woodsman Penetrating Oil Stain, and allow to dry. Apply a second coat if needed and allow to dry.
 Step nine
Hang the hammock on the stand, lie down and relax!
![]() Get inspired ! Subscribe
Get inspired ! Subscribe ![]() Get saving ! Apply for a DIY card
Get saving ! Apply for a DIY card
![]()
Can't find what you're looking for? Ask us!
Company profile | Terms | Privacy policy | Quality and environmental policy | Health and safety policy
Colours shown on this website are a representation only. Please refer to the actual paint or product sample. Resene colour charts, testpots and samples are available for ordering online. See measurements/conversions for more details on how electronic colour values are achieved.
What's new | Specifiers | Painters | DIYers | Artists | Kids | Sitemap | Home | TOP ⇧

