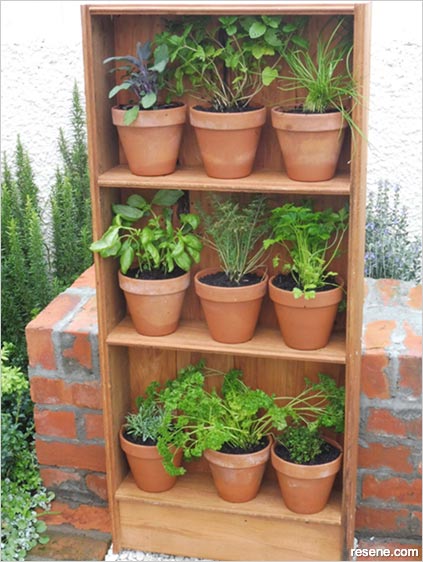
Use reclaimed native timber to create a set of rustic herb shelves.
![]()
To get the look: Mark painted the background stucco wall with Resene AquaShield tinted to Resene Pipi.
Top tip: To complete the rustic look, pot up a selection of your favourite herbs into weathered terracotta pots and place these on the shelves.
Handy hint: Reclaimed untreated timber eventually deteriorates outside. If you want a more permanent outdoor structure, use tanalised timber, such as fence palings, and adjust the measurements accordingly.
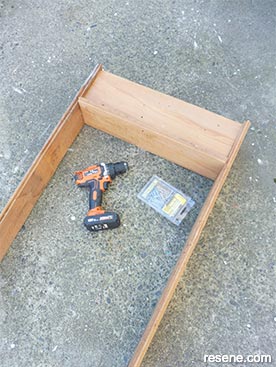
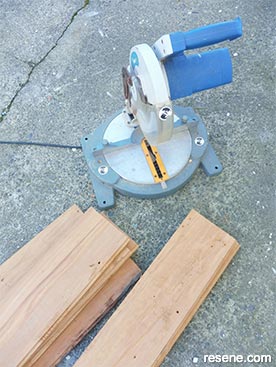 Step one
Measure, mark and cut the timber into six 1200mm lengths and six 500mm lengths. Smooth any rough edges with sandpaper.
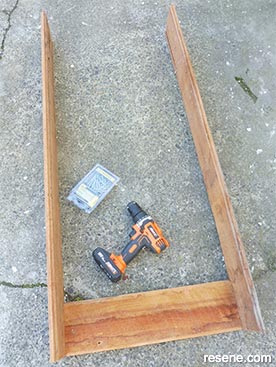 Step two
Attach two of the 1200mm lengths of timber to one of the 500mm lengths of timber, as shown, fixing from the sides with 60mm screws, drilling pilot holes first.
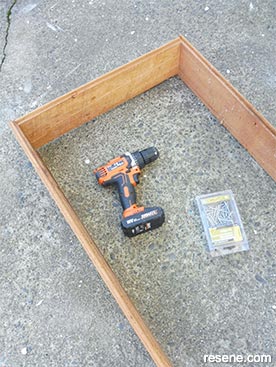
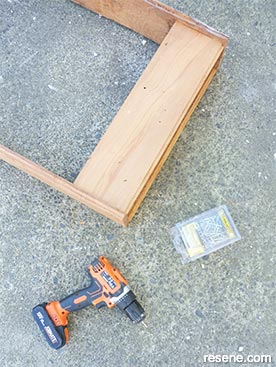 Step three
In the same way, attach a second 500mm length of timber, insetting it about 20mm at each end, as shown.
 Step four
Attach a third 500mm length of timber to form the bottom shelf, again, fixing from the sides with 60mm screws, drilling pilot holes first.
 Step five
Attach a fourth 500mm length of timber to form the top of the herb shelves, as shown. Once again, fix it from the sides with 60mm screws, drilling pilot holes first.
 Step six
In the same way, attach the two remaining 500mm lengths of timber to form the two middle shelves, as shown.
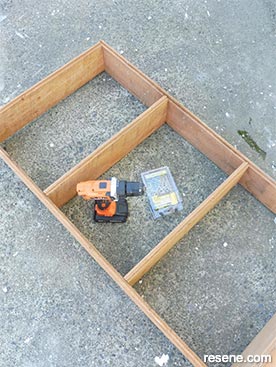
 Step seven
Ensure that the sides of the shelving unit are at 90 degrees using the set square and then attach the four remaining 1200mm lengths of timber into position, as shown, fixing to the back edge of each shelf using 60mm screws, drilling pilot holes first.
 Step eight
Sand the entire unit, smoothing any rough edges and corners, and then brush off any sanding residue with a hand brush.
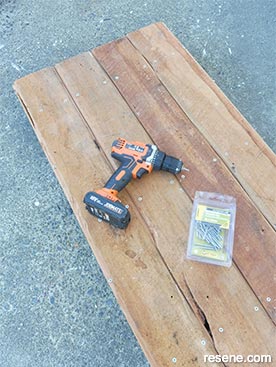
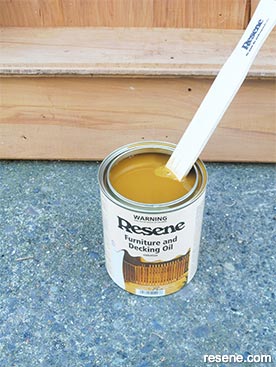 Step nine
Carefully stir the Resene Furniture and Decking Oil.
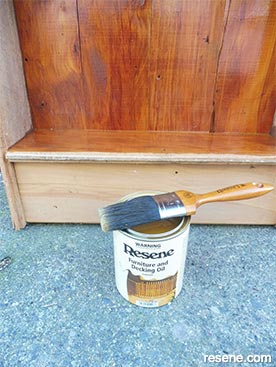 Step ten
Apply one generous coat of Resene Furniture and Decking Oil to the entire unit, allowing it to fully penetrate the wood. Allow to dry for 24 hours.
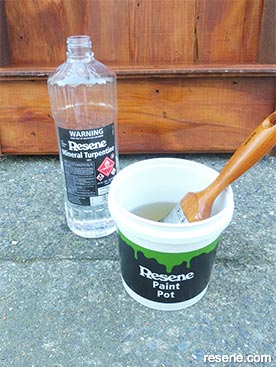 Step eleven
Clean the paintbrush using Resene Mineral Turpentine.
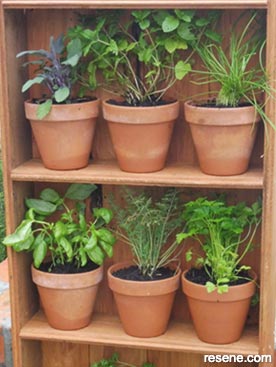 Shelf and plant detail
![]() Get inspired ! Subscribe
Get inspired ! Subscribe ![]() Get saving ! Apply for a DIY card
Get saving ! Apply for a DIY card
![]()
Can't find what you're looking for? Ask us!
Company profile | Terms | Privacy policy | Quality and environmental policy | Health and safety policy
Colours shown on this website are a representation only. Please refer to the actual paint or product sample. Resene colour charts, testpots and samples are available for ordering online. See measurements/conversions for more details on how electronic colour values are achieved.
What's new | Specifiers | Painters | DIYers | Artists | Kids | Sitemap | Home | TOP ⇧

