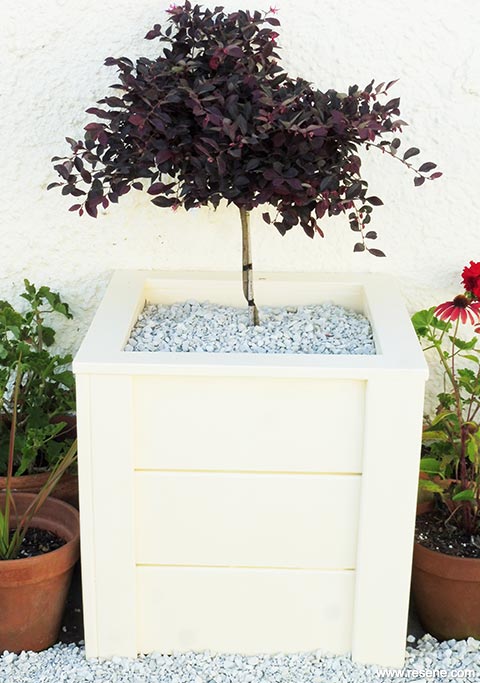
Build an attractive wooden planter box for your garden.
![]()
To get the look: The background wall was painted with Resene Lumbersider tinted to Resene Dutch White.
Here's another idea: Leave out the plywood base and this planter could also be used as a mini raised bed. Simply fill with topsoil or potting mix and position directly on bare soil.
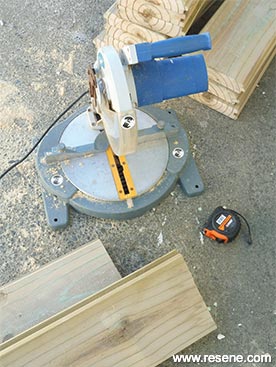 Step one
Measure, mark and cut the timber and plywood to the dimensions listed above.
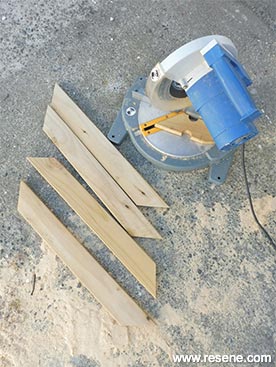 Step two
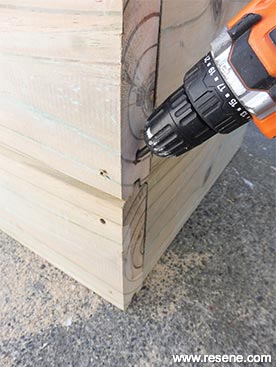
Mitre the ends of the four 580mm lengths of timber to 45 degrees, as shown.
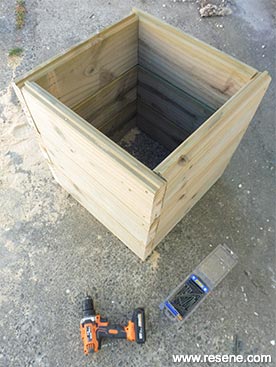 Step three
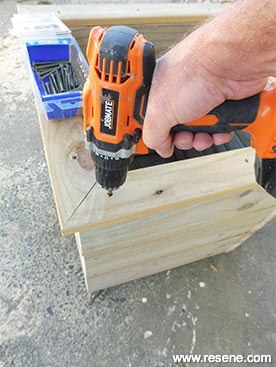
Assemble the 12 pieces of tongue and groove landscaping timber to form the main body of the planter, as shown. Fix at each corner with 65mm screws, countersinking the screw heads.
 Step four
Fix each layer of tongue and groove together at each corner with a 65mm screw, driven in at an angle, as shown. Again, countersink the screw head.
 Step five
Turn the planter over so that the ‘groove’ edge is uppermost and attach the four mitred pieces of timber to the top, as shown. Fix with 65mm screws, countersinking the screw heads.
 Step six
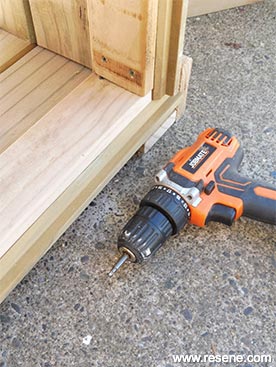
Attach the eight 550mm lengths of timber along each corner edge of the planter, as shown. Fix with 65mm screws, countersinking the screw heads.
 Step seven
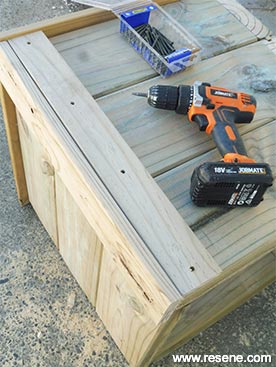
Attach the four 410mm lengths of timber along the inside bottom edge of the planter, as shown – this will support the plywood base. Fix with 65mm screws, countersinking the screw heads.
 Step eight
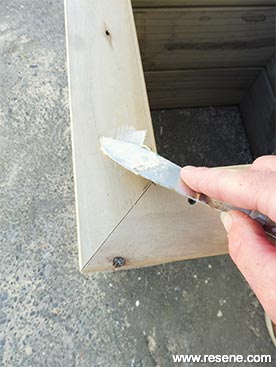
Fill the screw heads and any other imperfections with exterior filler and allow to dry.
 Step nine
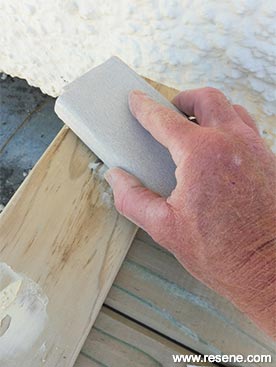
Sand the filler and smooth any rough edges on the planter and plywood with sandpaper. Wipe off any sanding residue with a clean cloth.
 Step ten
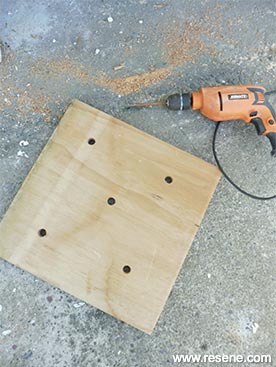
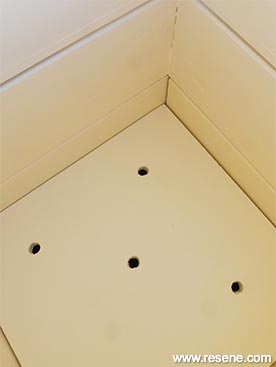
Drill five 20mm drainage holes in the plywood, as shown, smoothing any rough edges with sandpaper.
 Step eleven
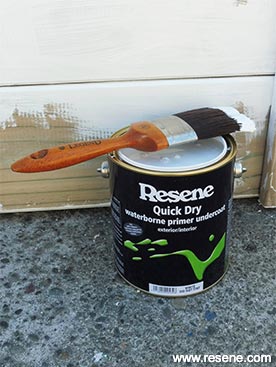
Apply one coat of Resene Quick Dry to all surfaces of the planter and the piece of plywood. Allow to dry.
 Step twelve
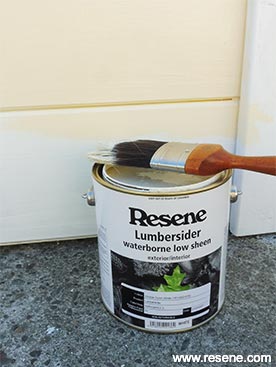
Apply two coats of Resene Lumbersider tinted to Resene Double Dutch White to all surfaces of the planter and the piece of plywood. Allow two hours for each coat to dry.
 Step thirteen
Place the piece of plywood in the base of the planter. To finish off we filled the planter with good quality potting mix, planted a standard Loropetalum chinensis ‘Plum Delight’ and topped with white gravel mulch.
 Plant detail
Loropetalum chinensis ‘Plum Delight’
![]() Get inspired ! Subscribe
Get inspired ! Subscribe ![]() Get saving ! Apply for a DIY card
Get saving ! Apply for a DIY card
![]()
Can't find what you're looking for? Ask us!
Company profile | Terms | Privacy policy | Quality and environmental policy | Health and safety policy
Colours shown on this website are a representation only. Please refer to the actual paint or product sample. Resene colour charts, testpots and samples are available for ordering online. See measurements/conversions for more details on how electronic colour values are achieved.
What's new | Specifiers | Painters | DIYers | Artists | Kids | Sitemap | Home | TOP ⇧

