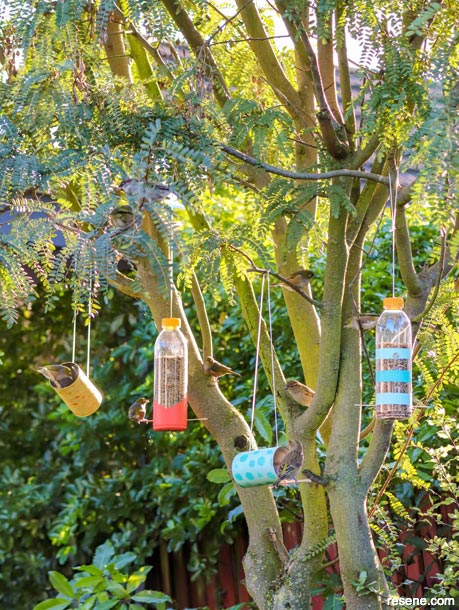
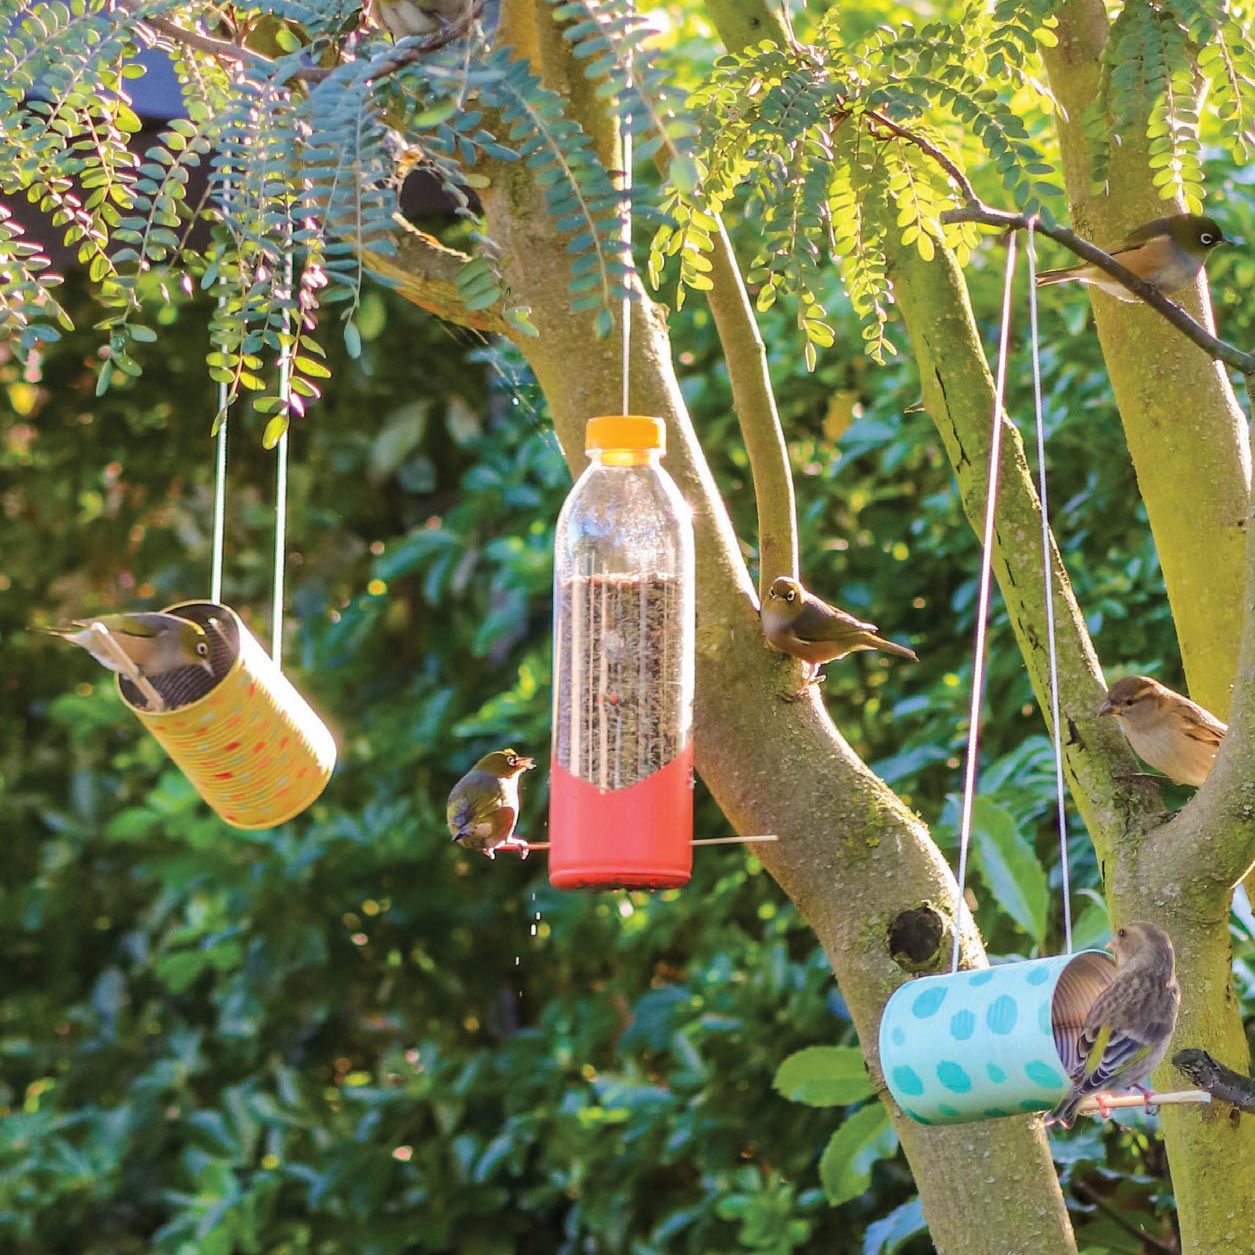
Colourful upcycled bird feeders
With winter an especially tough time for birds to find naturally occurring food, these colourful upcycled bird feeders will be a real treat.
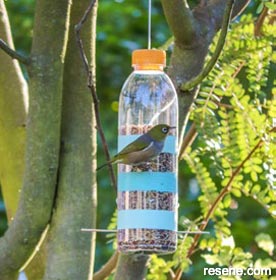
Vertical feeder
You will need:
- Lidded plastic bottle, tennis ball tube, juice carton or similar
- Resene Waterborne Smooth Surface Sealer
- Paintbrush
- Masking tape (optional)
- 2 skewers and string
- Scissors and drawing pin
- Bird seed and funnel
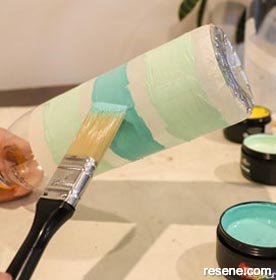
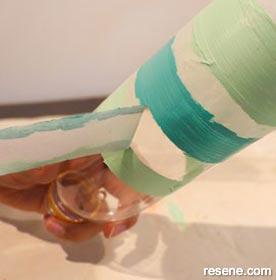
Painting tips: Try an ombre painting effect, like the fading hues you see during sunrise. Simply choose your favourite Resene testpot colour and paint on. For the next stripe, add a little white from a Resene white testpot and paint the next stripe. Add more white for each stripe. Your main colour will get lighter and lighter as you go.
If you'd like your bird feeder to blend into the bush, create a camouflage effect by using three or four testpots in different shade of green.
Instructions
How to build a vertical bird feeder:
 Step one
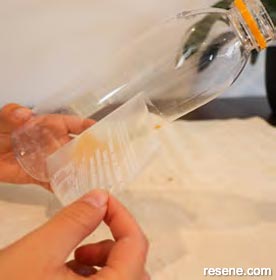
Remove all the stickers and make sure your container is clean and dry. For this project, we will use the plastic bottle option.
 Step two
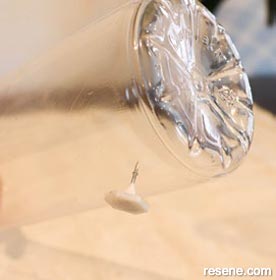
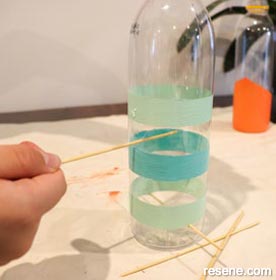
Use a drawing pin to poke a small hole into the end of the plastic bottle, a few centimetres up from the bottom, as shown. Now make an identical hole on the opposite side to first one. Repeat the process 10cm higher, but not directly above the first set. These holes will be where you add your perches.
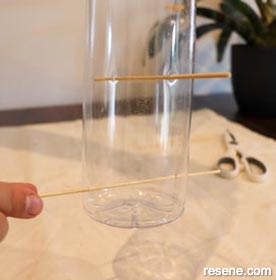 Step three
Slide a skewer through the holes, making sure they fit snuggly. If the holes are too big, the sticks will wiggle around too much and make the birds nervous. Cut the skewers shorter if the bottle you’re using is narrow.
 Step four
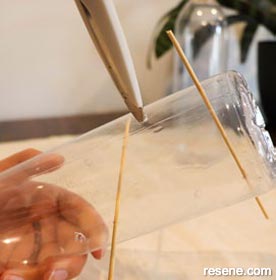
Using the drawing pin, poke a small hole a few centimetres above each perch. Use the tip of the scissors to make it a bit bigger. These will be the feeding holes, so should be small enough for the bird seed not to fall out, but big enough for the birds to feed through.
 Step five
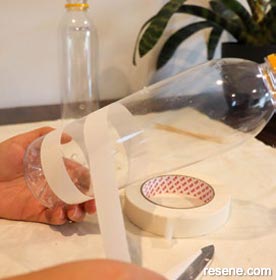
Remove the skewers and use tape to mark out a pattern. Try angles, solid blocks or stripes. (Skip this step if you want to paint freehand.)
 Step six
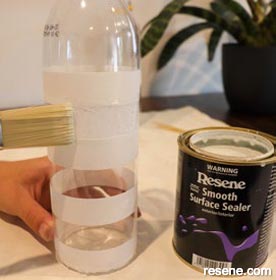
Prime your bottle using Resene Waterborne Smooth Surface Sealer and allow to dry.
 Step seven
Add pops of colour to your feeder! Leave some of the plastic clear so that you can see when it needs refilling.
 Step eight
Wait until the paint is completely dry and then slowly remove your tape.
 Step nine
Slide the skewer perches back into position.
 Step ten
Poke a hole through the lid, thread the string through and then tie a knot, as shown. Create a loop on the other end, this is how your bird feeder will hang so make sure it’s the right length for where you will be hanging it.
 Step eleven
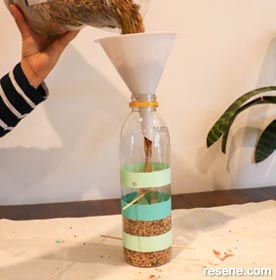
Carefully fill your feeder with bird seed, using a funnel, and screw on the lid.
 Step twelve
Hang your new feeder somewhere that is safe and easy for the birds to access it. We’d love to see your creations!
Horizontal feeder
With winter an especially tough time for birds to find food in the wild, these bird feeders will draw them to your garden
You will need:
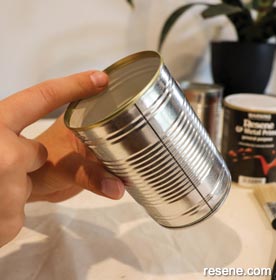
- Empty tin can, jar or similar
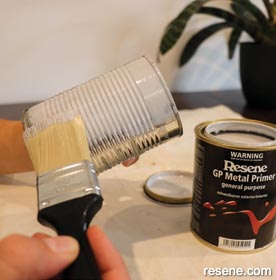
- Resene GP Metal Primer
- Paintbrush
- Stick (to use as perch)
- Drill
- Scissors and string
- Hot glue gun
- Bird seed
Top tip: It could take a few days for birds to notice the new feeder and get used to it. To improve your chances of it being found, hang it out of harm’s way and somewhere noticeable to birds flying past.
Another idea: Make your own bird seed for some extra fun! Have a look online for what birds in your area like to eat.
Instructions
How to build a horizontal bird feeder:
s
 Step one
Remove any labels and wash your container. If you are using a tin can, like us, make sure there are no sharp edges that could hurt the birds.
 Step two
Prime your tin using Resene GP Metal Primer and let dry.
 Step three
Add a splash of colour! If you are applying multiple coats or colours, make sure you wait for each layer to dry properly before adding the next one.
 Step four
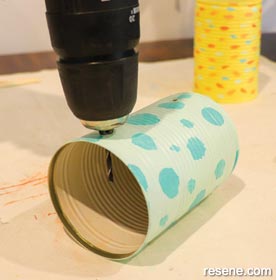
Once the paint is dry, lie the can down on its side and ask a grown – up to drill some holes in the top, in line with each other.
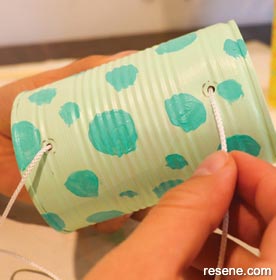 Step five
Cut some string and thread each end through the new holes, then tie a knot. This is what you will use to hang the bird feeder so make sure it’s the right length.
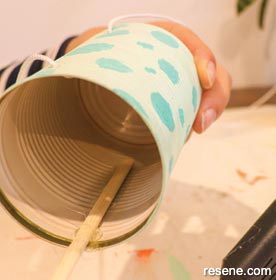 Step six
Use the hot glue gun to carefully glue the stick to the inside of the can, on the opposite side to the string, as shown. This will be the perch for the birds so make sure it sticks out far enough for them to sit on.
 Step seven
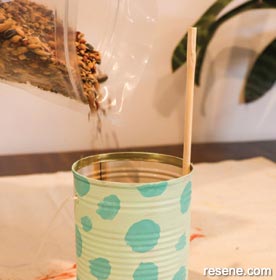
Once the glue is dry it’s time to fill your bird feeder with food. Don’t fill to the top as the feeder will hang on its side.
 Step eight
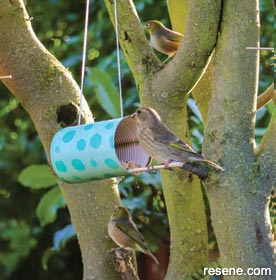
Find a spot that’s visible from inside so you can watch the birds enjoy their new food while you keep warm. Make sure not to hang it too close to a window as birds cannot see glass and you don't want any collisions. Hang your new feeder on a slight angle so the food doesn't tip out.