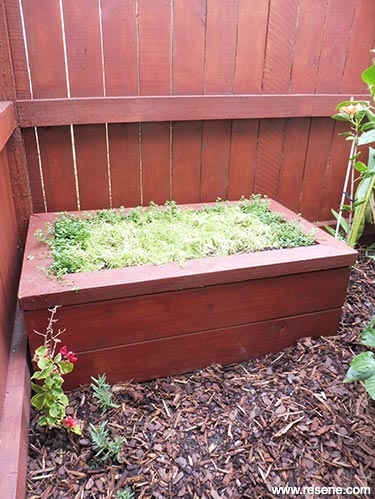
Fragrant bench
This little seat provides the perfect place to stop for a well-earned rest.
You will need
- 90mm exterior screws
- 100mm x 50mm treated timber cut to the following lengths:
- Tongue and groove landscaping timber cut to the following lengths:
- 4 x 1200mm (front and back of bench)
- 4 x 600mm (sides of bench)
- Clean dry brush
- Electric sander
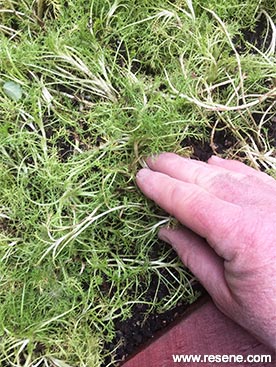
- Fragrant mat-forming plants – we used a combination of lawn chamomile and pizza thyme
- Good quality potting mix or topsoil
- Paint stirrer and paintbrush
- Pencil
- Resene Waterborne Woodsman tinted to Resene Warm Kwila
- Saw
- Screwdriver
- Spirit level
- Tape measure
Handy hint: Keep your bench well watered for the first few weeks and don’t use it until the plants are settled and established.
To get the look: Mark also stained the background fence with Resene Waterborne Woodsman tinted to Resene Warm Kwila.
Here's another idea: This project could also be used to create a grass bench by laying cut turf or sowing grass seed over the seat area.
How to build a fragrant garden bench
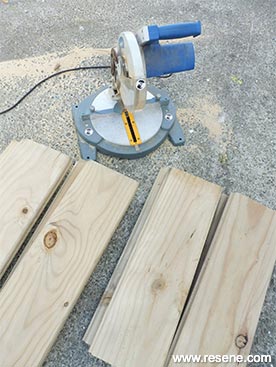 Step one
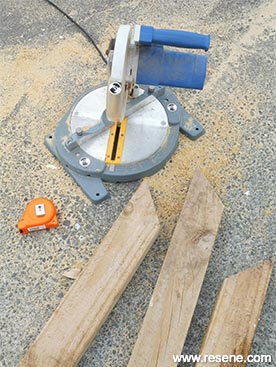
Measure, mark and cut the tongue and groove landscaping timber to the lengths listed above.
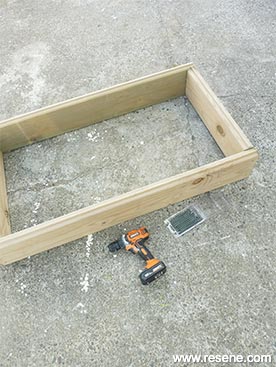 Step two
On a flat surface, fit two of the 1200mm lengths and two of the 600mm lengths of tongue and groove landscaping timber together, as shown, to form the first level of the bench. Fix at each corner with 90mm screws.
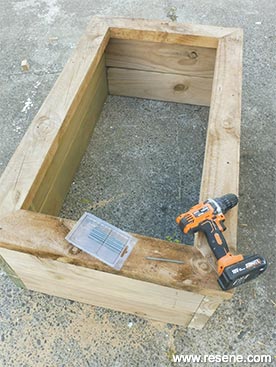
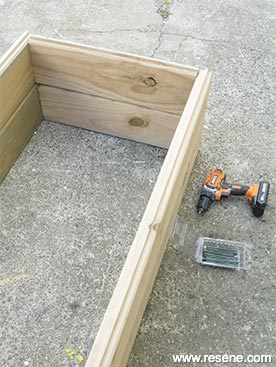 Step three
In the same way, fit the remaining lengths of tongue and groove landscaping timber together to form the second level of the bench. Again, fix at each corner with 90mm screws and then fix the two levels together with 90mm screws drilled down at an angle at each corner.
 Step four
Mitre each end of the four pieces of 100mm x 50mm timber at 45 degrees, as shown.
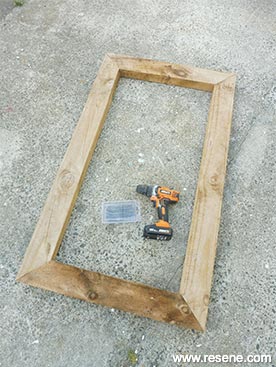 Step five
Fit these mitred lengths together to form a rectangular frame, as shown. Fix at each corner with two 90mm screws.
 Step six
Fit the frame into position on top of the bench, fixing with 90mm screws.
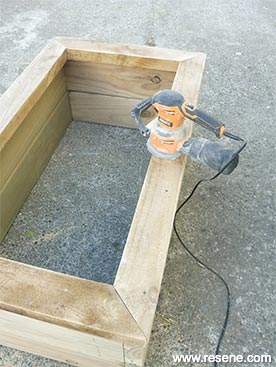 Step seven
Lightly sand the entire outside and top edge of the bench, softening any edges and corners. Brush off any sanding residue with a clean dry brush.
 Step eight
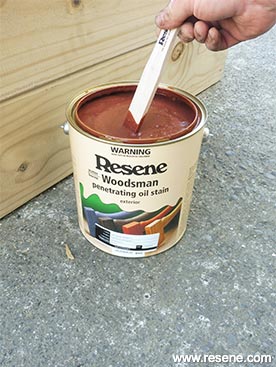
Carefully stir the Resene Waterborne Woodsman tinted to Resene Warm Kwila.
 Step nine
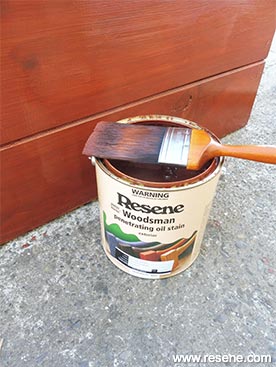
Apply two coats of Resene Waterborne Woodsman tinted to Resene Warm Kwila to the bench allowing two hours for each coat to dry.
 Step ten
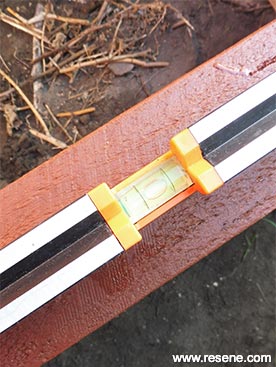
Place the bench into its final position using the spirit level to ensure each side is level.
 Step eleven
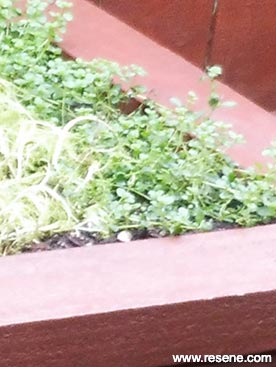
Fill the bench with good quality potting mix or topsoil and then gently level and firm down the soil. Plant up with a selection of your favourite mat-forming scented plants.
 Aftercare
Plants can be lightly trimmed, as necessary, to keep them flat and within the confines of the top edge.