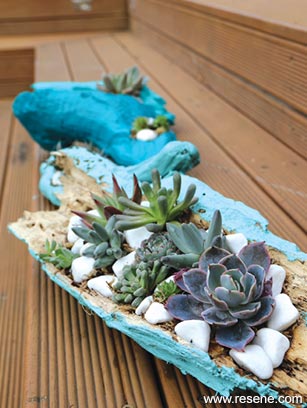
Collecting driftwood is a fun activity and keeps the kids entertained. Why not try making these planters in the holidays?
![]()
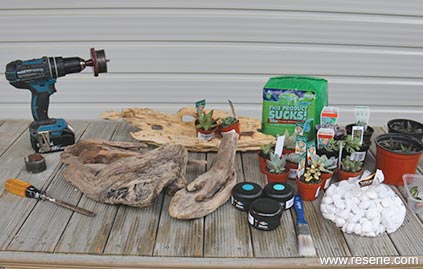
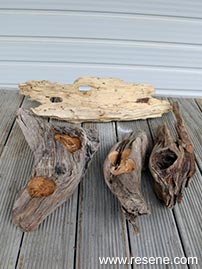
You will need: 3–4 pieces of good- sized driftwood (natural holes and dips are encouraged but not necessary), chisel, decorative pebbles or stones (found around your garden), drill with hole saw attachment, drop cloth to protect your work surface, hammer, paintbrushes, selection of interesting succulents and succulent cuttings, selection of Resene testpots and sphagnum moss.
Marvellous moss! When planting succulents, moss is a great alternative to soil. The sphagnum moss we used holds water well for a short amount of time but will then dry out fast. This makes it ideal for succulents and other plants that hate having wet roots.
Before you start: Collecting driftwood is a great activity to do with the kids! This project needs sizeable pieces, so why not have a competition to see who can find the biggest piece?
When you get the wood home, kill any bugs that might have been in the sea water by having an adult soak the wood in bleach for three days before thoroughly rinsing it off and drying it out in the sun. Alternatively, driftwood can be sanitised in the oven at 100°C.
Top safety tips:
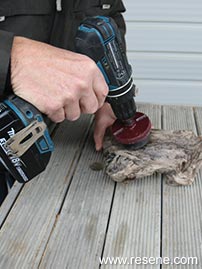
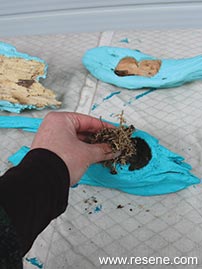
Step one: Drill holes into the driftwood using the hole saw drill attachment. Drill one to three holes per piece of wood. Get creative and do a few close together to create a bigger hole!
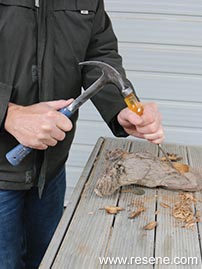
Step two: Chisel out the insides of the shape made with the drill. This should be easy depending on how porous your wood is. If your wood is particularly hard, use a hammer, bringing the hammer head down on the end of the chisel. Make sure someone who knows what they’re doing helps with this part.
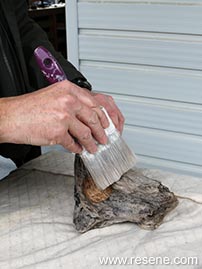
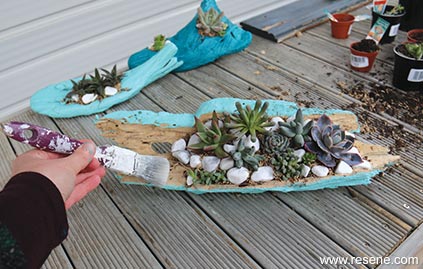
Step three: To avoid sand and wood getting into your paint, brush the wood down with a dry paintbrush before you start to paint.
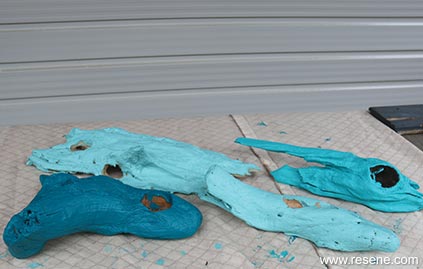
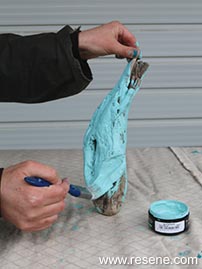
Step four: Paint the driftwood in your chosen colours: we used Resene Blue Lagoon, Resene Gulf Stream and Resene Java. The more porous the wood, the more paint it will soak up, so more than one coat might be needed.
Step five: once the paint is dry, half fill holes with a layer of moss.
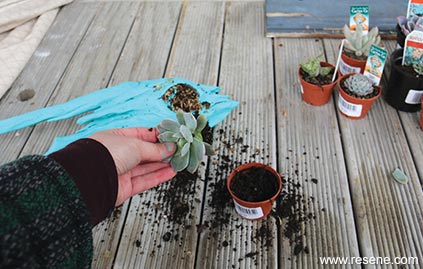
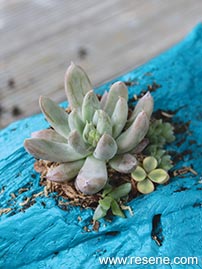
Step six: Choose a succulent that will fit in the hole with room to spare. Remove it from its container and gently massage its roots to remove the majority of the soil.
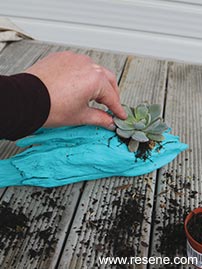
Step seven: Place the succulent on top of the moss and add more moss around it. Repeat the process until you are satisfied with your arrangement. For some cuttings, you may be able to slide them directly into the moss.
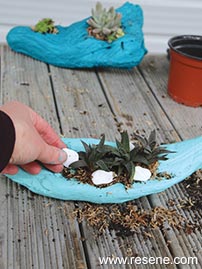
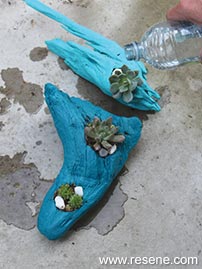
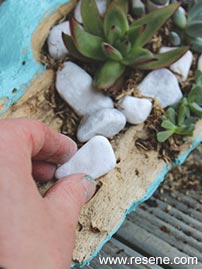
Step eight: To hold your succulents and moss in place, place a few stones around your succulents. you can continue to place stones around the moss as decoration.
Step ten: Water the succulents thoroughly to help settle them into their new home. Water may soak into the wood or come out the bottom, so take care when watering.
Paint tips:
![]() Get inspired ! Subscribe
Get inspired ! Subscribe ![]() Get saving ! Apply for a DIY card
Get saving ! Apply for a DIY card
![]()
Can't find what you're looking for? Ask us!
Company profile | Terms | Privacy policy | Quality and environmental policy | Health and safety policy
Colours shown on this website are a representation only. Please refer to the actual paint or product sample. Resene colour charts, testpots and samples are available for ordering online. See measurements/conversions for more details on how electronic colour values are achieved.
What's new | Specifiers | Painters | DIYers | Artists | Kids | Sitemap | Home | TOP ⇧

