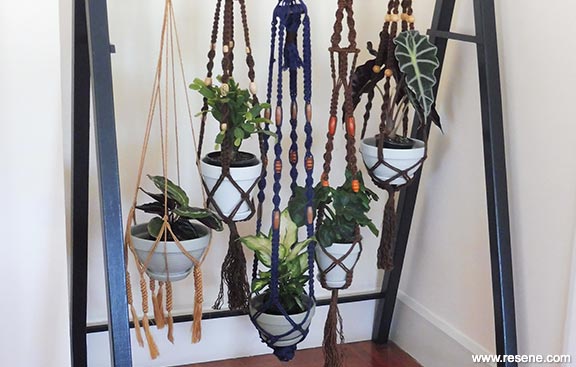
Indoor plant hangout
Show off your favourite plants on this easy-to-make display.
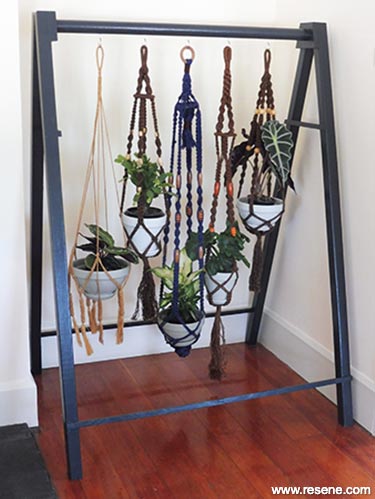
Many thanks to Nicky Gerard of Whanganui for supplying the macramé pot hangers.
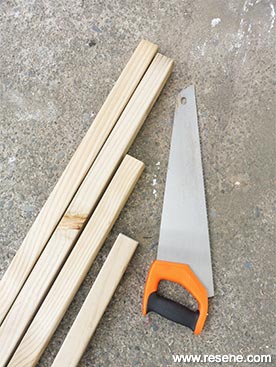
You will need:
- 45mm screws & 75mm screws
- 20mm x 200mm dressed timber (approx 250mm)
- 45mm dowel cut to 990mm
- 50mm x 50mm dressed timber (approx 6.4m)
- 10mm x 20mm dressed timber (approx 2.9m)
- Clamp
- Drill with drill bits, dowel, filler
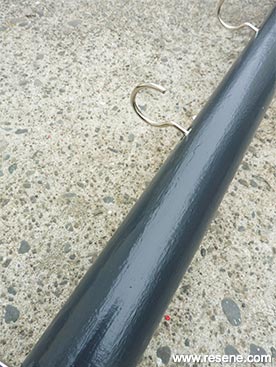
- Fve large cup hooks
- Five macramé pot hangers
- Five terracotta pots with terracotta saucers
- Long straight edge
- Paintbrush, pencil
- Putty knife or similar
- PVA glue
- Sandpaper
- Saw
- Screwdriver
- Tape measure
Top tip: To make a smaller or more upright version of this, simply shorten the legs or position them at a more acute angle.
To get the look: Mark painted the background wall with Resene SpaceCote Flat tinted to Resene Half Dutch White.

 Step one
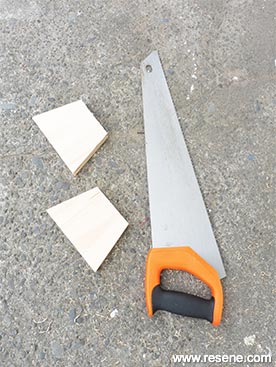
Measure, mark and cut two pieces from the 20mm x 200mm timber, as shown. The top edge should measure 90mm, the bottom edge should measure 140mm and the distance from top to bottom edge (at 90 degrees) should measure 100mm. Smooth rough edges with sandpaper.
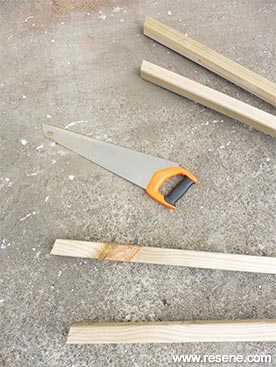
 Step two
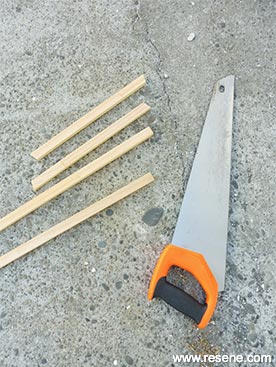
Measure, mark and cut four 1600mm pieces of 50mm x 50mm timber. Smooth rough edges with sandpaper.
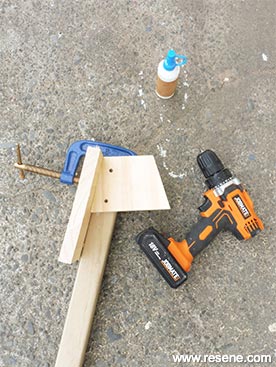 Step three
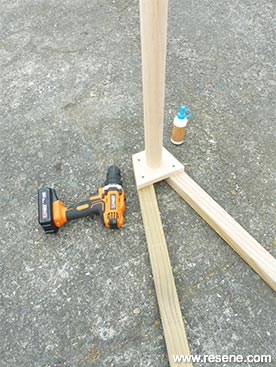
Clamp the offcut of 20mm x 200mm timber to the top of one of the 1600mm lengths and position one of the pieces of timber from step one, as shown. Fix with PVA glue and 45mm screws. Drill pilot holes first and countersink the screw heads.
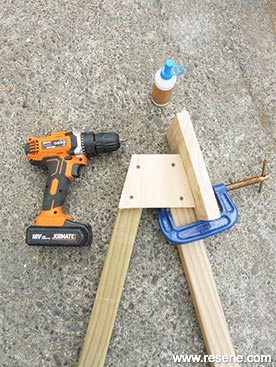 Step four
Repeat step three with a second of the 1600mm lengths to form a ‘V’ shape. Repeat steps three and four to form a second ‘V’ shape.
 Step five
Stand one of the ‘V’ shapes (with the apex at the top) on a flat surface and place the long straight edge across the bottom of each leg. Use this to rule a cutting line at the base of each leg. Repeat using the second ‘V’ shape and then saw along these angled cutting lines, as shown. Smooth rough edges with sandpaper.
 Step six
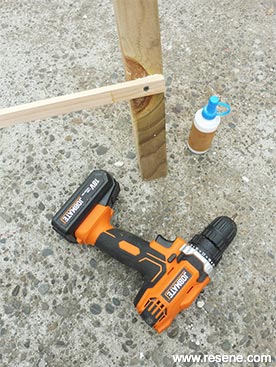
Fix one end of the dowel into position, as shown, using PVA glue and a 75mm screw. In the same way, fix the second end of dowel into position.
 Step seven
Measure, mark and cut two 1120mm lengths of 10mm x 20mm timber and two 300mm lengths. Note that the ends on the smaller pieces are angled to match the angles of the legs. Smooth rough edges with sandpaper.
 Step eight
Attach the longer pieces along the back and front of the stand (200mm up from the base of each leg) and the shorter pieces at each side (400mm down from the top of each leg). Fix with PVA glue and 45mm screws. Again drill pilot holes first and countersink the screw heads. Allow glue to dry and then fill all countersunk screw heads with filler. Once dry, sand the filled areas smooth.
 Step nine
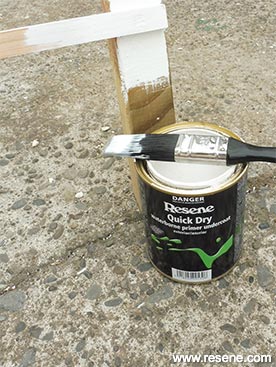
Apply one coat of Resene Quick Dry to the entire stand and allow to dry.
 Step ten
Apply two coats of Resene Lustacryl tinted to Resene Twilight Zone to the entire stand, allowing two hours for each coat to dry.
 Step eleven
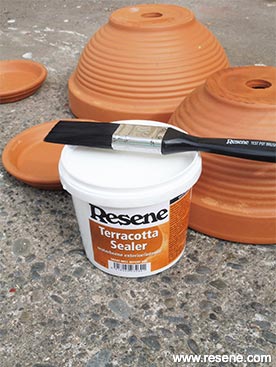
Apply one coat of Resene Terracotta Sealer to all surfaces of the terracotta pots and saucers. Allow to dry.
 Step twelve
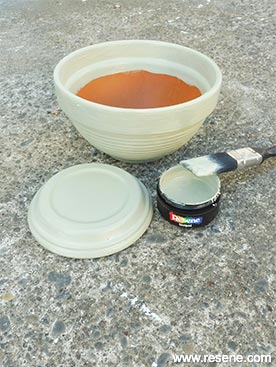
Paint each terracotta pot and saucer with two coats of a different shade of the five Resene Lemon Grass testpots, allowing two hours for each coat to dry.*
Step thirteen
Fix the five cup hooks at even intervals along
the underside of the dowel, drilling pilot holes
first. Hang a macramé hanger from each of the
cup hooks and then fill the painted pots with
a selection of indoor plants.
*To prevent the pots from sticking to the saucers don’t paint the base of each pot or the inside of each saucer.