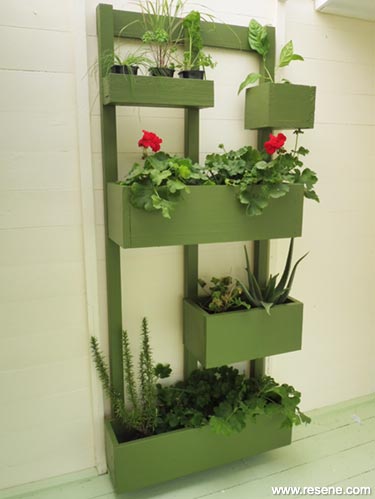
A place for potted plants
Go vertical with this easy-to-build plant display stand – perfect for showing off your potted beauties.
You will need:
- 50mm x 50mm treated timber (approx. 5.4m)
- 20mm x 90mm treated timber (approx. 1.4m) – we used decking
- Assortment of 25mm thick planks, and 20mm thick decking to create the boxes.
- 50mm galvanised nails
- 65mm exterior screws
- Drill with 13mm drill bit
- Hammer
- Paintbrush
- Pencil
- PVA glue
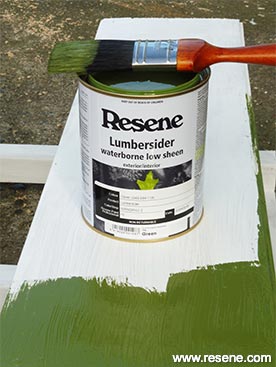
To get the look: Mark painted the background shed wall with Resene Lumbersider tinted to Resene Half Dutch White.
Handy hint: We used an assortment of reclaimed and leftover timber, including some untreated, in this project but for a more permanent structure, it would pay to use only appropriately treated timber.

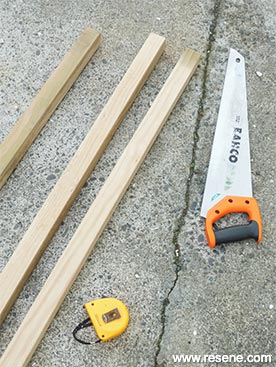 Step one
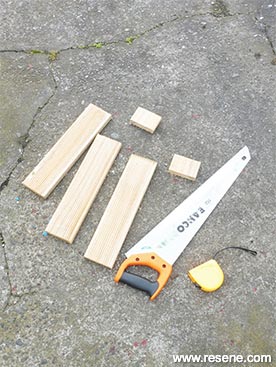
Measure, mark and cut the 50mm x 50mm timber into three 1800mm lengths. Smooth rough edges with sandpaper.
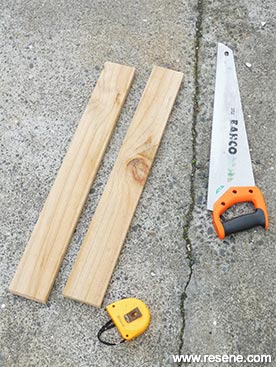 Step two
Measure, mark and cut the 20mm x 90mm timber into two 700mm lengths. Smooth rough edges with sandpaper.
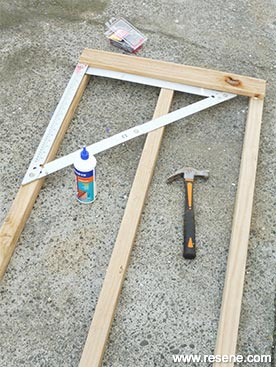 Step three
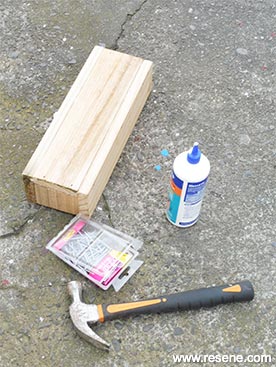
Attach the three 50mm x 50mm lengths of timber together at the top and bottom using the two 20mm x 100mm lengths of timber. Use a set square to ensure they are at 90 degrees, fixing with PVA glue and 50mm nails.
 Step four
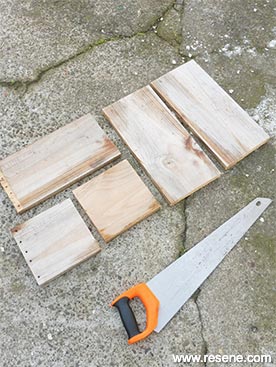
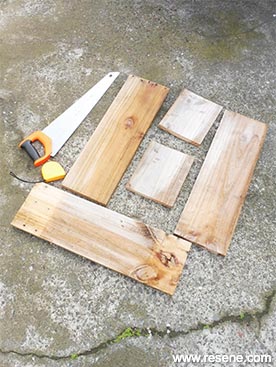
Measure, mark and cut five pieces of 25mm thick timber into the following sizes: 420mm x 200mm (x 2), 195mm x 200mm (x 2) and 195mm x 370mm. Smooth rough edges with sandpaper.
 Step five
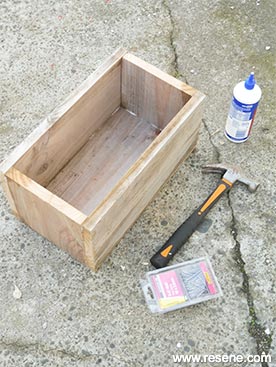
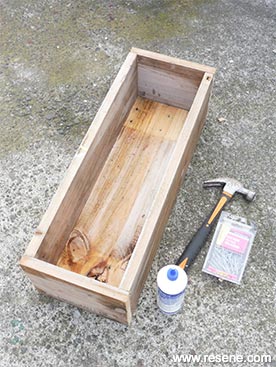
Assemble these pieces to form a rectangular box, as shown, fixing together with PVA glue and 50mm nails.
 Step six
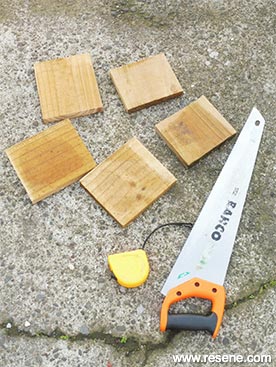
Measure, mark and cut five pieces of 25mm thick timber into the following sizes: 155mm x 180mm (x 3) and 155mm x 130mm (x 2). Smooth rough edges with sandpaper.
 Step seven
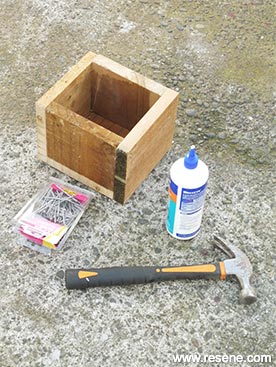
Assemble these pieces to form a rectangular box, as shown, fixing together with PVA glue and 50mm nails.
 Step eight
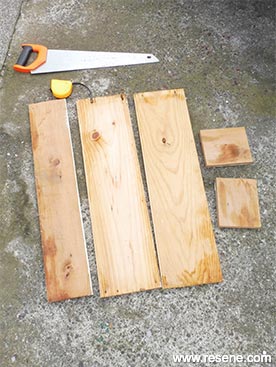
Measure, mark and cut five pieces of 25mm thick timber into the following sizes: 640mm x 200mm (x 3) and 250mm x 200mm (x 2). Smooth rough edges with sandpaper.
 Step nine
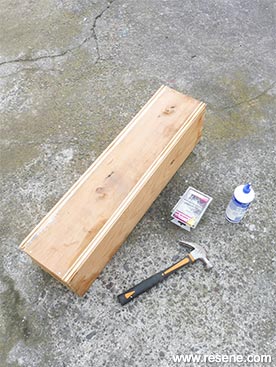
Assemble these pieces to form a rectangular box, as shown, fixing together with PVA glue and nails.
 Step ten
Measure, mark and cut five pieces of 25mm timber into the following sizes: 200mm x 770mm (x 2), 175mm x 150mm (x 2) and 150mm x 770mm. Smooth rough edges with sandpaper.
 Step eleven
Assemble these pieces to form a rectangular box, as shown, fixing together with PVA glue and nails.
 Step twelve
Measure, mark and cut five pieces of 20mm timber into the following sizes: 370mm x 90mm (x 3) and 90mm x 70mm (x 2). Smooth rough edges with sandpaper.
 Step thirteen
Assemble these pieces to form a rectangular box, as shown, fixing together with PVA glue and nails.
 Step fourteen
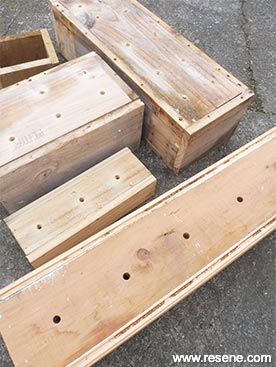
Drill 13mm drainage holes in the bottom of each box, as shown.
 Step fifteen
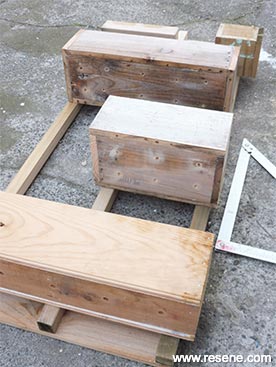
Fix the boxes to the back support frame using 65mm screws (drilled at an angle through the back of each box). Ensure they are fairly evenly spaced and use the set square to ensure they’re level.
 Step sixteen
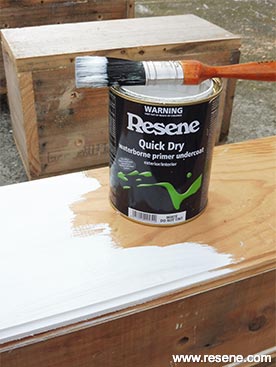
Apply one coat of
Resene Quick Dry to the plant display stand and allow to dry.
 Planter box closeup
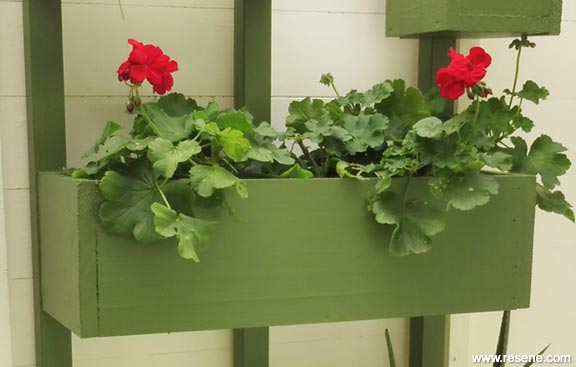 Detail of horizontal planter box
 Step seventeen