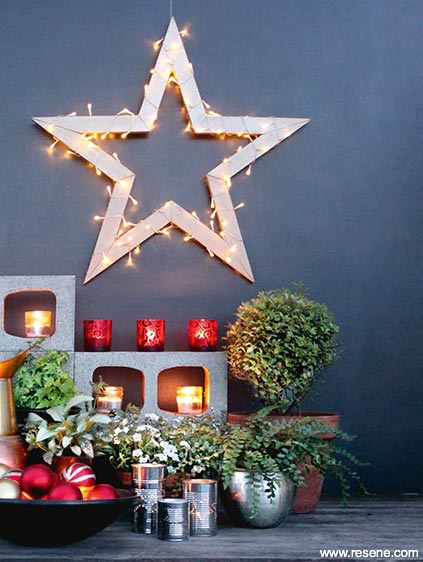
You will need:
Wooden star: 3.5m - 45mm x 20mm pine or similar, 12 x 40mm x 40mm corner brace brackets , 6g x 16mm screws, hook, pencil, ruler, straight edge, wood glue , filler and sandpaper, drop saw or handsaw, Resene Quick Dry Primer, Resene test pots, adhesive velcro strip or spots, jig: 250mm x 250mm ply offcut, batten offcut, protractor, pencil, screws, 5m (approx) battery powered fairy lights.
Please note this star is not designed to be left out in the weather.
Decorative tins: Recycled tin cans, cleaned with lids and labels removed, paper, pencil, masking tape, scissors, nails and hammer, tea lights
Concrete block candle holders: I used 2 x 140mm x 90mm plain end concrete blocks, Resene Concrete Primer, Resene test pots , Resene Concrete Clear (optional) , Small jars and tea lights.
Cost: $40 (excluding paint).
 Step one
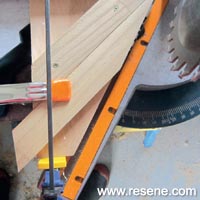 Step two
 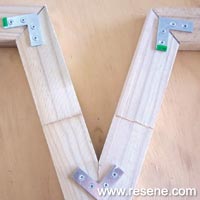 Step three
 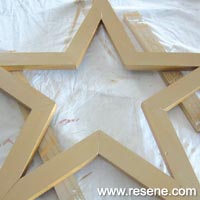 Step four
 Step five
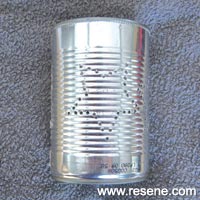 Step six
 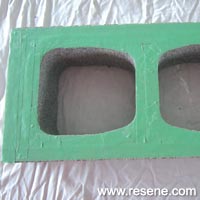 Step seven
 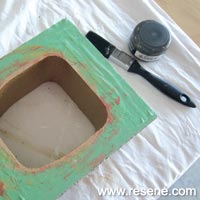 Step eight
 ![]() Get inspired ! Subscribe
Get inspired ! Subscribe ![]() Get saving ! Apply for a DIY card
Get saving ! Apply for a DIY card
![]()
Can't find what you're looking for? Ask us!
Company profile | Terms | Privacy policy | Quality and environmental policy | Health and safety policy
Colours shown on this website are a representation only. Please refer to the actual paint or product sample. Resene colour charts, testpots and samples are available for ordering online. See measurements/conversions for more details on how electronic colour values are achieved.
What's new | Specifiers | Painters | DIYers | Artists | Kids | Sitemap | Home | TOP ⇧

